


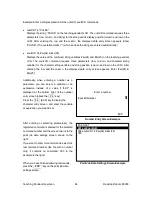


Teaching Pendant Operation
Desktop Robot JR3000
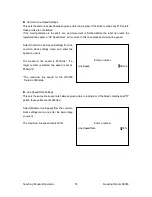
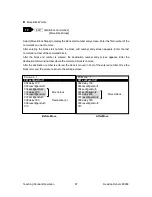
In Method 1, if you enter a point job number, or select a number from the list, the settings screen of the
point job data for the entered/selected number is displayed.
In Method 2, if you press the F4 (VIEW) key on the point job number entry screen, the point job
data settings screen for the currently displayed number appears.
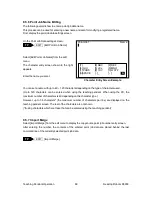
F0 (DEL) key: ························· This displays the delete point job number entry screen. Enter the
point job number for the data that you want to delete.
F1 (COPY) key: ······················ This displays the source point job number entry screen. Enter the
source number and destination number. The contents of the
source point job data are copied to the destination number.
F2 (NEW) key: ························ This displays the unregistered point job number list. Select a
number from the list. The new entry or selection screen for point
job data is displayed. Enter the commands or parameters. With
Method 2, pressing the ESC key sets the entered point job
data to that point and the display returns to the point settings
screen.
NOTE: With Method 1, the data is not set to the point.
F3 (LIST) key:························· This displays the registered point job number list. Select a number
from the list. With Method 2, the selected point job data is set to
that point and the display returns to the point settings screen.
NOTE: With Method 1, the command setting screen is displayed.
F4 (VIEW) key: ······················· This displays the settings screen for the currently displayed point
job data number. You can modify the data on this screen. (This
key is not available with Method 1.)
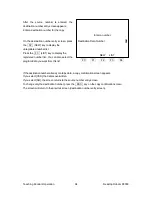
NOTE
For further details on point job data, refer to the operation manual
Functions I (Point Teaching)
.
82


