Product Overview
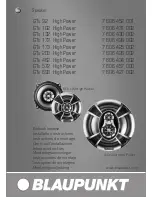
J&M’s NEW ROKKER XXR series 6.71” speakers have been designed
as exact size component/replacements for the stock Harley fairing
speakers as installed on the 2014-2017 Harley StreetGlide, Ultra or
Ultra Ltd.
Spec’d at 2 ohms impedance and an impressive 300 watts maximum
input (175w RMS - 91db sensitivity), these speakers provide the
ultimate in raw audio power and include the new custom grills with
built-in high-output tweeters.
Features of this new ROKKER XXR series speaker kit from J&M are:
• Lightweight waterproof one-piece woven-fiber driver cone.
• High-output grill-mounted dome tweeters.
• Super high-density lite-weight Neodymium magnet structure,
specially coated to maintain flux-strength integrity even at extreme
operating temperatures.
• High efficiency VENTED voice-coil for improved cooling when operat-
ing at high volume levels for extended periods.
• Custom speaker grills with high-output tweeters for crystal clear
sound at highway speeds.
Mounting hole pattern and spade electrical connections are exactly
the same as the factory specification, this is a total plug-and-play
no-modification solution complete with easy to follow installation
instructions.
These are THE most powerful speakers you can buy for your Harley
and they will perform extremely well when used with a medium to
high-powered accessory amplifier.
Installation and Instructions
1. Remove the windshield and outer fairing clamshell completely.
Important Note: If the bike is equipped with the Harley CB radio
module, ensure that the CB module is removed before removing
the applicable speaker pod assembly.
RIGHT SPEAKER
2. Remove the three 7/16 attachment screws from the inner bottom
edge of the speaker pod.
(Figure A)
3. Remove three 3/16 Allen head screws on the outside edges of
the speaker pod.
(Figure B)
4. Remove the two 5/32 Allen head screws from top edge of metal
mounting tray.
(Figure C)
5. Unplug the wire connection for the cigarette lighter socket from
the speaker pod.
6. Remove the pod from the fairing.
7. Remove the speaker from the pod by removing the 4 retaining
screws.
8. Unplug the speaker wires from the speaker and set aside.
Fig. B
Remove screws
Remove screw
Fig. A
Remove screws


