background image


DE 


31 

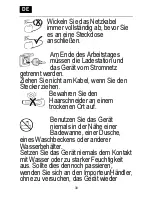
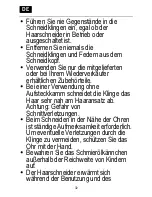
einzuschalten, da ein hohes 

Stromschlagrisiko besteht. 

Verwenden Sie das Gerät nicht mit 

feuchten Händen. 

Wenn das Gerät in einem Badezimmer 

verwendet wird, trennen Sie es nach dem 

Gebrauch durch Ziehen des Netzsteckers 

vom Stromnetz, da die Nähe von Wasser 

selbst bei ausgeschaltetem Gerät 

gefährlich sein kann. 

Warnhinweise 


Jeglicher Austausch von 

Zubehörteilen sowie jegliche Pflege 

des Gerätes müssen bei 

abgeschaltetem Gerät erfolgen. 


Die Ladestation muss auf einer stabilen 

und sauberen Oberfläche in sicherem 

Abstand von Wärmequellen (Heizkörper, 

Sonneneinstrahlung) aufgestellt werden. 


Die Kontakte der Ladestation und des 

Haarschneiders müssen stets sauber 

gehalten werden. Andernfalls kann der 

Ladevorgang behindert werden. 

Содержание HairCut TH24ST

Страница 1: ...lloser Profi Finishing Haarschneider ES Cortadora de acabado inal mbrica profesional IT Tagliacapelli professionale di finitura senza filo NL Professionele afwerkingstondeuse zonder snoer GUIDE DE L U...

Страница 2: ...2 Fig 1 Abb 1 Fig 2 Abb 2...

Страница 3: ...3 3a 3b Fig 3 Abb 3 4a 4b Fig 4 Abb 4 5a 5b 5c Fig 5 Abb 5 Fig 6 Abb 6...

Страница 4: ...adresse ce manuel Ce manuel s adresse toute personne d sirant utiliser la tondeuse dans un cadre professionnel 1 3 A propos du manuel Copyright 2016 by C A R SAS Code document TH24ST DOC version fran...

Страница 5: ...tre installation lectrique V rifier r guli rement l tat du c ble d alimentation Si celui ci est endommag cesser imm diatement l utilisation de l appareil Contacter le revendeur ou son service apr s ve...

Страница 6: ...es r cipients contenant de l eau Ne jamais exposer l appareil l eau ou une humidit trop importante Si cela devait tre le cas contacter l importateur distributeur sans essayer de remettre l appareil so...

Страница 7: ...socle de charge et de la tondeuse doivent tre maintenus propres Dans le cas contraire la charge pourrait tre d fectueuse Ne jamais ins rer d objet dans les lames de coupe tondeuse en marche ou l arr...

Страница 8: ...tiliser l appareil avec des temp ratures ambiantes inf rieures 0 C ou sup rieures 40 C Il est interdit de proc der l ouverture du bo tier de l appareil ou d essayer de le r parer En plus des dangers e...

Страница 9: ...ques sensorielles ou mentales r duites ou un manque d exp rience et de connaissances condition qu elles aient t plac es sous surveillance ou qu elles aient re u des instructions concernant l utilisati...

Страница 10: ...riaux ou sur des vices de fabrication Les vices ou les dommages qui ne sont pas couverts par la garantie sont ceux provoqu s par un non respect du mode d emploi Sauf en cas de responsabilit engag e e...

Страница 11: ...ants de la tondeuse et accessoires voir figure 1 Rep D signation A T te de coupe 25 mm B Bouton de r glage de la hauteur de coupe C Bouton mode Turbo D Bouton Marche Arr t E Ecran LCD F Fiche d alimen...

Страница 12: ...e voyant rouge Fig 1 S est allum La charge est termin e lorsque l cran LCD indique 100 L autonomie est alors de 100 minutes environ En fin de charge d brancher le bloc d alimentation La tondeuse est p...

Страница 13: ...upe 0 4 0 6 0 8 mm Rel cher le bouton central 3 4 Utilisation des contre peignes La tondeuse doit tre l arr t S lectionner un contre peigne 3 6 9 ou 12 mm Fig 1 rep res M P Positionner le contre peign...

Страница 14: ...la brosse fournie Fig 1 J Si n cessaire nettoyer le corps de la tondeuse avec un chiffon l g rement humidifi avec de l eau ou un savon liquide doux Ne jamais utiliser d abrasif ou de dissolvant Nettoy...

Страница 15: ...terie int gr e Rechargeable type LI ION 3 7 V 750 mAh Classification Mat riel de classe III Temps de charge 2 h Autonomie 90 min 120 min Poids 130 g Socle de charge TH24ST Descriptif Fonction Socle de...

Страница 16: ...d by this manual This manual is provided for all persons wishing to use the clippers in a professional context 1 3 About the manual Copyright 2016 by C A R SAS Document code TH24ST DOC English version...

Страница 17: ...at of your electrical installation Regularly check the condition of the electrical lead If the lead shows any signs of damage stop using the clippers immediately Contact the dealer or his after sales...

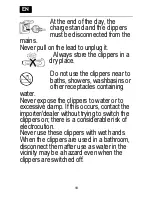
Страница 18: ...ashbasins or other receptacles containing water Never expose the clippers to water or to excessive damp If this occurs contact the importer dealer without trying to switch the clippers on there is a c...

Страница 19: ...lean Otherwise the clippers may not be charged correctly Never insert an object in the cutter blades whether the clippers are running or switched off Never remove the blades and the springs from the c...

Страница 20: ...the casing of the equipment or to try to repair it As well as the hazards involved any unauthorized opening automatically cancels the guarantee Never try to open the battery because it contains chemic...

Страница 21: ...of experience and knowledge provided that they are supervised or have received instructions on how to use the equipment in full safety and that they understand the hazards involved Children must not...

Страница 22: ...erial or manufacturing defects The guarantee does not cover any defects or damage caused by failure to comply with the instructions for use Except under a legal liability no claims of any type whatsoe...

Страница 23: ...Constituent elements of the clippers and accessories see figure 1 Ref Designation A Blades width 25 mm B Sliding knob used to adjust the cutting height C Turbo mode button D On Off button E LCD scree...

Страница 24: ...n charging the red light Fig 1 S comes on The battery is fully charged when the LCD indicates 100 The autonomy time is then 100 minutes When completely charged disconnect the power pack The clippers c...

Страница 25: ...e button 3 4 Using the comb attachments The clippers must be switched off Select a comb attachment 3 6 9 or 12 mm Fig 1 refs M P Place the comb attachment on the blades Fig 4b and clip in at rear When...

Страница 26: ...essary clean the body of the clippers with a cloth slightly dampened with water or mild liquid soap Never use abrasive products or solvents Clean the blades with an antibacterial spray We recommend ST...

Страница 27: ...Integrated battery Rechargeable type LI ION 3 7 V 750 mAh Classification Class III equipment Charging time 2 h Autonomy 90 min 120 min Weight 130 g Charge stand TH24ST Description Function Charge stan...

Страница 28: ...tet sich dieses Handbuch Dieses Handbuch richtet sich an alle die den Haarschneider zu beruflichen Zwecken nutzen m chten 1 3 ber dieses Handbuch Copyright 2016 by C A R SAS Dokument Code TH24ST DOC D...

Страница 29: ...Versorgungsspannung tats chlich der vorhandenen Netzspannung entspricht Kontrollieren Sie regelm ig den Zustand des Netzkabels Falls dieses besch digt ist stellen Sie den Gebrauch des Ger tes sofort...

Страница 30: ...am Kabel wenn Sie den Stecker ziehen Bewahren Sie den Haarschneider an einem trockenen Ort auf Benutzen Sie das Ger t niemals in der N he einer Badewanne einer Dusche eines Waschbeckens oder anderer W...

Страница 31: ...st bei ausgeschaltetem Ger t gef hrlich sein kann Warnhinweise Jeglicher Austausch von Zubeh rteilen sowie jegliche Pflege des Ger tes m ssen bei abgeschaltetem Ger t erfolgen Die Ladestation muss auf...

Страница 32: ...ltlichen Zubeh rteile Bei einer Verwendung ohne Aufsteckkamm schneidet die Klinge das Haar sehr nah am Haaransatz ab Achtung Gefahr von Schnittverletzungen Beim Schneiden in der N he der Ohren ist st...

Страница 33: ...es Geh uses einen Verfall der Garantie zur Folge Versuchen Sie niemals den Akku zu ffnen Dieser enth lt gesundheits und umweltgef hrdende Chemikalien Beim Auslaufen von Fl ssigkeit vermeiden Sie jeden...

Страница 34: ...oder Wissen fehlt nur dann benutzt werden wenn sie beaufsichtigt werden oder zuvor Anweisungen zur sicheren Benutzung des Ger tes erhalten und die bestehenden Gefahren verstanden haben Kinder d rfen...

Страница 35: ...erma en auf Material oder Produktionsfehlern basieren F r M ngel oder Sch den die durch eine Nichtbeachtung der Gebrauchsanleitung verursacht werden wird keine Garantie bernommen Au er im Falle einer...

Страница 36: ...aufgef hrten Zubeh rteilen geliefert 2 2 Bestandteile des Haarschneiders und Zubeh r siehe Abbildung 1 Pos Bezeichnung A Schneidkopf 25 mm B Schnittl ngenregler C Taste Turbo Modus D Ein Aus Schalter...

Страница 37: ...organgs leuchtet die rote Kontrollleuchte Abb 1 S auf Der Ladevorgang ist abgeschlossen wenn 100 auf der LCD Anzeige angezeigt wird Die Betriebsdauer des Akkus betr gt nun ca 100 Minuten Trennen Sie n...

Страница 38: ...uf die mittlere Taste Abb 4a und bet tigen Sie den Schnittl ngenregler W hlen Sie eine Schnittl nge aus 0 4 0 6 0 8 mm Lassen Sie die mittlere Taste los 3 4 Gebrauch der Aufsteckk mme Der Haarschneide...

Страница 39: ...e sich diesbez glich an Ihren H ndler Zum Entfernen und Montieren eines Schneidkopfes siehe Abb 5a und 5c 4 Wartung und Pflege 4 1 Laufende Pflege Reinigen Sie die Klingen nach jedem Gebrauch mit der...

Страница 40: ...Pfeile um die festen beweglichen Klingen auseinanderzuziehen Abb 6 Entfernen Sie alle Schneidr ckst nde und sonstigen R ckst nde zwischen den Klingen Schmieren Sie die Klingen und setzen Sie den Schne...

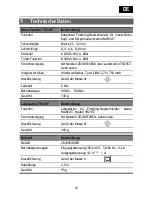
Страница 41: ...ter Akku Wiederaufladbar Typ LI ION 3 7 V 750 mAh Klassifizierung Ger t der Klasse III Ladezeit 2 Std Betriebsdauer 90 Min 120 Min Gewicht 130 g Ladestation TH24ST Beschreibung Funktion Ladestation f...

Страница 42: ...do este manual Este manual est destinado a cualquier persona que desee utilizar la cortadora en un medio profesional 1 3 Acerca del manual Copyright 2016 by C A R SAS C digo del documento TH24ST DOC v...

Страница 43: ...ig 2 corresponde a la de su instalaci n el ctrica Verificar peri dicamente el estado del cable de alimentaci n Si est da ado dejar de utilizar inmediatamente el aparato Contactar con el revendedor o c...

Страница 44: ...ontengan agua Nunca exponer el aparato al agua o a una humedad demasiado elevada Si esto ocurriese contactar con el importador distribuidor sin tratar de volver a encender el aparato ya que existe un...

Страница 45: ...e debe mantener limpios los contactos de la base de carga y de la cortadora En caso contrario la carga podr a ser defectuosa No insertar nunca un objeto entre las cuchillas de corte ya est la cortador...

Страница 46: ...ras se usa o se carga esto no es un signo de fallo No utilizar el aparato con una temperatura ambiente inferior a 0 C o superior a 40 C Est prohibido proceder a la apertura de la caja del aparato o tr...

Страница 47: ...s y por personas que tengan capacidades f sicas sensoriales o mentales reducidas o falta de experiencia y conocimientos siempre y cuando hayan sido puestos bajo vigilancia o hayan recibido instruccion...

Страница 48: ...los materiales o de fabricaci n Los defectos o da os no cubiertos por la garant a corresponden a los provocados por incumplimiento de las instrucciones de uso Salvo en caso de responsabilidad aplicabl...

Страница 49: ...la cortadora ver la figura 1 Ref Designaci n A Cabezal de corte de 25 mm B Bot n de ajuste de altura de corte C Bot n de modo Turbo D Bot n Encendido Apagamiento E Pantalla LCD F Clavija de alimentaci...

Страница 50: ...red Durante la carga el indicador luminoso rojo Fig 1 S est encendido La carga ha terminado cuando la pantalla LCD indica 100 La autonom a es entonces de aproximadamente 100 minutos Al final de la car...

Страница 51: ...de corte Pulsar el bot n central Fig 4a y presionar el bot n de ajuste Seleccionar una altura de corte 0 4 0 6 0 8 mm Soltar el bot n central 3 4 Utilizaci n de los contra peines La cortadora debe est...

Страница 52: ...corriente Despu s de cada uso limpiar las cuchillas con el cepillo proporcionado Fig 1 J Si es necesario limpiar el cuerpo de la cortadora con un trapo ligeramente humedecido con agua o un jab n l qui...

Страница 53: ...ater a integrada Recargable tipo LI ION 3 7 V 750 mAh Clasificaci n Material de clase III Tiempo de carga 2 h Autonom a 90 min 120 min Peso 130 g Base de carga TH24ST Descripci n Funci n Base de carga...

Страница 54: ...Utenti La presente guida rivolta alle persone che desiderano utilizzare il tagliacapelli in ambito professionale 1 3 Informazioni sulla guida Copyright 2016 by C A R SAS Codice documento TH24ST DOC ve...

Страница 55: ...impianto elettrico Verificare con regolarit lo stato del cavo di alimentazione Se fosse danneggiato interrompere immediatamente l uso dell apparecchio Contattare il rivenditore o il relativo servizio...

Страница 56: ...nti acqua Non esporre mai l apparecchio all acqua o ad un umidit troppo elevata Se ci dovesse accadere rivolgersi all importatore distributore senza tentare di ricollegare l apparecchio all alimentazi...

Страница 57: ...uliti i contatti della base di ricarica e del tagliacapelli Diversamente la carica potrebbe non avvenire correttamente Non inserire mai oggetti tra le lame n quando il tagliacapelli acceso n quando sp...

Страница 58: ...cchio a temperature ambiente inferiori a 0 C o superiori a 40 C Non consentito aprire il corpo dell apparecchio o tentare di ripararlo Oltre ai pericoli in cui si incorre l apertura non autorizzata co...

Страница 59: ...i ridotte o prive di esperienza e formazione a condizione che queste siano sorvegliate o che abbiano ricevuto delle istruzioni relative all utilizzo dell apparecchio in completa sicurezza e che compre...

Страница 60: ...o comprovatamente da difetti dei materiali o di fabbricazione Per difetti o danni che non sono coperti dalla garanzia si intendono quelli causati dalla mancata osservanza delle istruzioni di utilizzo...

Страница 61: ...sori vedere figura 1 Rif Designazione A Testina di taglio da 25 mm B Pulsante di regolazione dell altezza di taglio C Pulsante per la modalit Turbo D Pulsante di accensione spegnimento E Display LCD F...

Страница 62: ...nella presa del tagliacapelli Fig 3a Collegare l alimentatore Fig 1 H a una presa di rete Durante la ricarica la spia rossa Fig 1 S si accende La ricarica completa quando sul display LCD viene visual...

Страница 63: ...ile utilizzare il tagliacapelli anche con il filo In tal caso collegare il cavo al tagliacapelli Fig 3a e inserire l alimentatore Fig 1 H in una presa di rete 3 3 Regolazione dell altezza di taglio Pr...

Страница 64: ...ei 5 punti indicati Fig 5b Utilizzare solo il lubrificante in dotazione Rimontare la testina di taglio inserendo prima la parte posteriore Fig 5c Premere con il pollice sulle lame per fissare la testi...

Страница 65: ...ubrificanti STERIL CLEANER 920 o 921 Lubrificare le lame almeno una volta al giorno vedere la sezione 3 6 4 2 Pulizia della testina di taglio In caso di uso intenso pulire la testina di taglio almeno...

Страница 66: ...teria integrata Ricaricabile agli ioni di litio da 3 7 V 750 mAh Classificazione Materiale di classe III Tempo di carica 2 h Autonomia 90 min 120 min Peso 130 g Base di ricarica TH24ST Descrizione Fun...

Страница 67: ...dleiding bedoeld Deze handleiding is bedoeld voor alle professionele gebruikers van de tondeuse 1 3 Over de handleiding Copyright 2016 by C A R SAS Documentcode TH24ST DOC Nederlandse versie Uitgave m...

Страница 68: ...eenkomt met deze van het stroomnet Controleer regelmatig de toestand van de voedingskabel Als deze beschadigd is schakel de tondeuse dan onmiddellijk uit Contacteer de verkoper of de betreffende klant...

Страница 69: ...dkuipen douches wastafels of andere recipi nten met water Het toestel mag niet in contact komen met water en mag ook niet worden blootgesteld aan overdadig vocht Contacteer in dit geval de invoerder v...

Страница 70: ...rden geplaatst verwijderd van mogelijke warmtebronnen radiator zon De contactpunten van de laadsokkel en de tondeuse moeten altijd proper zijn Als deze vuil zijn kan het opladen mislukken Steek nooit...

Страница 71: ...het opladen een beetje warm dit is volledig normaal Gebruik het toestel niet bij een kamertemperatuur lager dan 0 C of hoger dan 40 C Het is verboden om de behuizing van het toestel te openen probeer...

Страница 72: ...rden gebruikt door kinderen vanaf 8 jaar en door personen met beperkte fysische zintuiglijke of mentale capaciteiten of met weinig ervaring en kennis op voorwaarde dat ze onder toezicht staan of dat z...

Страница 73: ...ewezen is dat ze het gevolg zijn van materiaal of fabrieksfouten De garantie geldt niet voor fouten of beschadigingen die veroorzaakt zijn door het niet toepassen van de handleiding Uitgezonderd de ge...

Страница 74: ...nderdelen van de tondeuse en accessoires zie figuur 1 Letter Benaming A Scheerkop 25 mm B Knop voor het instellen van de kniplengte C Knop voor turbomodus D AAN UIT knop E LCD scherm F Voedingsstekker...

Страница 75: ...laden brandt het rode lampje Fig 1 S Het opladen is klaar als er 100 verschijnt op het LCD scherm De autonomie bedraagt nu ongeveer 100 minuten Trek na het opladen het voedingsblok uit De tondeuse ka...

Страница 76: ...8 mm Laat de middelste knop los 3 4 Een opzetkam gebruiken De tondeuse moet uitgeschakeld zijn Kies een opzetkam 3 6 9 of 12 mm Fig 1 letters M P Plaats de opzetkam in de juiste stand op de scheerkop...

Страница 77: ...ig 5c Druk met de duim op de mesjes op de scheerkop vast te klikken Laat de tondeuse na het aanbrengen van de olie een paar seconden werken 3 7 De scheerkop wisselen De tondeuse wordt geleverd met 2 s...

Страница 78: ...als middel voor ontsmetting en smering Breng minstens eenmaal per dag olie aan op de mesjes zie 3 6 4 2 De scheerkop reinigen Reinig de scheerkop minstens eenmaal per dag als deze veelvuldig wordt ge...

Страница 79: ...kel zie verder Ge ntegreerde batterij Herlaadbare Li ion batterij 3 7 V 750 mAh Classificatie Materiaal klasse III Oplaadtijd 2 uur Autonomie 90 min 120 min Gewicht 130 g Laadsokkel TH24ST Beschrijvin...

Страница 80: ...C A R SAS 3 5 7 rue Gustave Eiffel F 13010 MARSEILLE Tel 33 0 4 91 78 20 50 Fax 33 0 4 91 79 04 45 E mail car sa jacques seban com WWW JACQUES SEBAN COM JACQUESSEBAN...

Отзывы: