background image

7    MAINTENANCE

22

7.8

MUFFLER AND EXHAUST __________________________________________________

To protect from carbon monoxide poisoning, inspect the
complete exhaust system regularly and always replace a
defective muffler.

If you notice a change in the color or sound of the exhaust,
stop the engine immediately. Identify the problem and have
the system repaired.

Torque all exhaust manifold hardware evenly. Tighten or
replace exhaust clamps.

7.9

TIRES ___________________________________________________________________

1. Keep tires properly inflated to prolong tire life. Check

inflation pressure while the tires are cool. Inspect tread
wear.

2. Check the pressure with an accurate, low pressure

tire gauge.

3. Keep tires inflated to 14 psi - (97 kPa).

7.10 WHEEL MOUNTING PROCEDURE____________________________________________

1. Remove dirt, grease and oil from stud thread. Do not

lubricate threads.

2. Position wheel on hub and inspect to insure full contact

between mounting surface of wheel and hub.

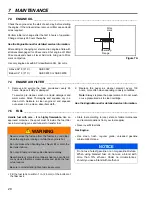
3. Finger tighten all hardware then torque hardware in

criss-cross order; always tighten nuts in the top
position.

4. Check and retorque daily until torque is maintained,

85-95 ft.lbs. (115-128 Nm).

7.11 CARE AND CLEANING _____________________________________________________

Wash the unit after each use. Keep the equipment clean.

Note: 

Do

 not wash any portion of the equipment while it is

hot. Do not use high pressure spray or steam. Use cold
water and automotive cleaners.

1. Use compressed air to clean engine and radiator fins. A

special blow gun is available through Jacobsen Dealer. 

2. Use only fresh water for cleaning your equipment.

Note: 

Use of salt water or effluent water has been known

to encourage rust and corrosion of metal parts resulting
in premature deterioration or failure. Damage of this
nature is not covered by the factory warranty.

3. Do not spray water directly at bearing housings and

seals.

4. Clean all plastic or rubber trim with a mild soap

solution or use commercially available vinyl/rubber
cleaners.

Repair damaged metal surfaces and use Jacobsen touch-up
paint. Wax the equipment for maximum paint protection.


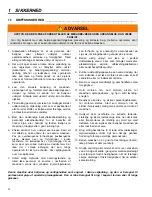
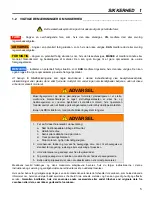
WARNING

Exhaust fumes contain carbon monoxide that is toxic and
can be fatal when inhaled.

NEVER

 operate an engine without proper ventilation.

!


CAUTION

Unless you have the proper training, tools and
experience, DO NOT attempt to mount a tire on a rim.
Improper mounting can produce an explosion which
may result in serious injury.

!


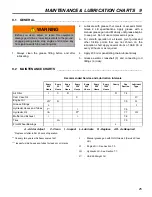
WARNING

Make sure the aerator is parked on a solid and level
surface. Never work on a aerator that is supported only
by the jack. Always use jack stands.

If only the front or rear of the aerator is raised, place
chocks in front of and behind the wheels that are not
raised.

!


CAUTION

 Clean debris from drives, muffler and engine to 

prevent fires.


WARNING

NEVER

 use your hands to clean aerator. Tine edges are

sharp and can cause serious injuries.

!

!

Содержание GA 24

Страница 1: ...e skal advares om farerne og l se hele instruktionsbogen f r maskinen forberedes bruges justeres eller serviceres WARNING If incorrectly used this machine can cause severe injury Those who use and mai...

Страница 2: ...ning This product contains or emits chemicals known to State of California to cause cancer and birth defects or other reproductive harm FOREWORD Suggested Stocking Guide To Keep your Equipment fully o...

Страница 3: ...ering 14 6 Adjustments 6 1 General 15 6 2 Turf Guard 15 6 3 Aerator Drive Idler Cable 15 6 4 Traction Drive Idler Cable 16 6 5 Aerator Timing 16 6 6 Shift Control Cable 17 6 7 Lift Cable 17 6 8 Torque...

Страница 4: ...r the machine while in operation The owner operator can prevent and is responsible for injuries inflicted to themselves to bystanders and damage to property 8 Never operate equipment that is not in pe...

Страница 5: ...prolong the life of your machine and maintain its maximum efficiency Adjustments and maintenance should always be performed by a qualified technician If additional information or service is needed co...

Страница 6: ...9 85 mm Fuel Type Unleaded Gasoline Rating Min 85 Octane Capacity 2 5 U S Gal 9 5 liters Governor Flyweight Mechanical Lubrication Capacity 1 quart 0 95 liters Type SAE 30W API Classification SG SH SJ...

Страница 7: ...CCESSORIES SUPPORT LITERATURE _____________________________________ Contact your area Jacobsen Dealer for a complete listing of accessories and attachments Accessories Air Blow Gun JAC5098 Orange Touc...

Страница 8: ...s de limpiar ajustar o reparar este equipo desengranar todas los mandos aplicar el freno de estacionamiento y apagar el motor 4 Mantener las manos los pies y la ropa alejados de las piezas en movimien...

Страница 9: ...ly raise lever to STOP position to shut off engine C Shift Control Lever Four position lever used to operate different functions of machine R Reverse Engages reverse traction Tine operation is locked...

Страница 10: ...adjusting trailering or storing unit G Choke The choke lever opens and closes the choke valve in the carburetor The CLOSED position enriches the fuel mixture for starting a cold engine The OPEN posit...

Страница 11: ...h control lever A slightly until OPC handle E can be engaed Do not engage tine operation d The drive mechanism will engage and the unit will slowly move backward e Release the OPC handle The handle mu...

Страница 12: ...machine begins to vibrate abnormally Have the equipment repaired before resuming operation 10 Slow down and use extra care on hillsides Read Section 5 7 Use caution when operating near drop offs 11 Us...

Страница 13: ...to H position and engage OPC handle D to drive to and from the area of operation 4 Adjust Throttle lever B to desired transport speed 5 7 HILLSIDE OPERATION ___________________________________________...

Страница 14: ...ust be shut down and removed from the area it should be loaded onto a trailer for transport Use care when loading and unloading unit Tines may drag or catch on trailer ramp To prevent push rods from b...

Страница 15: ...ATOR DRIVE IDLER CABLE _____________________________________________ 1 Engage OPC handle and tine operation See 4 1 2 Adjust cable nuts D as required to obtain 0 18 inch 3 3 mm deflection with a 4 4 l...

Страница 16: ...between crankshaft halves 4 Rotate right camshaft sprocket G until the keyway is pointing towards the front of the unit Timing marks should be at a 45 angle with dot towards the lower front 5 Rotate r...

Страница 17: ...s N aligns with mounting hole in lever P 5 If additional adjustment is required cable may be adjusted at the handle 6 Test each position of shift control Shift lever P should lock into each detent at...

Страница 18: ...7 40 54 2 3 8 24 ft lbs Nm 35 47 5 45 61 0 7 16 14 ft lbs Nm 50 67 8 65 88 1 7 16 20 ft lbs Nm 55 74 6 70 94 9 1 2 13 ft lbs Nm 75 101 7 100 135 6 1 2 20 ft lbs Nm 85 115 3 110 149 2 9 16 12 ft lbs N...

Страница 19: ...ne manufacturer is supplied with this unit Read the Engine Manual carefully until you are familiar with the operation and maintenance of the engine Proper attention to the engine manufacturer s direct...

Страница 20: ...paper element Do not wash or use pressurized air to clean cartridge See the Engine Manual for detailed service information 7 5 FUEL____________________________________________________________________...

Страница 21: ...to overheat and also lead to hose failure 7 7 HYDRAULIC OIL___________________________________________________________ Refer to Section 9 2 for specific maintenance intervals Drain and replace the hyd...

Страница 22: ...n of the equipment while it is hot Do not use high pressure spray or steam Use cold water and automotive cleaners 1 Use compressed air to clean engine and radiator fins A special blow gun is available...

Страница 23: ...erior of engine Paint exposed metal or apply a light coat of rust preventative oil For engine protection Jacobsen recommends the use of a fuel additive such as STABIL Mix additive following instructio...

Страница 24: ...ng 1 Air intake restricted 1 Clean cooling air intake 2 Engine overload 2 Reduce forward speed Tines Plugging 1 Dirty or corroded tines 1 Thoroughly clean tines and lightly water greens 2 Burrs on Tin...

Страница 25: ...___________ A Add or Adjust C Clean I Inspect L Lubricate R Replace AR As Required Replace oil after initial 5 hours of operation Or every two years whichever comes first Inspect visible hoses and tub...

Страница 26: ...Description Directive 2000 14 CE Beskrivelse Direktivet 2000 14 EF Descrizione Direttiva 2000 14 CE Descri o Directiva 2000 14 CE Beschrijving Richtlijn 2000 14 EC Beskrivning Direktiv 2000 14 EC 360...

Страница 27: ......

Страница 28: ...il lagerliste For at sikre at Deres udstyr altid er fuldst ndigt driftsklart og produktivt anbefaler Jacobsen at De s rger for at have en beholdning af de mest almindeligt anvendte vedligeholdelsespro...

Страница 29: ...elt 15 6 2 Pl neafsk rmning 15 6 3 Dybdelufterdrevets fril bskabel 15 6 4 Traktionsdrevets fril bskabel 16 6 5 Dybdelufterens synkronisering 16 6 6 Gearskiftekabel 17 6 7 L ftekabel 17 6 8 Specifikati...

Страница 30: ...at ren kan forhindre og er ansvarlig for personskader p sig selv omkringst ende og skader p ejendom 8 Betjen aldrig udstyr der ikke er i perfekt driftsm ssig stand eller som mangler m rkater afsk rmni...

Страница 31: ...r altid udf res af en uddannet tekniker Hvis du har behov for yderligere oplysninger kan du kontakte den autoriserede forhandler for Jacobsen som holdes l bende informeret om hvordan udstyret bedst se...

Страница 32: ...de 74 61 x 69 85 mm Br ndstof Type Blyfri benzin Ampere Min 85 oktan Kapacitet 9 5 liter Regulator Svingklods mekanisk Sm ring Kapacitet 0 95 liter Type SAE 30W API klassificering SG SH SJ Luftfilter...

Страница 33: ...______________________________ Kontakt din lokale Jacobsen forhandleren for at f en komplet liste over tilbeh r og redskaber Tilbeh r Trykluftpistol JAC5098 Orange pletreparationsmaling sprayd se med...

Страница 34: ...et f r du betjener denne traktor samt form lene med disse HOLD H NDER OG F DDER V K FARE 8 3 5 8 9 2 835892 524729 Uafsk rmede bev gelige dele kan for rsage alvorlig personskade M ikke betjenes uden a...

Страница 35: ...hastighed Tr k h ndtaget helt op til STOP for at slukke for motoren C Gearskifteh ndtag H ndtag med fire indstillinger der bruges til at styre forskellige funktioner p maskinen R bakgear Tilkobler ba...

Страница 36: ...enheden justeres bugseres eller opmagasineres G Choker Chokerh ndtaget bner og lukker for chokerventilen i karburatoren I stillingen CLOSED LUKKET beriges br ndstofblandingen til start af en kold mot...

Страница 37: ...k fra operat ren n r testen udf res c Tr k lidt i koblingsh ndtaget A indtil d demandsgrebet E kan aktiveres S t ikke piberne i drift d Drivmekanismen tilkobles og enheden vil langsomt bev ge sig bagl...

Страница 38: ...F udstyret repareret f r du genoptager driften 10 S nk farten og v r ekstra forsigtig p bakkeskr ninger L s afsnit 5 7 V r forsigtig n r du k rer n r bratte skr nter 11 V r forsigtig n r du n rmer dig...

Страница 39: ...for at k re til og fra arbejd somr det 4 Indstil gash ndtaget B p den nskede ganghastighed 5 7 K RSEL P SKR NINGER__________________________________________________ Enheden er konstrueret til god trak...

Страница 40: ...det er n dvendigt at flytte den fra omr det skal den l sses p en transportanh nger Udvis forsigtighed ved p og afl sning af enheden Piberne kan sl be hen over eller s tte sig fast p anh ngerens l sser...

Страница 41: ...________________________________ 1 Aktiver d demandsgrebet og s t piberne i drift Se 4 1 2 Juster kablets m trikker D efter behov indtil der p det viste sted opn s en afb jning p 3 3 mm med et tryk p...

Страница 42: ...n mellem krumtapakslens to halvdele 4 Drej det h jre knastakselk dehjul G indtil kilegangen peger mod enhedens forkant T ndingsm rkerne skal st i en vinkel p 45 og prikken pege mod den nederste del af...

Страница 43: ...ing shullet i stangen P 5 Hvis yderligere justering er p kr vet kan kablet justeres ved h ndtaget 6 Test alle gearskifteh ndtagets mulige stillinger Gearstangen P skal fastl ses i hvert indhak for hve...

Страница 44: ...lbs Nm 30 40 7 40 54 2 3 8 24 ft lbs Nm 35 47 5 45 61 0 7 16 14 ft lbs Nm 50 67 8 65 88 1 7 16 20 ft lbs Nm 55 74 6 70 94 9 1 2 13 ft lbs Nm 75 101 7 100 135 6 1 2 20 ft lbs Nm 85 115 3 110 149 2 9 1...

Страница 45: ...ducenten sammen med denne traktor L s motorvejledningen grundigt indtil du er bekendt med betjeningen og vedligeholdelsen af motoren Opm rksomhed p motorproducentens henvisninger sikrer maksimal levet...

Страница 46: ...lementet skal altid udskiftes Fors g ikke at vaske eller at bruge trykluft til at reng re indsatsen Se motorproducentens ejermanual for at f mere detaljerede oplysninger om eftersyn 7 5 BR NDSTOF_____...

Страница 47: ...7 HYDRAULIKOLIE __________________________________________________________ Se Afsnit 9 2 for at f oplysninger om specifikke vedligeholdelsesintervaller Dr n og udskift hydraulikolien efter et st rre...

Страница 48: ...Brug koldt vand og bilrensemidler 1 Brug trykluft til at rense motoren og oliek leribberne En s rlig trykluftpistol f s gennem en autoriseret Jacobsen forhandler 2 Brug kun ferskvand til reng ring af...

Страница 49: ...ler p f r et tyndt lag rustbeskyttende olie Til beskyttelse af motoren anbefaler Jacobsen at der bruges et tils tningsstof til br ndstoffet som f eks STABIL Bland tils tningsstoffet i henhold til vejl...

Страница 50: ...r k leluftindsugningen 2 Motoren overbelastet 2 S nk hastigheden i fremadg ende retning Piberne tilstoppes 1 Snavsede eller korroderede piber 1 Reng r piberne omhyggeligt og vand greens let 2 Grater...

Страница 51: ...DELSESSM RINGSOVERSIGTER ________________________________ A P f r eller juster C Reng r I Efterse L Sm r R Udskift AR Efter behov Skift olie efter de f rste 5 driftstimer Eller for hver to r alt efter...

Страница 52: ...00 14 CE Description Directive 2000 14 CE Beskrivelse Direktivet 2000 14 EF Descrizione Direttiva 2000 14 CE Descri o Directiva 2000 14 CE Beschrijving Richtlijn 2000 14 EC Beskrivning Direktiv 2000 1...

Страница 53: ...part number and description of the part as given in the parts list 5 Send or bring the order to an authorized Jacobsen Distributor 6 Inspect all shipments on receipt If any parts are dam aged or miss...

Страница 54: ...r pasajeros en maquinas sin asiento para ellos 6 Mantener a las demas personas alejadas 7 Si no sabe leer ingles solicitarle a otra persona que le lea y explique el contenido de las etiquetas y del ma...

Страница 55: ...Product ID GA 24 7 4152417 1 Decal GA 24 New Stripe Left Hand 8 4152418 1 Decal GA 24 New Stripe Right Hand 9 835892 1 Decal Danger Hands Feet 10 361854 1 Decal Warning 11 340623 1 Decal Spanish Warn...

Страница 56: ...30 2 3 28 6 7 8 8 9 9 10 12 23 13 14 16 18 19 20 21 4 17 15 1 8 9 10 11 7 27 26 3 2 6 25 24 22 27 26 GA 24 2 1 Chassis Serial No All...

Страница 57: ...7 Mount Isolation 10 548900 8 Screw 10 24 x 1 2 Hex Head 11 800390 4 Pop Rivet 1 8 x 3 8 12 827449 2 Handle Latch 13 832578 2 Keeper Latch 14 2703553 1 Cover Rear 15 2703622 1 Cover Drive Side 16 4111...

Страница 58: ...32 3 11 5 9 8 7 10 6 5 1 Ref 1 2 2 4 GA 24 3 1 Aerator Enclosure Serial No All...

Страница 59: ...Rear 2 2703714 7 2 Plate Cover Seal 3 403746 2 Screw 10 24 x 3 4 Hex Head 4 548900 4 Screw 10 24 x 1 2 YS HSF G5 5 800521 6 Nut 10 24 YS HSF 6 521050 6 Boot 7 545371 6 Ring Assembly Plated 8 400106 12...

Страница 60: ...26 26 1 5 10 21 24 29 37 1 2 3 5 6 7 8 9 10 12 11 13 14 16 18 19 20 21 21 22 23 24 43 27 28 29 Ref 30 31 33 4 17 15 26 34 37 38 39 40 35 36 32 42 1 19 19 21 24 25 1 41 21 10 21 GA 24 4 1 Controls Ser...

Страница 61: ...enterlock 18 800305 1 Screw 1 4 20 Hex Head 19 400190 3 Screw 5 16 18 x 1 1 4 Hex Head 20 400196 1 Screw 5 16 18 x 2 Hex Head 21 445796 14 Nut 5 16 18 Crownlock 22 806765 1 Pin Clevis 23 816401 1 Spri...

Страница 62: ...36 8 7 7 7 5 5 4 4 2 6 6 3 3 1 22 10 9 13 12 14 11 15 16 17 18 19 20 21 GA 24 5 1 Chassis Serial No All...

Страница 63: ...kwasher 1 2 8 400406 6 Screw 1 2 13 x 1 1 4 Hex Head 9 2702704 7 1 Cross Tube Assembly 10 2702668 7 1 Axle Assembly Right Hand 11 2702667 7 1 Axle Assembly Left Hand 12 548458 2 Pin Clevis 13 460030 2...

Страница 64: ...6 7 8 8 9 10 33 33 32 21 21 12 12 11 11 13 13 14 16 16 18 19 19 20 20 20 21 21 22 22 23 24 28 29 30 31 4 4 17 17 15 15 15 25 26 27 1 9 37 34 36 35 Part of Front Chassis 38 39 40 GA 24 6 1 Transaxle Se...

Страница 65: ...545786 2 Bearing 17 548349 2 Snap Ring External 18 604174 2 Flat Washer 3 8 19 440086 6 Carriage Bolt 31 18 1 50 YS G5 20 445795 14 Nut 5 16 18 Crownlock Flange 21 445796 8 Nut 3 8 16 Crownlock Flange...

Страница 66: ...40 25 3 3 18 19 20 21 2 16 17 5 12 9 10 14 14 15 15 17 18 8 8 11 11 13 25 1 5 4 30 7 6 22 24 23 26 27 28 29 GA 24 7 1 Steering Axle Serial No All...

Страница 67: ...1 4 Hex Head 10 453010 1 Flat Washer 3 8 11 521206 2 Bushing 12 4116182 7 1 Axle Assembly Steering 13 523221 1 Spacer 14 4133028 2 Brace Cover 15 452008 2 Washer Flat 3 8 16 446140 2 Lockwasher 3 8 17...

Страница 68: ...42 15 1 19 19 3 5 6 18 21 17 16 6 1 8 3 4 14 2 9 10 11 12 13 7 20 22 23 24 25 26 GA 24 8 1 Engine and Pump Serial No All...

Страница 69: ...762 2 Pulley 3 0 OD 3V I Groove 10 4128971 1 Coupling 1 0 Bore 25 Key Set SC 11 4128973 1 Coupling Element Urethane 12 4128970 1 Coupling 0 5 Bore 1 8 Key Set SC 13 445795 10 Nut 5 16 18 CS HF GF Crow...

Страница 70: ...6 7 8 9 10 12 11 13 14 16 18 19 20 21 22 23 24 27 28 29 30 31 33 41 42 43 44 4 17 15 25 26 34 37 38 39 35 40 36 32 1 11 16 4 4 12 11 11 10 16 26 25 27 27 27 31 34 37 38 GA 24 9 1 Belts Pulleys Serial...

Страница 71: ...2 75 OD 19 4147382 1 Bracket Assembly 20 4112441 1 Pulley 3 OD 1 Bore 2 3V 21 4113437 1 Belt 3V 2 Rib Mechanism 22 2703944 1 Bracket Assembly Idler Pivot 23 800453 3 Screw 5 16 18 x 7 8 Hex Head 24 44...

Страница 72: ...6 2 3 3 3 3 5 5 6 6 7 7 7 7 8 8 9 9 10 10 12 12 11 11 13 13 14 14 16 16 18 18 19 20 21 19 20 21 22 22 23 24 27 28 30 30 29 29 31 4 4 4 4 4 4 17 17 15 15 25 26 1 32 33 GA 24 10 1 Cam Case Serial No All...

Страница 73: ...6 548926 2 Spiral Retaining Ring 17 548272 2 Seal Oil 18 520236 2 Cage Bearing 19 520238 AR Shim 0 005 Add shims as required to obtain 0 005 to 0 015 end play 20 520239 AR Shim 0 010 21 520240 AR Shim...

Страница 74: ...6 6 7 7 8 20 9 20 10 12 10 11 11 20 19 13 14 16 16 14 18 25 17 21 21 22 22 23 26 26 26 27 28 29 28 29 28 29 4 4 4 13 15 Part of 15 24 25 1 33 32 35 34 30 31 32 36 36 27 27 GA 24 11 1 Aerator Crankshaf...

Страница 75: ...Set Bearing Sleeve 17 548226 6 Grease Fitting Straight 125 NPT 62 18 434039 12 Screw 1 4 20 x 1 Socket Head 19 520374 2 Spacer 20 548814 2 Race Inner 21 547293 2 Retainer Bearing 22 548797 1 Bearing...

Страница 76: ...50 2 8 10 7 14 14 13 12 7 A 1 30 32 31 5 17 17 3 4 9 5 4 1 16 16 13 12 15 11 6 6 A 18 19 20 21 22 5 23 24 25 26 27 28 34 33 29 GA 24 12 1 Hydraulic System Serial No All...

Страница 77: ...Lift Lower Valve to Tee 15 4114534 1 Adapter 90 1 2 NPT to 37 Flare 16 4114536 2 Fitting Tee 1 4 NPT to 37 17 829997 3 Grommet 1 31 x 2 00 x 48 18 4123824 1 Hydraulic Tank Includes Cap 4139462 1 Tank...

Страница 78: ...52 2 1 1 3 2 1 4 5 6 9 3 8 7 8 10 11 12 13 14 13 15 GA 24 13 1 Slide and Glide Assmebly Serial No All...

Страница 79: ...3 is required to install push rod through slide seals 3 522636 2 Bushing Split 4 522644 1 Retainer Disc 5 522641 2 Disc Felt 6 306959 1 Plug Expansion 2702104 1 Guide Slide Assembly 7 522643 1 Guide S...

Страница 80: ...54 1 2 3 4 5 10 12 6 11 11 8 9 7 13 13 14 GA 24 14 1 Turf Guard Assembly Serial No All...

Страница 81: ...4 4115935 2 Bracket Connecting 5 4115944 2 Link Adjustment 6 518510 2 Spring Compression 7 809265 2 Pin Hair 78 x 2 69 x 15 8 822529 2 Pin Hair 44 x 2 00 x 13 9 548458 2 Pin Clevis 10 548165 2 Washer...

Страница 82: ...37 35 36 32 32 17 15 1 24 38 38 40 41 42 39 25 26 28 27 29 30 39 Standard Tine Holder Optional Quad Tine Accessory 1 2 O D Tines Optional Tine Holder 5 8 O D Tines Use with Item 31 3 4 O D Tines Use w...

Страница 83: ...1 Lockwasher 5 16 21 800512 1 Screw 5 16 18 x 1 1 14 Socket Hd 22 800694 2 Screw 5 16 18 x 2 1 2 Grade 8 23 829973 2 Washer Special 24 523864 24 Tine 1 4 Side Ejecting Coring 1 2 Mounting O D 25 5174...

Страница 84: ...67 41 4117070 41 4118263 43 4119323 43 4119864 7 31 4120230 41 4123824 51 4124712 29 4124956 31 4124958 31 4125175 39 4125837 35 4125856 31 4128970 43 4128971 43 4128973 43 4130234 7 35 4132129 31 413...

Страница 85: ...00 51 548902 47 548926 47 800113 47 800766 53 805860 39 806765 35 809252 45 814924 51 816320 39 816401 35 819898 41 823118 51 825560 35 826558 51 827395 51 827449 31 827821 35 829973 57 829997 51 8325...

Страница 86: ......

Страница 87: ......

Страница 88: ...nd ISO 14001 registration at all our manufacturing locations A worldwide dealer network and factory trained technicians backed by Jacobsen Parts Xpress provide reliable high quality product support Ud...

Отзывы: