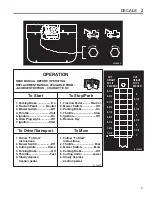
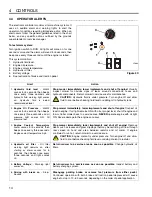


5 OPERATION
20
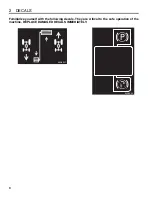
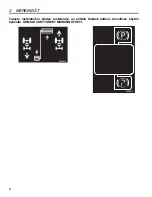
5.11 DAILY MAINTENANCE _____________________________________________________
Important:
For more detailed maintenance information,
adjustments and maintenance/lubrication charts, see the
Parts & Maintenance
manual.
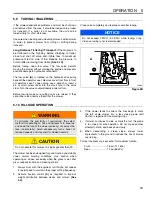
1.
Park the mower on a flat, level surface. Fully lower
the implements to the ground, engage parking brake,
stop the engine and remove key from ignition switch.
2.
Grease and lubricate all points if required. To
prevent fires, wash the cutting units and mower after
each use.
a.
Use only fresh water for cleaning your
equipment.
b.
Do not use high pressure spray.
c.
Do not spray water directly at the instrument
panel, or any electrical components.
d.
Do not spray water into the cooling air intake or
the engine air intake.
3.
Fill mower’s fuel tank at the end of each operating day
to full mark on fuel gauge.
Always use clean, fresh #2 diesel fuel. Minimum
Cetane Rating 45.
4.
Handle fuel with care - it is highly flammable.
Use
an approved container; the spout must fit inside the
fuel filler neck. Avoid using cans and funnels to transfer
fuel.
5.
Store fuel according to local, state or federal
ordinances and recommendations from your fuel
supplier.
6.
Never overfill or allow the tank to become empty.
7.
Inspect hydraulic hoses and tubes daily. Look for wet
hoses or oil spots and replace worn or damaged hoses
and tubes before operating the machine.
8.
Check the engine oil and hydraulic oil at the start of
each day, before starting the engine. If the oil level
is low, remove the oil filler cap and add oil as
required. Do not overfill.
9.
After engine has cooled, check coolant level.
Radiator should be full and recovery bottle should be
up to the
cold
mark.
10. Park machine in designated area. Engage parking
brake and remove key. Place key in a secure
location to prevent unauthorized use of equipment.
11. Check the engine oil and hydraulic oil at the start
and end of each day. If the oil level is low, remove
the oil filler cap and add oil as required. Do not
overfill.
NOTICE
Do not wash a hot or running engine. Use
compressed air to clean the mower, engine and
radiator fins to reduce the potential for corrosion and
moisture contamination.
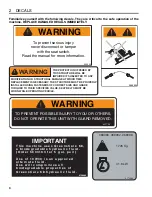
WARNING
Never remove the fuel cap from the fuel tank, or add fuel,
when the engine is running or while the engine is hot.
Do not smoke when handling fuel. Never fill or drain the
fuel tank indoors.
Do not spill fuel. Clean spilled fuel immediately.
Never handle or store fuel containers near an open flame
or any device that may create sparks and ignite the fuel
or fuel vapors.
Be sure to reinstall and tighten fuel cap securely.
!
WARNING
To prevent serious injury from hot, high pressure oil,
never use your hands to check for oil leaks; use paper
or cardboard.
Hydraulic fluid escaping under pressure can have
sufficient force to penetrate skin. If fluid is injected into
the skin, it must be surgically removed within a few
hours by a doctor familiar with this form of injury or
gangrene may result.
WARNING
To prevent serious bodily injury from hot coolant or
steam blow-out, never attempt to remove the radiator
cap while the engine is running. Stop the engine and
wait until it is cool. Even then, use extreme care when
removing the cap.
Do not pour cold water into a hot radiator. Do not operate
engine without a proper coolant mixture. Install cap and
tighten securely.
!
!