background image

SAFETY    1

GB-3

1  Safety 

1.1   OPERATING SAFETY ______________________________________________________

1. Safety is dependent upon the awareness, concern, 

and prudence of those who operate or service the 
equipment. Never allow minors to operate any 
equipment.

2. It is your responsibility to read this manual and all 

publications associated with this equipment (Safety 
& Operation Manual, Parts & Maintenance Manual, 
Engine Manual, and attachments/accessories 
instruction sheets). If the operator cannot read 
English it is the owner’s responsibility to explain the 
material contained in this manual to them.

3. Learn the proper use of the machine, the location and 

purpose of all the controls and gauges before you 
operate the equipment. Working with unfamiliar 
equipment can lead to accidents.

4. Never allow anyone to operate or service the machine 

or its attachments without proper training and 
instructions, or while under the influence of alcohol or 
drugs.

5. Wear all the necessary protective clothing and personal 

safety devices to protect your head, eyes, ears, hands, 
and feet. Operate the machine only in daylight or in 
good artificial light.

6. Evaluate the terrain to determine what accessories and 

attachments are needed to properly and safely perform 
the job. Only use accessories and attachments 
approved by Jacobsen.

7. Stay alert for holes in the terrain and other hidden 

hazards.

8. Inspect the area where the equipment will be used. 

Pick up all the debris you can find before operating. 
Beware of overhead obstructions (low tree limbs, 
electrical wires, etc.) and also underground obstacles 
(sprinklers, pipes, tree roots, etc.). Enter a new area 
cautiously. Stay alert for hidden hazards.

9. Never direct discharge of material toward bystanders, 

nor allow anyone near the machine while in operation. 
The owner/operator can prevent and is responsible for 
injuries inflicted to themselves, to bystanders, and 
damage to property.

10. Do not carry passengers. Keep bystanders and pets a 

safe distance away.

11. Never operate equipment that is not in perfect working 

order or is without decals, guards, shields, discharge 
deflectors, or other protective devices securely fastened 
in place.

12. Never disconnect or bypass any switch.

13. Do not change the engine governor setting or 

overspeed the engine.

14. Carbon monoxide in the exhaust fumes can be fatal 

when inhaled. Never operate the engine without proper 
ventilation or in an enclosed area.

15. Fuel is highly flammable, handle with care.

16. Keep the engine clean. Allow the engine to cool before 

storing and always remove the ignition key.

17. Disengage all drives and engage parking brake before 

starting the engine (motor). Start the engine only when 
sitting in operator’s seat, never while standing beside 
the unit.

18. Equipment must comply with the latest federal, state, 

and local requirements when driven or transported on 
public roads. Watch out for traffic when crossing or 
operating on or near roads.

19. Local regulations may restrict the age of the operator.

20. Operate the machine up and down the face of slopes 

(vertically), not across the face (horizontally). 

21. To prevent tipping or loss of control, do not start or stop 

suddenly on slopes. Reduce speed when making sharp 
turns. Use caution when changing directions.

22. Always use the seat belt when operating mowers 

equipped with a Roll Over Protective Structure (ROPS).

Never use a seat belt when operating mowers 
without a ROPS.

Accessory operator protective structures will 
continue to be offered for all equipment currently 
covered. This allows for the outfitting of any 
machines without previous ROPS installations or 
replacement of damaged structures.

23. Keep legs, arms, and body inside the seating 

compartment while the vehicle is in motion.

24. Disconnect battery and controller electrical connectors 

before performing any welding on this mower.

This machine is to be operated and maintained as specified in this manual and is intended for the professional 
maintenance of specialized turf grasses. It is not intended for use on rough terrain or long grasses.


WARNING

EQUIPMENT OPERATED IMPROPERLY OR BY UNTRAINED PERSONNEL CAN BE DANGEROUS. 

 Familiarize yourself with the location and proper use of all controls. Inexperienced operators should receive instruction 

from someone familiar with the equipment before being allowed to operate the machine.

!

Содержание AR-522 jossa ROPS

Страница 1: ...y Those who use and maintain this machine should be trained in its proper use warned of its dangers and should read the entire manual before attempting to set up operate adjust or service the machine...

Страница 2: ...operating and maintenance instructions you will prolong the life of your equipment and maintain its maximum efficiency If additional information is needed contact your Jacobsen Dealer The serial plat...

Страница 3: ...als guards shields discharge deflectors or other protective devices securely fastened in place 12 Never disconnect or bypass any switch 13 Do not change the engine governor setting or overspeed the en...

Страница 4: ...ntenance should always be performed by a qualified technician If additional information or service is needed contact your Authorized Jacobsen Dealer who is kept informed of the latest methods to servi...

Страница 5: ...the icons shown above and what they represent Learn the location and purpose of all the controls and gauges before operating this mower Read Manual High Low Engine Throttle PTO Lock Unlock Forward Rev...

Страница 6: ...bystanders away 7 Inspect hoses and fabric covers daily If worn or damage replace with original quality parts 8 Do not use on slopes greater than 22 4131828 Total Hours 1 10 0 0 0 0 0 A Tilt Steering...

Страница 7: ...adjusting knob on front of seat H Hydraulic Oil Cap Dipstick Fill to mark on dipstick using clean hydraulic fluid while machine is cool Do not overfill J Air Cleaner Indicator Indicates condition of a...

Страница 8: ...to turn lights off S Traction Control Pressing switch enables controller traction control system This system reduces down pressure on decks by pulsing the lift circuit transferring weight to mower Re...

Страница 9: ...k 2 Engine Oil Pressure alarm sounds for 5 seconds then beeps once every three seconds and oil pressure light comes ON Oil pressure low Stop mower immediately lower implements and shut off engine Insp...

Страница 10: ...spect paint and decals for damage or scratches Decals provide important operaing and safety information Replace all missing or hard to read decals 3 All fluids must be at the full level mark with engi...

Страница 11: ...er switch ON traction pedal out of Neutral or parking brake Disengaged 2 Perform each of the following tests to insure the interlock system is functioning properly Stop the test and have the system in...

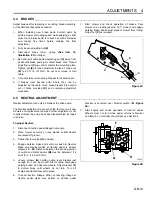
Страница 12: ...ed Tighten nut to hold adjustment in place Figure 4A 4 3 BELT____________________________________________________________________ Inspect and adjust new belt after first ten hours of operation Adjust...

Страница 13: ...lling Adjust nut C as required Figure 4C 4 5 NEUTRAL ADJUSTMENT ___________________________________________________ Neutral adjustment can only be made at the drive pump The Neutral adjustment is pres...

Страница 14: ...to on 5 Start engine and check forward speed Repeat procedure until 10 mph 16 kph forward transport speed is attained To adjust reverse speed 1 Set forward speed 2 Start engine and check reverse trave...

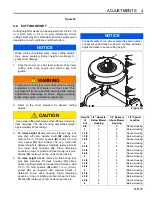
Страница 15: ...ce remaining spacers on top of spindle and insert snap lock pins Washer F is always on top under snap lock pin Figure 4G NOTICE When cutting undulating areas lower cutting heights may cause scalping A...

Страница 16: ...Tap the lift lever to raise position and wait for 3 to 5 seconds Repeat if required until cutting units just begin to raise 6 Tap the lift lever to lower position and wait until decks stop moving Repe...

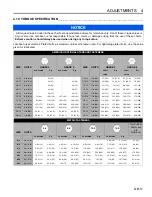
Страница 17: ...Nm 75 8 4 100 11 3 107 12 1 143 16 1 9 16 18 ft lb Nm 92 124 122 165 129 174 172 233 1 4 28 in lb Nm 85 9 6 115 13 0 120 13 5 163 18 4 5 8 11 ft lb Nm 113 153 151 204 159 215 211 286 5 16 18 in lb Nm...

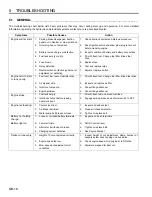
Страница 18: ...r runs poorly 1 Fuel level low fuel or fuel filter dirty 1 Fill with fresh fuel Change fuel filter Bleed fuel lines 2 Air cleaner dirty 2 Inspect and replace air filter 3 Injectors fuel pump 3 Consult...

Страница 19: ...Valve Hold Coil lamp 27 must be on NOTICE For factory assistance with troubleshooting controller problems please note the controller hardware revision and software version located on the lower right c...

Страница 20: ...that not all switches are located on the instrument panel The traction pedal reel lift limit and brakes are controlled by small proximity switches mounted on the frame of the mower If an input lamp do...

Страница 21: ...using only manual grease gun with NLGI Grade 2 Service Class LB Grease Fittings F1 50 Hours Every Week 1 Mower Pivot 5 2 Lift Arm Pivot 5 3 Lift Cylinders 10 4 Caster Pivot and Wheels 10 5 Deck Rear R...

Страница 22: ...7 NOTES GB 22 7 Notes...

Страница 23: ...crimped hoses o For oil leaks o Tow Valve is closed Miscellaneous__________________ o Check for loose or missing hardware o All lubrication points o Examine paint finish touch up where necessary o Ch...

Страница 24: ...2 Kontroller 6 2 3 Kontrollpanel 8 2 4 Operat rvarsler 9 3 OPPSETT 3 1 Generelt 10 3 2 F rste inspeksjon f r bruk 10 3 3 Brukskontroller 11 3 4 Interlock System 11 4 JUSTERINGER 4 1 Generelt 12 4 2 Kl...

Страница 25: ...er annet sikkerhetsutstyr som skal v re forsvarlig montert p maskinen 12 Ikke deaktiver eller bypass noen bryter 13 Ikke foreta endringer p innstillingen av motorens fartsregulator eller rus motoren o...

Страница 26: ...dens maksimale effektivitet Justeringer og vedlikehold m alltid utf res av en kvalifisert tekniker Hvis ytterligere informasjon eller tjenester er n dvendig kontakt din autoriserte Jacobsen forhandle...

Страница 27: ...d ikonene som vises ovenfor og hva de representerer L r deg plasseringen og hensikten med alle kontroller og m lere f r du tar i bruk gressklipperen Les manualen H y Lav Gasspjeld Kraftuttak L s pne F...

Страница 28: ...ystanders away 7 Inspect hoses and fabric covers daily If worn or damage replace with original quality parts 8 Do not use on slopes greater than 22 4131828 Total Hours 1 10 0 0 0 0 0 A Spak for ratt t...

Страница 29: ...over eller bakover Drei justeringshjulet p forsiden av setet for justere fj rspenningen under setet H Hydraulisk oljelokk peilepinne Fyll ren hydraulikkv ske til merket p peilepinnen mens motoren er k...

Страница 30: ...p Trykk bakre del av bryteren for sl lyset av S Kj rekontroll Traction Control Trykk p bryteren aktiverer kontrolleren for kj resystemet TCS Dette systemet reduserer trykket p klippeenhetene ved pulse...

Страница 31: ...k alarmen varer i 5 sekunder dernest h res en lyd en gang hvert tredje sekund og varsellyset for oljetrykket tennes Lavt oljetrykk Stopp gressklipperen umiddelbart senk klippeenhetene og sl av motoren...

Страница 32: ...r viktig bruks og sikkerhetsinformasjon Erstatt alle oblater som mangler eller som er vanskelig lese 3 Alle v sker m n opp til maksimummerket med kald motor Kontroller a Niv et p kj levannet i radiato...

Страница 33: ...ON kj repedalen ikke i N YTRAL eller parkeringsbremsen FRAKOBLET 2 Gjennomf r hver av f lgende tester for p se at Interlock System virker som det skal Stopp testen og s rg for at systemet inspiseres...

Страница 34: ...stere stoppskruen opp for senke hastigheten og ned for ke hastigheten Stram mutteren for sikre justeringen Fig 4A 4 3 REIM ____________________________________________________________________ Inspiser...

Страница 35: ...ingsbremsen Bremsene m hindre gressklipperen fra rulle Juster mutter C etter behov Fig 4C 4 5 N YTRAL JUSTERING _____________________________________________________ N ytral justering kan bare utf res...

Страница 36: ...tigheten forover Gjenta prosedyren inntil en hastighet forover p 16 km t 10 mph er oppn dd For justere hastigheten bakover 1 Still inn hastigheten forover 2 Start motoren og kontroller kj rehastighete...

Страница 37: ...ne Plasser gjenv rende avstandsstykker p toppen av spindelen og sett tilbake l sepinnene Skive F er alltid verst under l sespinnene Fig 4G NB N r det klippes i kuperte omr der kan lav klippeh yde f re...

Страница 38: ...yteren i 5 sekunder Hornet vil h res n r kontroller g r inn i kalibreringsmodus 5 Sett l ftespaken i heveposisjon og vent i 3 til 5 sekunder Gjenta om n dvendig inntil klippeenhetene s vidt begynner l...

Страница 39: ...154 209 1 4 20 in lb Nm 75 8 4 100 11 3 107 12 1 143 16 1 9 16 18 ft lb Nm 92 124 122 165 129 174 172 233 1 4 28 in lb Nm 85 9 6 115 13 0 120 13 5 163 18 4 5 8 11 ft lb Nm 113 153 151 204 159 215 211...

Страница 40: ...filteret er skittent 1 Fyll tanken med nytt drivstoff Skift drivstoffilter Luft drivstoffsystemet 2 Luftfilteret er skittent 2 Inspiser og skift luftfilter 3 Innspr ytingsdyser drivstoffpumpe 3 Se Mot...

Страница 41: ...pole lampe 27 m v re p NB For fabrikkassistanse ved feils king av kontrollerproblemer v r klar over at maskinvarerevisjoner og programvareversjoner finnes angitt p nedre h yre hj rne av kontrolleren S...

Страница 42: ...tdata Ha i mente at ikke alle brytere befinner seg p instrumentpanelet Kj repedalen spolel ftebegrenser og bremser kontrolleres av sm brytere montert p rammen til gressklipperen Hvis en inndatalampe i...

Страница 43: ...Class LB Fettnipler F1 50 timer hver uke 1 Klippeenhets opplagringspunkt 5 2 L ftearmens opplagringspunkt 5 3 L ftesylindere 10 4 Trinsehjuls opplagringspunkt 10 5 Klippeenheters bakre ruller 10 6 Bre...

Страница 44: ...7 NOTER nn 22 7 NOTER...

Страница 45: ...pressede slanger o For oljelekkasjer o Tilhengerventil er stengt Diverse _______________________ o Kontroller for l st eller manglende utstyr o Alle sm repunkter o Studer lakkoverflatene frisk opp der...

Страница 46: ......
Страница 47: ...A Textron Company 11108 Quality Drive Charlotte NC 28273 USA www Jacobsen com Ransomes Jacobsen Limited West Road Ransomes Europark Ipswich England IP3 9TT England English Company Registration No 1070...

Отзывы: