background image


LIGHTING INSTRUCTIONS 


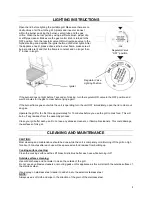
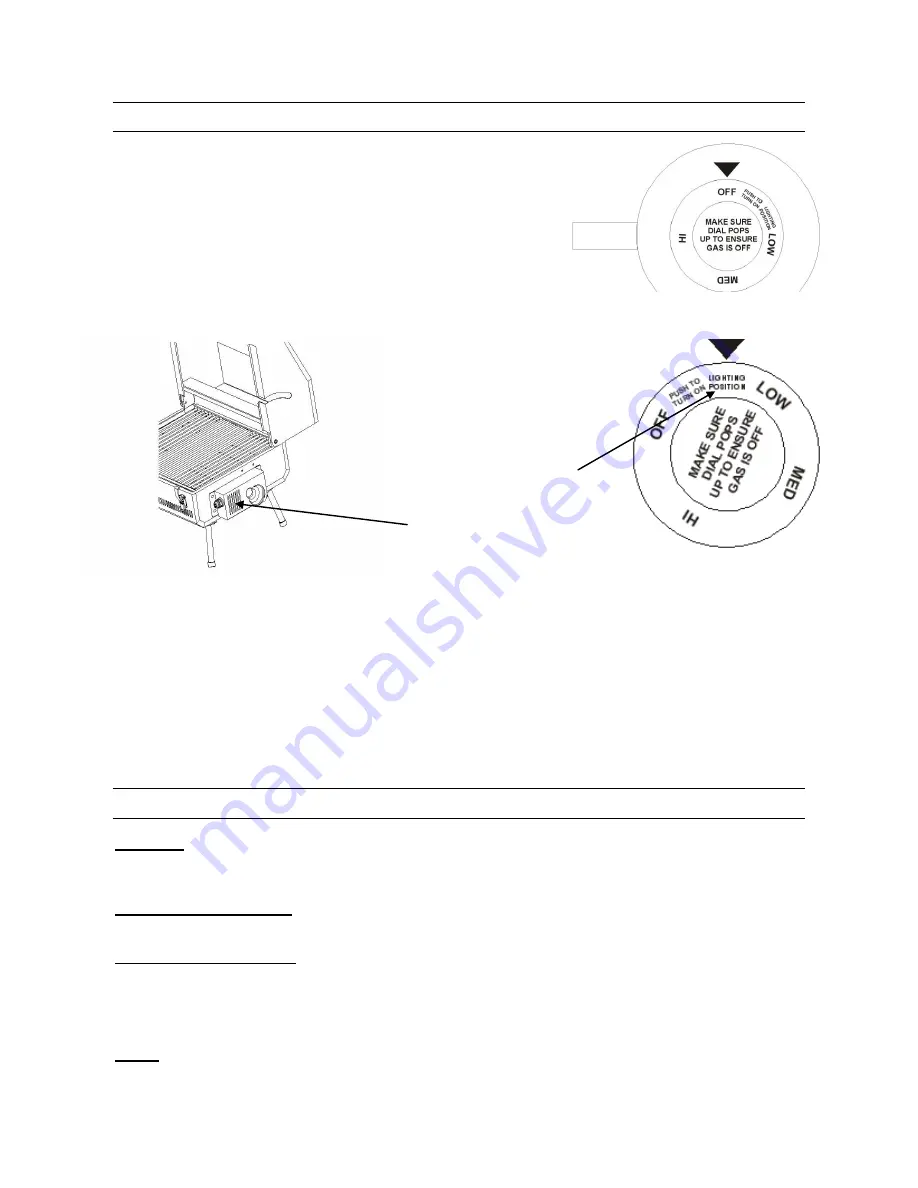
Open the lid before lighting the portable grill. Make sure there are no 
obstructions of air flow to the grill. Spiders and insects can nest 
within the burner and clog the burner, venturi tube and the gas 
orifice. Clean the burner ports by using a stiff wire brush, paper clip 
or stiff pipe cleaner. Make sure the gas control knob is turned to the 
OFF position. Turn the regulator valve OR multi purpose valve to the 
highest setting and depress the igniter button until burner lights. After 
the appliance has lit, please observe the burner flame, make sure all 
burner ports are lit and that the flame is constant and no longer than 
2” inches in length.  
.  


If the burner does not light before 7 seconds of clicking, turn the regulator OR valve to the OFF position and 
wait 5 minutes for the gas to clear before trying again. 
 
If the burner flame goes out while the unit is operating turn the unit OFF immediately, open the lid to clear out 
any gas. 
 
Operate the grill for the first time approximately for 15 minutes before you use the grill to cook food. This will 
burn off any residues from the assembly process.  
 
Clean your grill after each use. Do not use any abrasive cleaners, or flammable cleaners. This could damage 
the surfaces of this grill. 


CLEANING AND MAINTENANCE 


CAUTION: 

Most cleaning and maintenance should be done while the unit is completely cold. Burning off the grill on high 
for about 5 minutes after each use will keep excessive food residue from building up.   
 

Cooking surface cleaning: 

Clean the cooking surface with a stiff brass bristle brush after each use while burning it off.  
 

Outside surfaces cleaning:


Use mild dish soap and hot water to clean the outside of the grill.  
Do not use any abrasive cleaners or scouring pads on this appliance as this will scratch the outside surface of 
the stainless steel. 
 
Use a spray-on stainless steel cleaner to add shine to the exterior stainless steel. 

NOTE: 

Always use a soft cloth and wipe in the direction of the grain of the stainless steel. 

Igniter  

Regulator Valve 

Lighting Position 

Regulator Valve 

“OFF” position 

Содержание Versa 100 JPG100-PKG1

Страница 1: ...E ELSE GIVE THIS MANUAL TO HIM OR HER FOR FUTURE REFERENCE FOR YOUR SAFETY If you smell gas 3 Do not attempt to light this appliance 4 Extinguish any open flame 3 Disconnect from the fuel supply FOR Y...

Страница 2: ...PACKAGING YOUR GRILL AND TOOLS REQUIRED FOR ASSEMBLY 5 PREPARING YOUR GRILL FOR OPERATION 6 7 LIGHTING INSTRUCTIONS CLEANING AND MAINTENANCE 8 9 REGISTRATION 10 WARRANTY 11 PARTS LIST AND EXPLODED VIE...

Страница 3: ...e factory for use with Propane Gas only LP Propane Cylinder not included For use with Natural Gas please follow instructions for Converting to Natural Gas 3 Never use Charcoal or Lighter fluid 4 Do no...

Страница 4: ...inder to be used must be constructed and marked in accordance with the National Standards of Canada CAN CSA B339 Cylinders spheres and tubes for the Transportation of Dangerous Goods Only cylinders ma...

Страница 5: ...NG orifice 56 supplied 1 Full Length Cover 1 QCC Hose Regulator 1 LP Portable Regulator 4 4 Table Top Legs 1 Owners Operators Manual TOOLS REQUIRED FOR ASSEMBLY 2 Phillips Screwdriver Crescent Wrench...

Страница 6: ...installed in the correct direction STEP 2 Decide what fuel system you are going to be using the grill with For single use 1 lb liquid propane LP cylinders install the LP portable regulator onto the si...

Страница 7: ...nd then remove the stainless burner tube Loosen the Philips screw at the end of the burner and close air shutter so it is open 1 16 th of an inch STEP 3 TO INSTALL SUPPLIED ROTISSERIE KIT To install T...

Страница 8: ...o clear out any gas Operate the grill for the first time approximately for 15 minutes before you use the grill to cook food This will burn off any residues from the assembly process Clean your grill a...

Страница 9: ...es Wipe out firebox with a paper towel or rag NOTE Make sure all of the oven degreaser is wiped dry and let the grill air out with the lid open for 15 minutes before using Burner maintenance Clean the...

Страница 10: ...or quick reference If you need to obtain replacement parts for your Jackson Grill contact your local dealer NOTE It is normal for stainless steel surfaces to discolor due to high heat given off from t...

Страница 11: ...and chemical cleaners will also damage grill and grill surface Should deterioration occur to the point of non performance within the duration of the warranted coverage a replacement will be provided i...

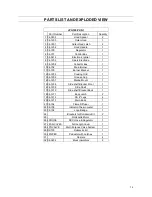
Страница 12: ...ing Grid 1 13 04 1206 Grease Cup 1 14 04 1207 Marine Mount 1 15 04 1208 Side shelf Bracket Front 1 16 04 1209 Side Shelf 1 17 04 1210 Side shelf Bracket Back 1 18 04 1211 Body Latch 2 19 04 1212 SS 4...

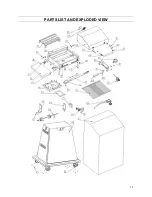
Страница 13: ...13 PARTS LIST AND EXPLODED VIEW...

Отзывы: