background image

10


ZH


ZH      11

中文

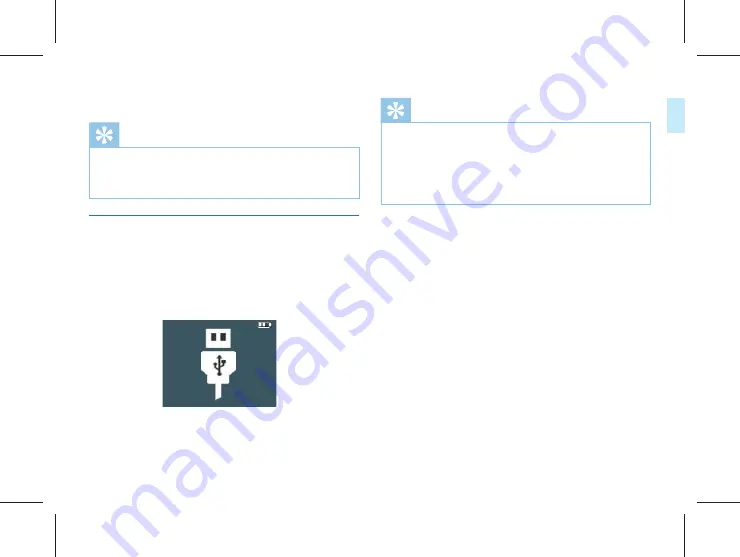
音视频记录仪可作为大容量的  USB  存储设备,并可方便使音视

频记录仪与电脑相连,BVR20 无须安装软件,音视频会自动显示

为可移动设备。连接电脑图标如下图所示。

4.3 连接电脑

提示

提示

本机充电可以使用关机充电和开机充电的方式,一般情况下,

关机充满电需要 2.5 小时左右,开机充满电需要 5 小时左右(建

议关机充电)。

在文件移入或移出音视频记录仪时,请不要断开音视频与电

脑的连接。

请将机器开机后再使用  USB  数据线将音视频记录仪与电脑相

连或者使用  USB  数据线将音视频记录仪与电脑相连后长按电

源键 3s。

• 

• 

• 

过程中充电指示灯常亮绿色,充满后熄灭。

Содержание BVR20

Страница 1: ...English 32 03 http www jwdigital com BVR20 User Manual BVR20 Register your product and get support at...

Страница 2: ......

Страница 3: ...ZH 03 1 05 06 2 08 3 10 4 17 9 20 11 05 1 1 08 3 1 3 2 06 2 1 06 06 08 2 2 2 3 10 10 18 20 4 1 9 1 11 1 11 4 2 4 3 12 5 15 7 14 6 16 8 19 10 22 12 28 13 22 28 22 28 12 1 13 1 23 24 12 2 13 2 12 3 12 4...

Страница 4: ...04 ZH 30 15 31 16 29 14...

Страница 5: ...ZH 05 1 http www jwdigital com F1 8 3 5mm BVR20 128G MP3 USB 2 0 USB 1 1...

Страница 6: ...06 ZH 2 2 2 2 3 2 1...

Страница 7: ...ZH 07...

Страница 8: ...08 ZH 3 3 1 1 BVR20 3 2 20 19 21 23 22 1 4 2 3 5 11 16 17 18 15 12 13 14 7 6 8 9 10 28 24 25 27 26 29...

Страница 9: ...ZH 09 1 2 3 4 5 6 7 8 9 10 11 12 13 14 15 16 17 18 19 20 21 22 23 USB TF 24 25 26 27 28 29...

Страница 10: ...10 ZH 4 MENU 3s 3 3s BVR20 4 1 1 USB PC 2 USB 4 2...

Страница 11: ...ZH 11 USB BVR20 4 3 2 5 5 USB USB 3s...

Страница 12: ...12 ZH 1 2 3 IR 4 5 6 7 8 5 1 5 7 6 8 2 4 3...

Страница 13: ...ZH 13 ID 1 2 3 4 5 6 7 8...

Страница 14: ...14 ZH 6...

Страница 15: ...ZH 15 7 1 2 3 3 1 2 3 BVR20 00 00 01 R 00 00 01 1 2 3...

Страница 16: ...16 ZH 8...

Страница 17: ...ZH 17 9 1 2 3 4 5 6 ID 4 3 5 1 2 6...

Страница 18: ...18 ZH 9 1 1 2 3 4 5 6 2 4 8 16 32 64...

Страница 19: ...ZH 19 10...

Страница 20: ...20 ZH 11 1 2 3 4 5 11 1 1 2 3 4 5 5 4 1 2 3...

Страница 21: ...ZH 21...

Страница 22: ...22 ZH 12 12 1 12 1 1 12 2 12 2 1 2304x1296 30P 1920x1080 30P 1280x720 30P 848x480 30P...

Страница 23: ...ZH 23 16 5 10 15 30 60 12 2 2 12 2 3 12 2 4 38M 34M 23M 20M 18M 16M 14M 12M 8M 5M 3M 2M 12 12 3 12 3 1...

Страница 24: ...24 ZH 3 5 10 30 60 12 3 3 NTSC PAL ID 12 4 2 12 4 3 12 4 12 4 1 3 5 10 20 12 3 2...

Страница 25: ...ZH 25 12 4 5 12 4 4 1 3 5 0 10 11 12 4 6 12 4 7 12 4 8 12 4 9...

Страница 26: ...26 ZH 12 4 15 12 4 16 12 4 13 12 4 14 12 4 10 12 4 11 5 10 15 20 30 12 4 12...

Страница 27: ...ZH 27 2 0 2 0 13 ID 12 4 17 12 4 18 BVR20 ID 12 4 19...

Страница 28: ...28 ZH 13 13 1 1 2 13 2...

Страница 29: ...ZH 29 14 1 2...

Страница 30: ...30 ZH 15 www JWD com support USB USB...

Страница 31: ...ZH 31 16 32GB 549 C10 TF 72 54 27 mm 106g Windows 10 8 7 Vista XP 2000 Mac OS X Linux USB 128kbps MP3 30 55 10 90...

Страница 32: ...arge 12 2 Video settings 4 3 PC connection 38 49 38 34 2 Important 35 44 46 47 3 Your Video Audio Recorder 9 Video Mode 10 Camera Mode 11 Voice Mode 37 49 39 42 41 43 4 Get Started 12 Settings Mode 5...

Страница 33: ...s the stop button to play the file 130 ultra wide angle lens free from dead zones for video recording Double filter switcher for images without color deviation during the day and clearer images at nig...

Страница 34: ...hat the recording of telephone conversations is illegal Please check if the use of such data is legal in your country prior to recording telephone calls Adjust to a desired volume do not use headphone...

Страница 35: ...EN 35 English 3 Your Video Audio Recorder 3 1 BVR20 what s in the box 3 2 Overview 20 19 21 23 22 1 4 2 3 5 11 16 17 18 15 12 13 14 7 6 8 9 10 28 24 25 27 26 29...

Страница 36: ...u option file choosing Next track Fast forward Menu option choosing Last track Fast forward Menu option choosing Decreasing volume Menu option file choosing Microphone Video recording Photo taking Voi...

Страница 37: ...en the device is off it can be started by pressing the Power On Off button for 3s the screen then displays the JWD logo See the picture below Then the device displays the preview interface as seen in...

Страница 38: ...The device can be connected to a PC using the USB cable When recharging the indicator remains green When the indicator goes out the device is fully recharged 2 The device can be connected to the rech...

Страница 39: ...recording at night or in a low light environment press the button to gain more light 5 Press the Capture button to capture the current video recording picture 6 Press the button to mark the file as an...

Страница 40: ...recording the system will automatically save the recorded file then shut down If the device has a low battery please recharge the device promptly When the device shuts down on a low battery the follo...

Страница 41: ...w interface press the Camera button to take a photo While taking a photo a red light appears with a click sound If taking a photo in a dark environment the device needs its infrared lamp or additional...

Страница 42: ...video recorder to voice recorder 4 Press the Record button to end recording The device returns to the Preview interface Record state Current recording time 1 2 Status of the battery 3 Note Prior to r...

Страница 43: ...button quickly after the video recording file is saved the Voice Tracer will directly play the file Press the Stop button quickly after the voice recording file is saved the Voice Tracer will directl...

Страница 44: ...ed when loop recording and only can be deleted through computer Press the or button to select a video file to play and then press the Play button quickly to enter the Video Stop interface 9 Video Mode...

Страница 45: ...EN 45 English playing 5 When playing press or to choose 2x 4x 8x 16x 32x 64x to fast forward or backward Note If the headphones are plugged in the speaker of the recorder is disabled...

Страница 46: ...oto file list interface is shown in the following figure On this interface press the sensitivity button to mark the current file as important And the file will not be covered when loop recording and o...

Страница 47: ...interface The voice file list interface is shown in the following figure On this interface press the button to mark the current file as important And the file will not be covered when loop recording a...

Страница 48: ...o start playing and the status indicator turns green 3 Press or to adjust volume 4 Press the Stop button to end playing and return to the voice file list interface 5 When playing press to pause press...

Страница 49: ...can be achieved by selecting different levels The interface reference has the following settings MIC sensitivity High Medium Low 12 2Video settings 12 2 1 Resolution The Video Settings menu includes R...

Страница 50: ...the button to save the recorded video Delay Record has six options Off 5 Sec 10 Sec 15 Sec 30 Sec and 60 Sec Press the or button to select After selection press the Menu button to confirm or press the...

Страница 51: ...e Menu button to confirm or press the Back button to return to the previous menu The System Settings menu comprises Language TV Mode Default Settings LCD Brightness System Time Auto Off Photo selftime...

Страница 52: ...rightness has three levels High Medium and Low Press or to select the desired level After selecting the level press the OK button to confirm or press the Back button to return to the previous menu The...

Страница 53: ...und volume of the device Volume can be set to any of 11 values within 0 to 10 Press the or button to select the desired value and confirm by pressing the Menu button 12 4 9 In car mode 12 4 10Video lo...

Страница 54: ...ction 12 4 12 Duration Video recording has five time periods 5 Min 10 Min 15 Min and 20 Min 30Min In the course of video recording this function can automatically save a video file periodically at the...

Страница 55: ...re Motion detection has four options Off Low Medium and High It can be turned off or set to a desired level 12 4 19 System information The System Information menu includes Total Space Available Space...

Страница 56: ...13 1 Back clip installment 13 2 Back clip uninstallment Match the back clip with the slot 1 on the device and install the clip according to direction 2 as shown in below picture Pull out the clip from...

Страница 57: ...7 English 14 How To Wear The Back Clip 1 Open the clip by pressing the finger position then nip the epeulet and make the clip hook hookup the bottom of the epaulet 2 Adjust the device to a proper posi...

Страница 58: ...t the time date in the menu if the recording time is incorrect If the camera lens are unclean please clean up the lens with a piece of flannelette The Voice Tracer s memory is full and the loop record...

Страница 59: ...de Long High 77 54 27 mm Weight with battery 106g Operating System Windows 10 8 7 Vista XP 2000 Mac OS X Linux Port USB Bit rate 128kbps MP3 format Temperature 30 55 C Humidity 10 90 no condensation I...

Страница 60: ...OTG Micro Type C USB...

Страница 61: ...16 2...

Страница 62: ......

Страница 63: ......

Страница 64: ......

Отзывы: