background image

10

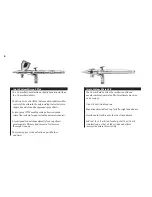
Micro Air Control (MAC) Valve (CM-C Plus Only)

The MAC Valve enables infinite airflow control at the airbrush’s 

head providing control between stipple, fine detail, and  

background spray effects.

  • Spray coarse stippling effects and increase to full atomization  

in a quick turn.

  • Fine tuned airflow.

  • Maximized paint atomization control.

  • Open the valve fully during cleaning. The higher pressure pulls  

more paint through the airbrush. 

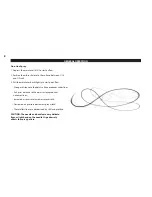
Stippling

Iwata airbrushes are designed to produce a wide range of     

stippling textures. 

1. Unscrew the crown cap (#1A) and screw onto the cap dock 

located on the end of the pre-set handle (#12).

2. Unscrew the nozzle cap (#1B).

3. Adjust the air pressure between 5 and 30 psi.

  •  Low air pressure creates coarse stipples.

  •  High air pressure provides fine stipple effects. 

  •  Paint viscosity also effects stippling texture.

Air Pressure

Working pressures generally vary between 8 and 60 psi,  

depending on the type of surface, the desired spray texture,  

and the paint’s viscosity. Try using 14 psi or below to take full 

advantage of the Custom Micron’s unique, spray characteristics.

•  Spray thick paint with greater pressure.

•  Spray thin paint with less pressure.

•  Spray large paint amounts with greater pressure.

•  Spray small paint amounts with less pressure.

WARNING: Do not exceed 98 psi

Содержание Custom Micron B

Страница 1: ...CUSTOM MICRON SERIES VERSION 2 MANUAL PARTS GUIDE...

Страница 2: ...w w w I W A T A A I R B R U S H c o m...

Страница 3: ...RPORATION Yokohama Japan 81 0 45 591 1111 www anest iwata co jp ANEST IWATA U K LTD Neots Cambs England 44 0 1480 474742 www anest iwata co jp ANEST IWATA MOTHERSON LTD Uttar Pradesh India 91 0 120 46...

Страница 4: ...es are designed for the demanding professional Modern precision machining and carefully selected materials are used in the manufacturing process to ensure consistent high performance and long life Eac...

Страница 5: ...e ergonomic to lessen fatigue and the needle chucking guide and auxiliary lever are now combined to ease reassembly In addition the pre set handle now has a threaded crown cap dock so you can screw on...

Страница 6: ...gned funnel shaped gravity feed cup allows greater paint efficiency and ensures a faster more thorough clean up The cutaway pre set handle allows quick flushes and rinses Iwata Custom Micron SB The 18...

Страница 7: ...t Jet Pro Good for small studios and normal use Power Jet Lite Good for normal studios and extended use Power Jet Great for normal studios and great for extended use Power Jet Pro Great for normal stu...

Страница 8: ...nt flow A longer distance to the paint surface produces wider lines A shorter distance to the paint surface produces narrower lines Increased air pressure increases spray width Decreased air pressure...

Страница 9: ...ed adjusting screw mounted behind the handle limits the distance the main lever can be pulled back This provides accurate paint volume control and is especially useful for repetitive precision work Cu...

Страница 10: ...and screw onto the cap dock located on the end of the pre set handle 12 2 Unscrew the nozzle cap 1B 3 Adjust the air pressure between 5 and 30 psi Low air pressure creates coarse stipples High air pre...

Страница 11: ...ent based flammable paints around open flames Use the appropriate respirator to safely filter out paint vapors particular to your specific paint type Wear eye protection to prevent paint contact with...

Страница 12: ...uld feel a positive stop If you feel a spongy stop you still have debris in your nozzle CAUTION The most probable time to damage the needle is when the needle passes through the main lever 13 and thro...

Страница 13: ...cause severe paint flow problems DONOTuselightmachineoilorWD 40forlubrication These lubes cause the needle to stick when it moves through the needle packing o ring and can also get into the air syste...

Страница 14: ...ed down to let gravity help your efforts 16 Place the needle chucking guide into the airbrush body 17 Place the needle spring over the needle chucking guide 18 Screw the needle spring adjuster into th...

Страница 15: ...9 15...

Страница 16: ...16...

Страница 17: ...17...

Страница 18: ...1D 1 Unscrew the handle 11 2 Loosen the needle chucking nut 10 3 Gently pull the needle 9 part way back It doesn t need to be fully pulled out 4 Simply unscrew the entire head system NOTE Removing th...

Страница 19: ...ng it back through the nozzle If not the bent needle might damage the nozzle as it s pulled through TIP Keep a spare needle on hand for unforeseen accidents Needles are sharp Needle tips are bent easi...

Страница 20: ...10 8 7 5 6 4 13 14B 15B 15 15C 15D 15A 9 21 16B 16A 17 3A 18 19 20 2 1 1A 1B 1C 1D 3D 3B 3C 23 22 11B 12 11A 14A 20...

Страница 21: ...CM B Orig CM SB Orig 0 23 mm E I 540 3 x x x n CM C Orig 10 Needle Chucking Nut B I 560 1 n n n n All CM 11A Pre Set Handle G I 585 4 n n n opt 11B Pre Set Handle Single Cut G I 585 5 opt opt opt n PR...

Страница 22: ...n visit www iwata medea com 22 All Iwata airbrushes areWarranted against all manufacturing defects of material and manufacture or workmanship for a period of FIVE years from date of purchase This warr...

Страница 23: ...6...

Страница 24: ...5 4 5...

Страница 25: ...4 3 3 1 3 2...

Страница 26: ...3 2 2 1 2 2...

Страница 27: ...2...

Страница 28: ...1 Part No ICM 110 2 Rev6 4 16...

Отзывы: