14
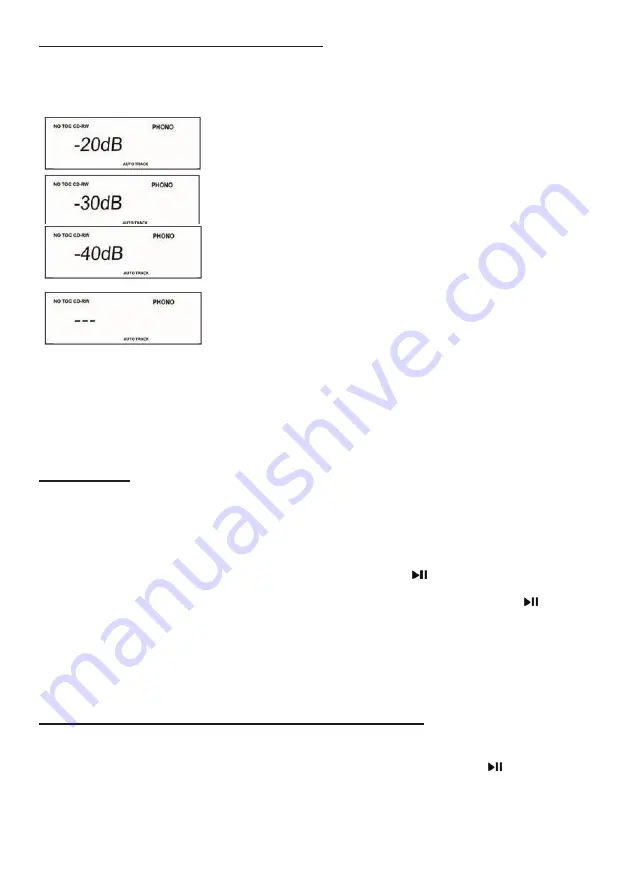
Select Auto Track Increment Selection Mode
Tracks can be set to assign automatically when the input sound level drops below a certain limit
(-20db/-30db/-40db ) for more than 2 seconds.
Press the AUTO/MANUAL button repeatedly ( or MANUAL/AUTO INCREMENT on the remote) to
cycle between the following modes:
“AUTO TRACK -20db”
A new track will be assigned automatically when the sound level
drops below -20db
“AUTO TRACK -30db”
A new track will be assigned automatically when the sound level
drops below -30db
“AUTO TRACK -40db”
A new track will be assigned automatically when the sound level
drops below -40db
Manual Track Selection
Tracks will not be assigned automatically. A new track will be
assigned whenever “TRACK INCREMENT” is pressed during
recording.
AUTO TRACKING function is to cut the separation for each music/song you are recording to CD by
recognizing the silence that is in between the songs on your records or cassette tapes. The decibels
(lowest 20-30-40highest) allow you to choose the level of minimal sound that may still exist between
the songs to be recognized as the separation before the next song to cut a track. If your source of the
recording quality is not of best quality it is recommended to use the “MANUAL TRACKING” function
for best result in recording.
RECORDING
1) First put the blank CD-R or CD-RW on the CD tray and close the tray.
2) Make sure that the display shows “NO TOC CD-R (or CD-RW).
3) Pick the source of music and press the button (Phono, Tape, Aux, USB or Bluetooth).
4) If using a record, put the vinyl on the turntable.
5) Press RECORD button to select CD Recording Mode.
6) Adjust your recording volume to about middle (you can adjust on your next recording if too loud or too low).
7) Place the needle on the record and then press “play/pause” button ( ).
8) Now you are recording.
9) When the last song is recorded from the one side of vinyl, press the “play/pause” button ( ) to pause.
10) When paused, flip the record to the other side and place the needle back to play.
11) Press the “play/pause” button again to resume recording.
12) When all recording is done, wait for about 10 seconds and then press the stop button.
Note : Audio from USB record to CD, please follow up these steps:
1. First put the blank CD-R or CD-RW on the CD tray and close the tray.
2. Make sure that the display shows “NO TOC CD-R (or CD-RW).
3. Connect the USB memory stick into the USB slot and press the PLAY/PAUSE ( ) button to
begin playing.
Please Note: When making auto tracks, the recording level must be at " 0 ”, The track will be
intermittent if choosing recording level from “-3 to +8”. However, some songs can’t make auto track at
recording level “0” due to original file converting issue. You need to reduce the recording level in between
-3 to -1 when song level is strong. Increase level in b1 to +8 when song level is weak.
4. Press AUTO/MANUAL button, “—AU” will appear on the display a few seconds, it can record
the whole track automatically onto the CD, “AUTO TRACK” will appear on the display.
5. Press AUTO/MANUAL button again, “---“ will appear on the display a few seconds, to record
a single track onto the CD, and then “AUTO TRACK” will disappear from the display.
Содержание ITVS-760B
Страница 1: ...MODEL ITVS 760B WOODEN MUSIC CENTER WITH BLUETOOTH AND RECORDABLE CD PLAYER USB ...
Страница 27: ...760150604E ...


