


Running the U-Pointer
After you double click on the U-Pointer icon
on the desktop, the U-Pointer will initiate and the
U-Pointer icon will be created on the system tray area.
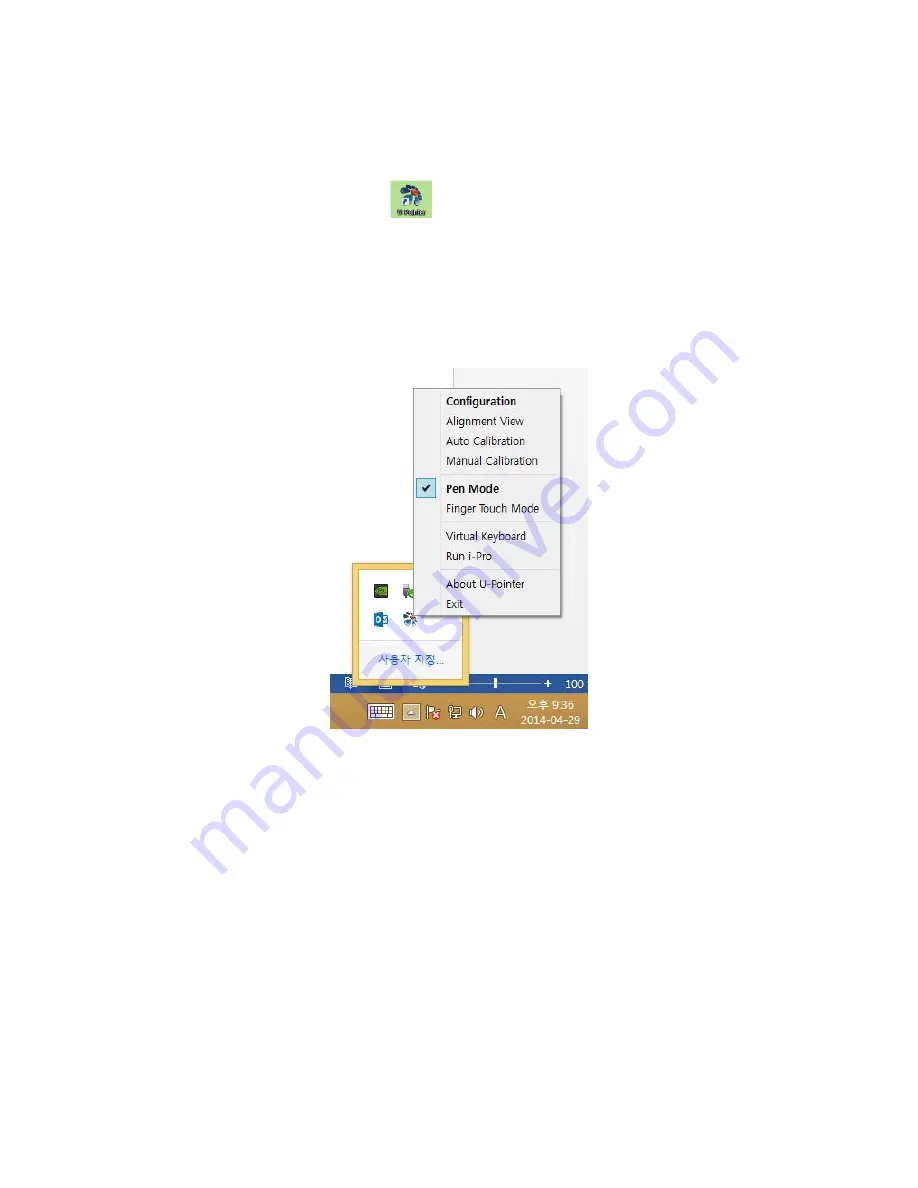
Right click on the U-Pointer icon on the system tray area and a pull-up menu appears.
Configuration : Choose this when you want to change the installation position of the projector.
To change the language,
Alignment View : See “Alignment View” on page 9 for details.
Auto Calibration : If the accuracy is not enough when using the U-Pointer, execute the auto calibration again.
Manual Calibration : If the accuracy is not enough when using the U-Pointer or the auto calibration fails,
execute the manual calibration.
Pen Mode : Writing and touch are possible in this mode with electronic pen included in a product.
Finger Touch Mode : Finger Touch and writing are possible with laser module as an option.
Virtual Keyboard : If keyboard input is needed, click on the “Virtual Keyboard” and then keyboard will appear
on the screen.
Run i-Pro : Choose this when you want to run the “i-Pro”.


