Ironwood BR23 | User Manual
15
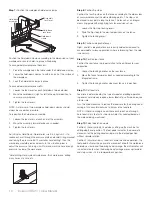
Boring depth can be adjusted using the revolving drum (B). It has
six turret stops for quick adjustment to your most commonly used
boring depths.
1. Before adjusting the revolving turret, make sure that the boring
head is completely lowered.
2. Rotate the turret to the necessary stop for the desired depth.
A
B
C
D
Step 5:
Set boring position
Use the digital readout to position the drilling head to the desired
drilling distance from the edge of the workpiece. Turn the crank
handle to adjust position. The position is displayed in millimeters (mm)
on the digital readout in the handle assembly.
To adjust:
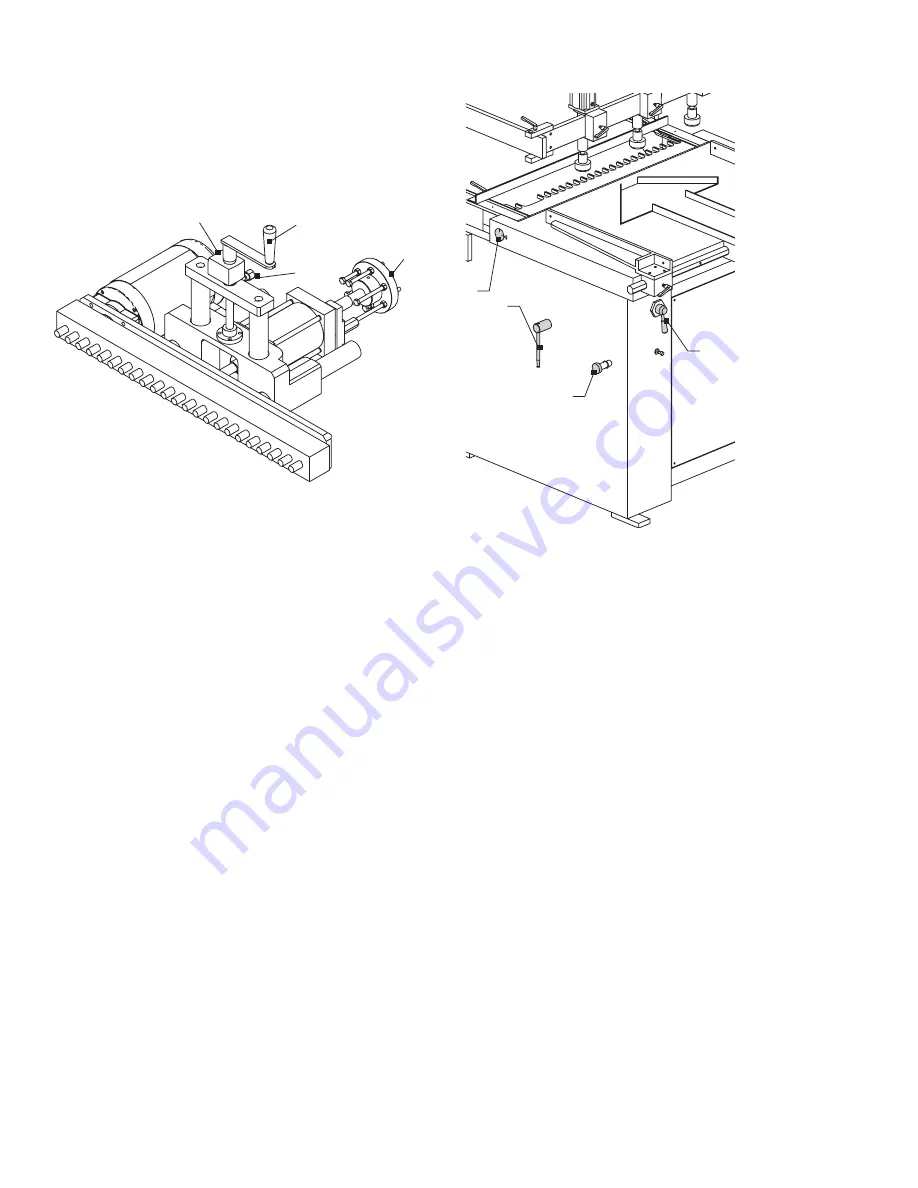
1. Loosen the lock knob (A).
2. Turn the crank lever (C) to change position of the boring head,
observing the position on digital readout (D).
3. Once positioned as desired, tighten the lock lever (A).
Step 6:
Set angle of boring head
B
C
A
D
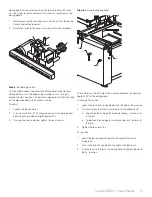
The scale (D) on the left side of the machine indicates the working
angle (0-90°) of the drilling head.
To change tilt position:
1. Loosen the lock lever (A) located on the left side of the machine.
2. Turn lever (B) on the front of machine to tilt the drilling head.
a. To position the carriage for horizontal boring, turn the lever
to the left.
b. To position the carriage for vertical boring, turn the lever to
the right.
3. Tighten the lock lever (A).
45° position
1. Adjust the boring head carriage to the horizontal position
(0 degrees).
2. Push in the knob (C) located to the right of the lock lever.
3. Turn the lever to the right. The boring head carriage will lower to
the 45° position.
Содержание BR23
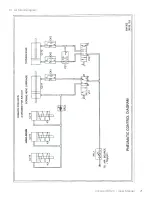
Страница 21: ...Ironwood BR23 User Manual 21 9 1 Air Circuit Diagram...
Страница 22: ...Ironwood BR23 User Manual 22 9 2 Electrical Diagram...
Страница 23: ......


