background image

Page 7 of 10 


Check for loose hardware. 

Operating Instructions 

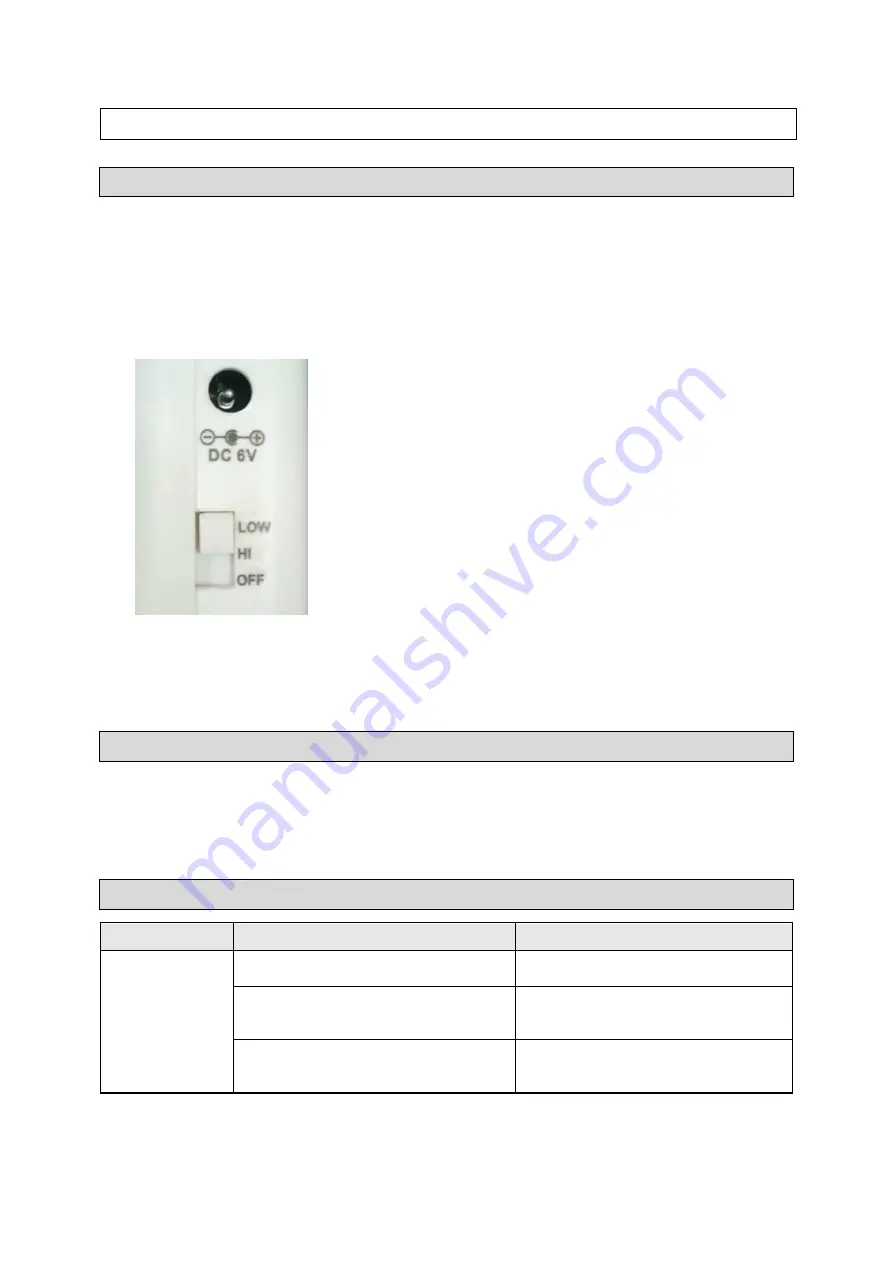
1.  The power switch has three settings: 


OFF

: Power is off. 


HI

: A loud beep (92dB) and the LED will flash when motion is detected. 


LOW

: A short beep (80dB) and the LED will flash when motion is detected. 


2.  Slide the power switch on the receiver to the HI setting. Allow 30 seconds for a warm-up. Two 

short beeps will sound, indicating the alarm is working. 

3.  Once the alarm is working properly, choose the HI setting or the LOW setting, as needed. 

After Each Use 


Wipe the external surfaces of the product with a clean cloth.


Replace the batteries in the receiver and/or sensor when the low battery LED indicator lights.


Troubleshooting 

Failure 

Possible Cause 

Corrective Action 

Alarm is not 
working. 

Battery is low. 

Change the batteries. 

The distance between the sensor and 
the receiver is too far. 

Relocate the sensor or the receiver. 

There are obstacles between the 
sensor and the receiver. 

Check for any possible obstructions 
and remove them. 

Содержание 58643

Страница 1: ...iveway Alert Owner s Manual WARNING Read carefully and understand all ASSEMBLY AND OPERATION INSTRUCTIONS before operating Failure to follow the safety rules and other basic safety precautions may result in serious personal injury Item 58643 ...

Страница 2: ... you read the entire manual to become familiar with this product before you begin using it This wireless driveway alert is designed for certain applications only Northern Tool and Equipment is not responsible for issues arising from modification or improper use of this product such as an application for which it was not designed We strongly recommend that this product not be modified and or used f...

Страница 3: ...Specifications 4 Important Safety Information 4 Specific Operation Warnings 5 Main Parts of Alarm System 6 Installing Instructions 6 Before Each Use 6 Operating Instructions 7 After Each Use 7 Troubleshooting 7 Parts Diagram 8 Parts List 8 Replacement Parts 8 Limited Warranty 9 ...

Страница 4: ...derstand all instructions Failure to follow all instructions may result in serious injury or property damage The warnings cautions and instructions in this manual cannot cover all possible conditions or situations that could occur Exercise common sense and caution when using this product Always be aware of the environment and ensure that the product is used in a safe and responsible manner Do not ...

Страница 5: ...designed Plan your work and use the correct product for the job Check for damaged parts before each use Carefully check that the product will operate properly and perform its intended function Replace damaged or worn parts immediately Never operate the product with a damaged part Do not use a product with a malfunctioning switch Any power tool that cannot be controlled with the power switch is dan...

Страница 6: ... weather resistant 1 Take the following factors into consideration when choosing the install location of the sensor A The passive infrared sensor detects heat Avoid aiming it toward areas that produce heat heater vents windows where the sun hits or outdoor spotlights B The sensor needs to be mounted at least 3 feet above the ground If placing under garage eaves be sure that the sensor is not block...

Страница 7: ...rm is working 3 Once the alarm is working properly choose the HI setting or the LOW setting as needed After Each Use Wipe the external surfaces of the product with a clean cloth Replace the batteries in the receiver and or sensor when the low battery LED indicator lights Troubleshooting Failure Possible Cause Corrective Action Alarm is not working Battery is low Change the batteries The distance b...

Страница 8: ...s are available for replacement The illustrations provided are a convenient reference to the location and position of parts in the assembly sequence When ordering parts the following information will be required item description item model number item serial number item lot date code and the replacement part reference number The distributor reserves the rights to make design changes and improvemen...

Страница 9: ...claim contact Us at 1 800 222 5381 identify the product by make and model number and follow the claim instructions that will be provided The product and the purchase receipt must be provided to Us in order to process Your warranty claim Any returned product that is replaced or refunded by Us becomes our property You will be responsible for return shipping costs or costs related to Your return visi...

Страница 10: ...Page 10 of 10 Distributed by Northern Tool Equipment Company Inc Burnsville Minnesota 55306 www northerntool com Made in China ...

Отзывы: