Ironton 46257 Скачать руководство пользователя страница 8

Page      of 12 

OPERATION 

WARNING

:


To reduce the risk of serious personal injury, read and follow all 

important safety warning and instructions before using this tool.


WARNING

:


Always be sure the tool is disconnected from the power source before 

making any adjustments or setting up prior to cutting. Failure to disconnect or unplug the 
tool may cause accidental starting, resulting in serious personal injury. 

NOTE: Always check that the power supply corresponds to the voltage on the ratings plate. 

1.  Squeeze the Trigger Switch to activate the Shear. Release Trigger to turn off the Shear.   

2.  For continuous operation, press the Lock-on button on the side of the handle. The Lock-on 

button will deactivate once the Trigger is released.   

3.  If shear becomes jammed during cutting, release Trigger and unplug tool immediately.   

4.  Use the Belt Clip to hang the Shear from the work belt.   

5.  To prevent accidents, turn off the tool and disconnect its power supply after use. Clean, then 

store the tool indoors out of children’s reach.   


APPLICATIONS 

NOTE: Always check that the power supply corresponds to the voltage on the ratings plate. 

1. Secure the workpiece. 

2. Place the side blades on the edge of top side of the workpiece.   

3. Pull the Trigger Switch and guide into work. 

Ø

  Hold the shear so the main body is parallel to the workpiece. 

Ø

  Blades are to be at right angles to work.   

Ø

  Engage blades at the edge of material.   

Ø

  Apply sufficient forward pressure to begin cutting. Too much tilt in operation will stop the cut.   

Ø

  Do not force.   

4. For cutting in a perimeter of workpiece, drill a starting hole and follow instruction above.   

5. If there is a problem in the operation. Stop using the tool. Check for the following: Proper 

lubrication, thickness of the material and sharpness of the blades.   

.   

MAINTENANCE 


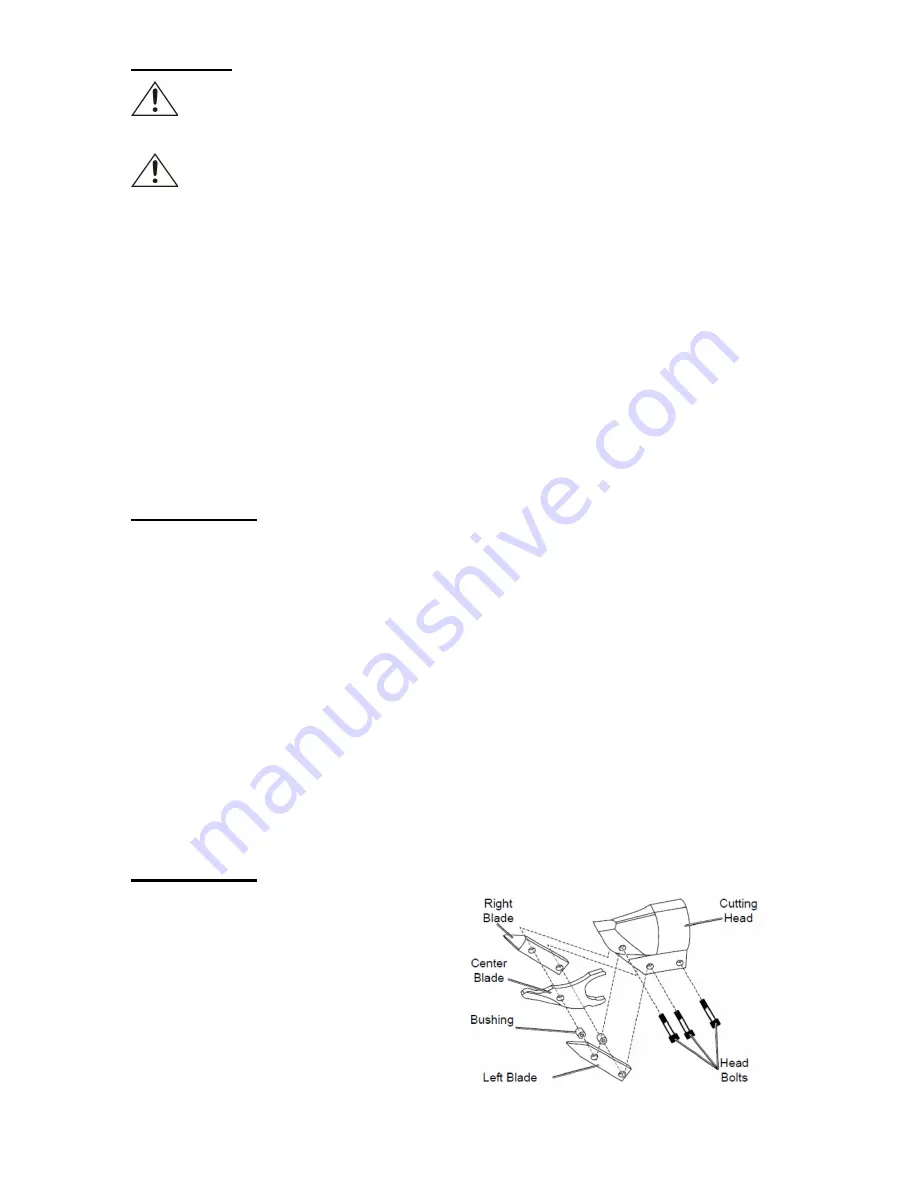
BLADE MAINTENANCE (FIG 3) 

1.  Unplug the tool.   

2.  Using the Hex Tool, remove the three 

Head Bolts.   

3.  Cutting Head Bolts Left Blade Right Blade 

Center Blade Bushing. The three Blades 
and the two Bushings will be loose.   


                                                    FIG 3


Содержание 46257

Страница 1: ...NER S MANUAL WARNING Read carefully and understand all ASSEMBLY AND OPERATION INSTRUCTIONS before operating Failure to follow the safety rules and other basic safety precautions may result in serious...

Страница 2: ...head lets you easily adjust your cutting speed and direction SPECIFICATIONS Item 46257 Rated Power 120V 60Hz 4 0A No Load Speed 0 2500 RPM Cutting Capacity 14 Gauge Sheet Metal and 18 Gauge stainless...

Страница 3: ...Stay alert watch what you are doing and use common sense when operating a power tool Do not use tool while tired or under the influence of drugs alcohol or medication A moment of inattention while ope...

Страница 4: ...ssories Using accessories and attachments not recommended by the manufacturer or intended for use on this type tool may cause damage to the tool or result in personal injury to the user Consult the op...

Страница 5: ...hen using more than one extension cord to make up the total length be sure each cord contains at least the minimum wire size required If you are using one extension cord for more than one tool add the...

Страница 6: ...rsened from use Pregnant women or people who have impaired blood circulation to the hand past hand injuries nervous system disorders diabetes or Raynaud s Disease should not use this tool If you feel...

Страница 7: ...perator s Manual 1 ASSEMBLY AND ADJUSTMENTS WARNING Always be sure that the tool is switched off and unplugged before adjusting installing accessories or checking a function of the tool SWIVELING CUTT...

Страница 8: ...ts turn off the tool and disconnect its power supply after use Clean then store the tool indoors out of children s reach APPLICATIONS NOTE Always check that the power supply corresponds to the voltage...

Страница 9: ...aning plastic parts Most plastics are susceptible to damage from various types of commercial solvents and may be damaged by their use Use clean cloths to remove dirt dust oil grease etc WARNING Do not...

Страница 10: ...Page of 12 10 DIAGRAM AND PARTS LIST...

Страница 11: ...1 27 Left Fixed Blade 1 9 Front Winding 1 28 Socket Head Cap Screw 1 10 Housing Front Piece 1 29 Power Switch 1 11 Shear Head Seal 1 30 Power Cord 1 12 Cutting Head Rear Bushing 1 31 Cord Retainer 1 1...

Страница 12: ...ome dust created by power sanding sawing grinding drilling and other construction activities contains chemicals known to the State of California to cause cancer birth defects or other reproductive har...

Отзывы: