page
4
Z-
39
6
EHT
www.ironlogic.
me
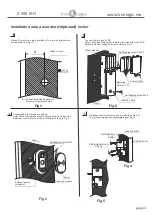
Installation onto a
metal
locker
www.ironlogic.ru
2
1
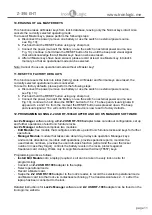
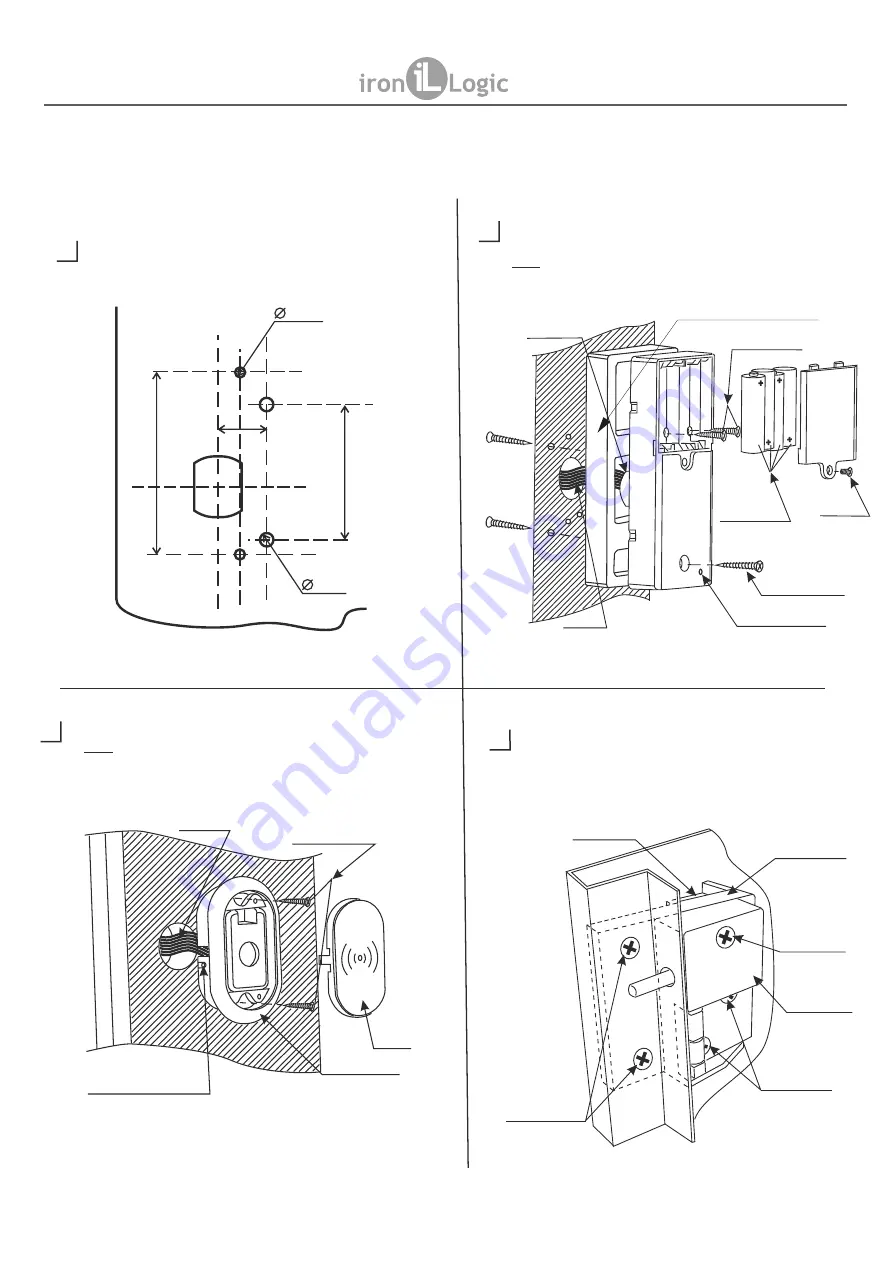
Make hole
s
in the locker's door. To mark the hole position use
template from Fig. 1
4
.
Mount the NAK-1 spacer from the inside of the locker`s door.
Connect cable to lock's PCB.
Note: Check that cable socket is firmly connected with lock's PCB
socket. Install the locking module according to Fig.
7
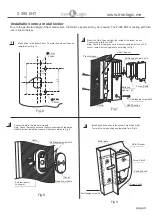
Connect cable to
the reader`s module
.
Note: Check that cable socket is firmly connected with
readers`s
module socket
. Install the
reader`s
module according to Fig. 8.
Fig.
8
External power
connector
Self-tapping screw
3х12
Reader`s module
Cover
Cable
3
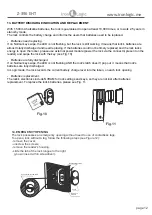
Install push bolt unit onto the locker`s wall (See Fig.9)
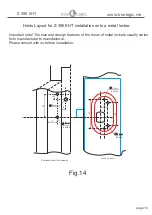
To mark the hole position use template from Fig.14
3
4
14
51
40
4 mm
4 mm
4 mm
4 mm
4 mm
2
holes
.
3
mm
2
holes
Fig.6
Fig
.
7
Cable
Self-tapping screw
3.5
х
15
Batteries
size
АА 1,5
V
Screw
2.5х4
RESET
button
Self-tapping screw
4
х
35
Plastic
washer
NAK-1 Spacer
Fig
.
9
Metal plate
Push bolt unit
NAK-1 Spacer
Screw
3,5х
3
0
Self-tapping screw
3,5х
15
Screw
3,5х20
Due to the particular design of the metal lockers, the NAK-1 spacers kit may be required. The Z-396 EHT mounting with their
use is shown below.


