background image

2.


Ensure proper contact between the battery and robot and then gently wipe the battery 
contacts on both the battery and robot with a clean, dry cloth: 


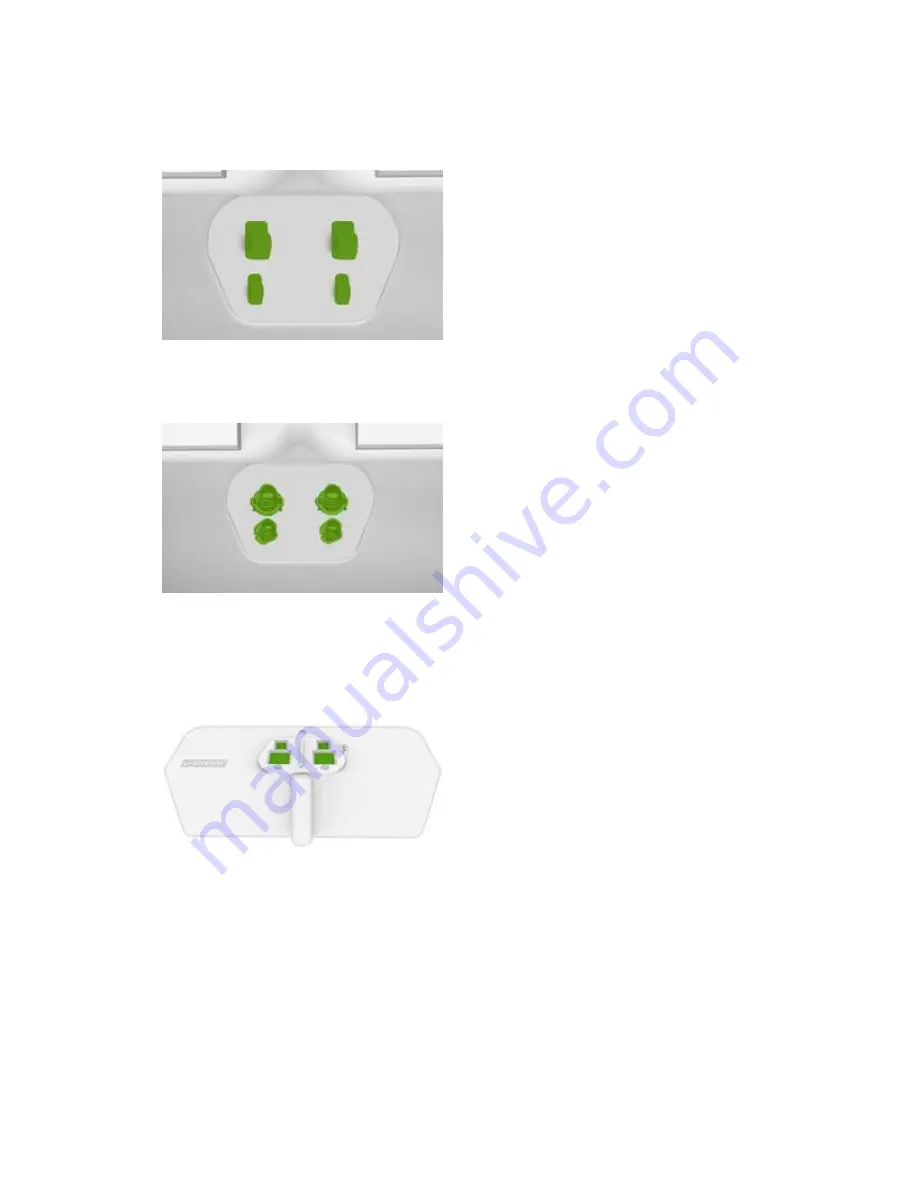
For robots with tabs in the battery well, use the back of a pen to gently bend the 2 small 
battery contacts upward. 


For robots with a coil spring in the battery well, simply remove the battery and with 
slight pressure re-install the battery to ensure that the battery is making contact to the 
charging contacts on the robot. 


Contacts on the battery. 

3.


Gently wipe the battery contacts with a clean dry cloth (battery colour may vary). 

Содержание ROOMBA 900 SERIES

Страница 1: ...cleaning cycle it will not play a tone as it docks and its CLEAN button will pulse with the battery indicator The iRobot HOME App will also display the robot s current status If desired you can also send Roomba to its Home Base manually by pressing Dock on Roomba or by pressing CLEAN on the main screen of the iRobot HOME App and then ending the job Note If you pick up Roomba and manually move it t...

Страница 2: ...of power any time it is on the Home Base to ensure it is ready for its next cleaning job as well as to maintain Wi Fi connectivity It is possible to put Roomba in a further reduced power state when not in use For instructions and more details on this Reduced Power Standby Mode refer to the iRobot HOME App and navigate to More Settings Reduced Power Standby Mode The Wi Fi Setup Process for a Wi Fi ...

Страница 3: ...remove the yellow battery pull tab and the yellow bin insert 4 Place Roomba on the Home Base and ensure it is powered on Connecting Roomba to the iRobot HOME App Step 1 Complete Setup Checklist Confirm you have completed the following ...

Страница 4: ...r Wi Fi The iRobot HOME App will display the name of the Wi Fi network that the mobile device is currently connected to Confirm this is the network you would like to use iOS To set up Roomba on a different network with an iOS device select the Wi Fi network in the iRobot HOME App and change the network in the settings of the mobile device Android To set up Roomba on a different network with an And...

Страница 5: ...ice to complete this process Step 4 Activate Roomba Roomba 900 Series Roomba i Series and Roomba e Series Roomba 600 and 800 This step will allow Roomba to generate its own Wi Fi network To activate Roomba make sure Roomba is on the Home Base Press and hold Home and SPOT Clean simultaneously for 2 seconds Roomba will generate a tone and flash a green Wi Fi icon iSeries Roomba models will indicate ...

Страница 6: ...tooth is activated on your mobile device Android Roomba will automatically begin network setup and connect to your mobile device once you have activated Roomba iSeries This step is automatically performed if Bluetooth is activated on your mobile device Roomba 900 series stops running with no error indicators If Roomba stops with no lights or error message check the battery 1 Remove the 2 screws on...

Страница 7: ...ll use the back of a pen to gently bend the 2 small battery contacts upward For robots with a coil spring in the battery well simply remove the battery and with slight pressure re install the battery to ensure that the battery is making contact to the charging contacts on the robot Contacts on the battery 3 Gently wipe the battery contacts with a clean dry cloth battery colour may vary ...

Страница 8: ...Battery contacts Battery contacts in the battery well ...

Отзывы: