b. REMOVAL –
With the sunshield set screw loosened, gently pull
the sunshield toward you until it is free of the sunshield bracket.
c. OPTIONAL –
The bracket that holds the sunshield can also be
removed if desired. To remove the sunshield bracket, loosen and
remove the two (2) 3mm countersunk screws using the supplied
3mm Allen wrench. The bracket can then be removed. Though it is
not required for the integrity of the Sentinel unit, you may wish to
re-insert and tighten the two (2) 3mm countersunk screws back
into the Sentinel casing.
12. Camera/Lens Adjustment
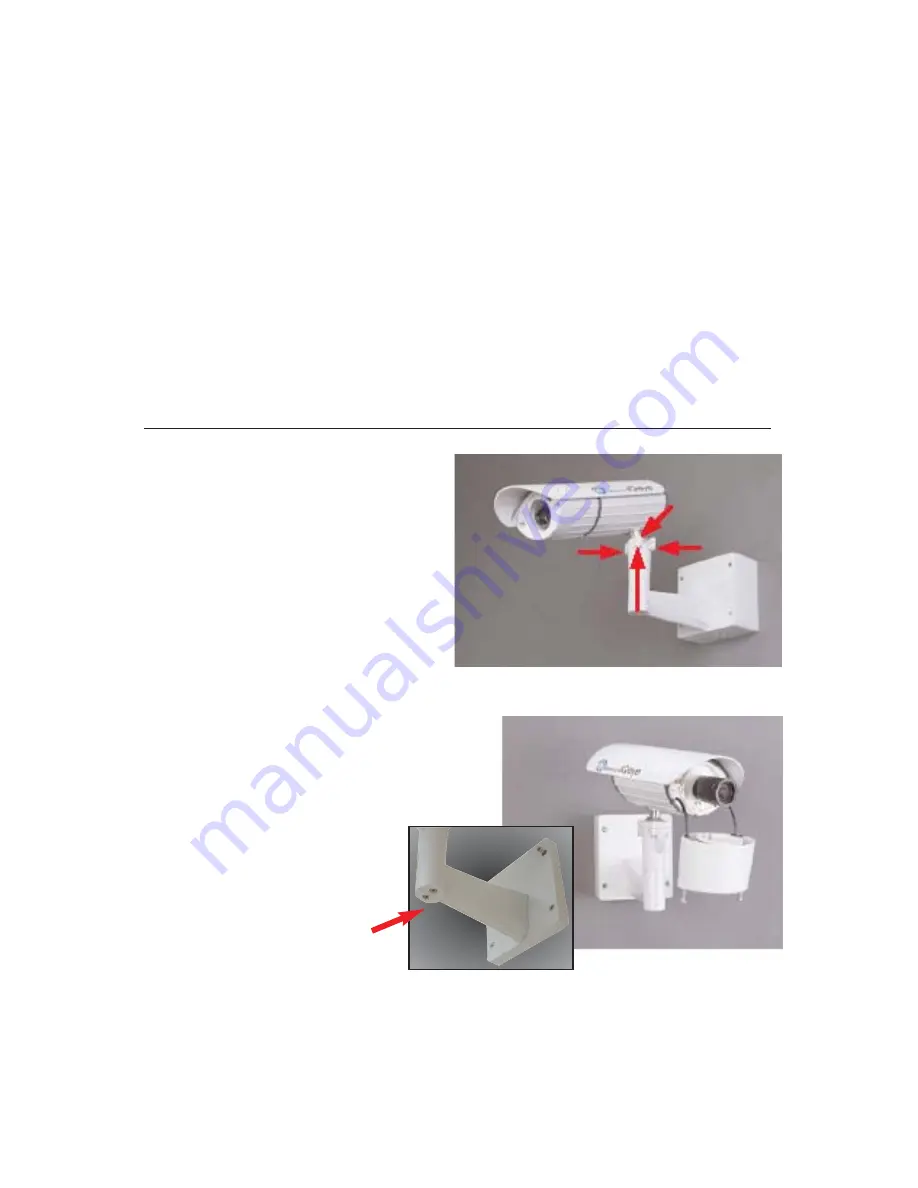
1.
With the supplied 3mm Allen
wrench, loosen any two adjacent
screws of the four available ball pivot
screws. This should loosen the ball
enough to allow you to position
the camera to the desired orienta-
tion. Tighten the screws to secure
the camera module in place.
2.
For the ceiling and parapet
mount, it may be necessary to rotate
the lower portion of the ball bracket.
This can be achieved by loosening
the two 3mm Allen screws on
the bottom of the arm elbow.
(NOTE: DO NOT REMOVE
the screws in the elbow of
the mount as they can be
very difficult to re-insert.)
Once the lower arm is rotated to the necessary position, retighten the elbow
3mm screws.
Figure 13
Figure 12
12


