


IQCCTV
IQ960DVR User Manual
23
1
、
Click [APPLY] button on the bottom of the sub-menu windows to accept the changes and
click the [OK] button when prompted to save.
2
、
If you want to cancel the modification, click [Exit] button to exit the menu.
3
、
When clicking [DEFAULT] button, all the system default values will be reset to default
value.
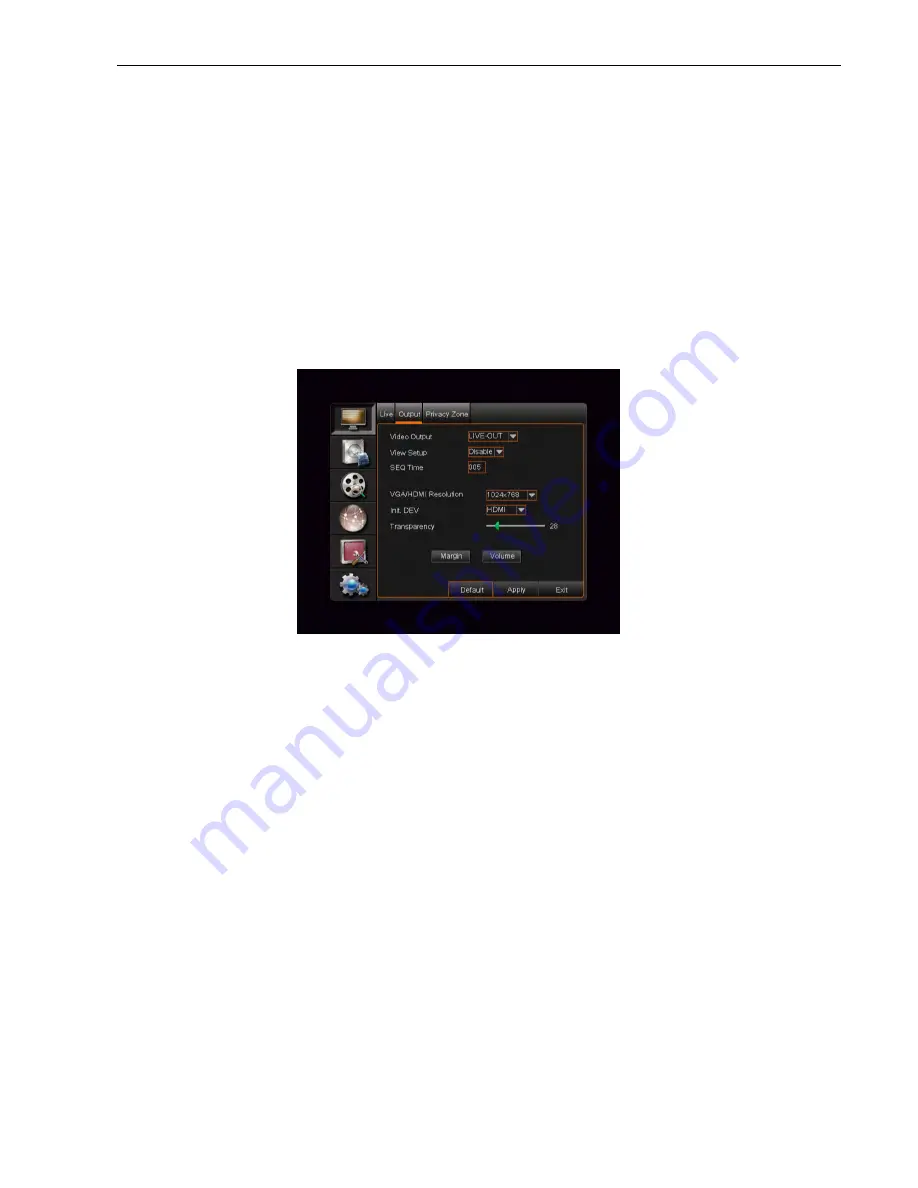
5.3.1.2 Output mode
To enter the output mode menu, go to [Main menu
à
Display
à
Output] to enter into the output set
interface shown as shown below.
Ø
Video output:
Supports CVBS output Live and Spot mode simultaneously. Live mode is the
main output, and Spot is the auxiliary output.
Ø
CH Sequence:
This option is defaulted to “Off” and the sequence time is 5 seconds. The
user can activate the option as desired.
Ø
Rotate time:
Allows the user to set the sequence time. Minimum time can be set to 3
seconds.
Ø
VGA/HDMI Resolution:
Select VGA or HDMI output, including 800x600, 1024x768,
1280x1024, 1440x900 and 1920 x 1080.
Ø
Display Mode:
Live output: display window will include Single, Quad, 9-split and 16-split
mode;
Spot output: Display window will include Single, Quad and 9-split mode.
Ø
Transparency:
Adjust the menu’s transparency. Range is 1~128.
Ø
Margin:
Adjust the whole screen’s margin. Details operations please refer to the Picture 5-4.
Ø
Volume:
Adjust the DVR volume.


