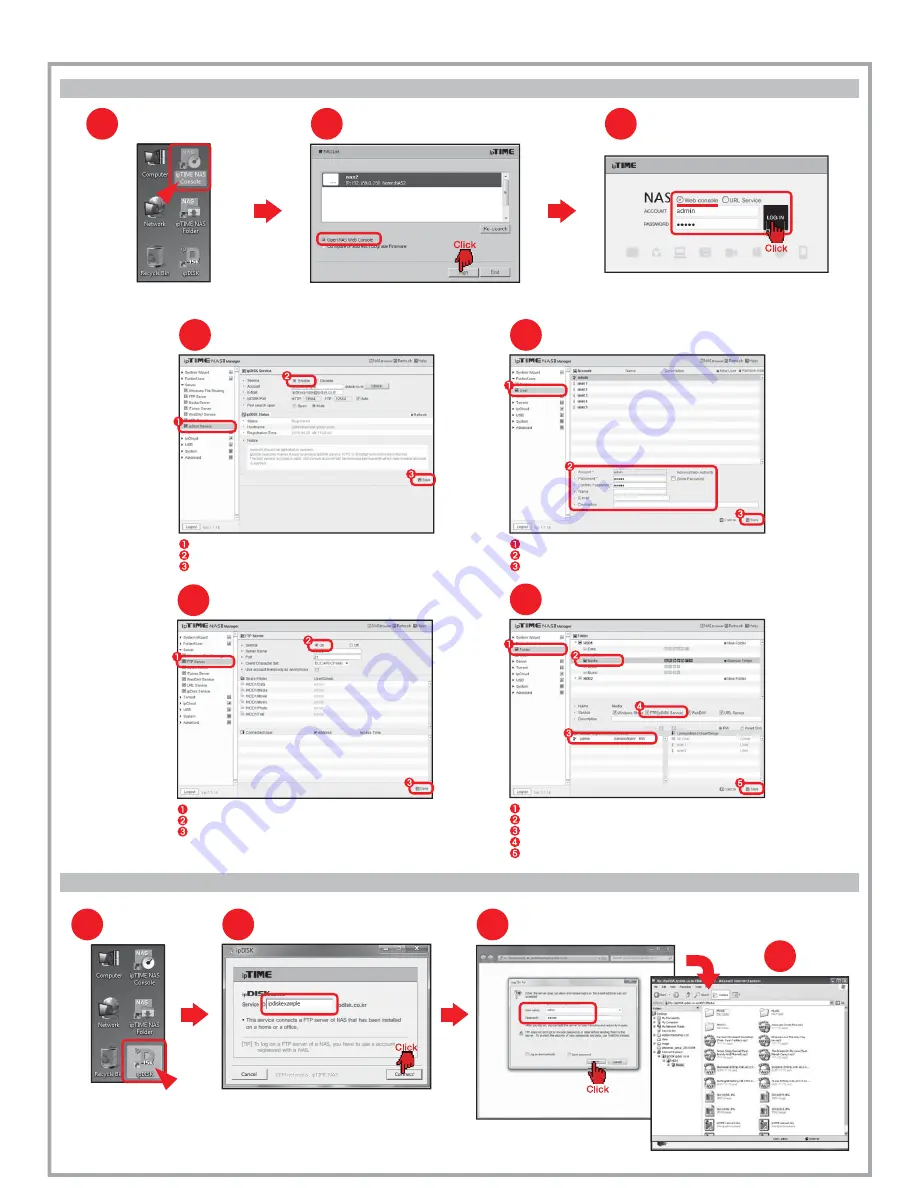
Login
3
Enter the user name and the password
and click [Log on].
ipDISK service
Three.
A.
Before using ipDISK service...
To use ipDISK service, following setup need to be done through the web console.
B.
Using ipDISK Service
Running ipTIME NAS Console
Double click the [ipTIME NAS Console] icon
in the desktop window.
1
Select the NAS from the searched list.
Choose [Open NAS Web Console] and click the [Run].
Opening NAS web console
2
Login
3
Choose Web console and enter the user account and password.
Click the [LOG IN] to start the web console.
Double Click [ipDISK] icon
in the desktop.
Running ipDISK
1
Enter the service account and click [Connect].
Entering the service
2
※ In the case when the executing files cause problems, copy the file to the local PC and use it.
Using NAS
4
Checking ipDISK service
4
Select the menu [Server] > [ipDISK Service] from the left menu browser.
Make the service as on.
Click [Save] to finish setup.
Checking FTP Server for ipDISK service
6
Select the menu [Server] > [FTP Server] from the left menu browser.
Make the service as on.
Click [Save] to finish setup.
7
Checking the Folder for FTP
Select the menu [Folder/User] > [Folder] from the left menu browser.
Select the folder to be used for ipDISK(FTP) service.
Check the user for this folder.
Make sure the FTP(ipDISK Service) is checked for the selected folder.
Click [Save] to finish setup.
5
Checking Accounts
Select the menu [Folder/User] > [User] from the left menu browser.
Check the user accounts.
Click [Save] to finish setup.
※Refer [User’
s Guide for Web console] for more information about the web console.


