


5. Initialization
1. Initial Ethernet setup IPEDIT
Click “ipEdit.exe” . Please affirm the power of
9212A-SL had been turn on and the Ethernet connection of RJ45 is correct.
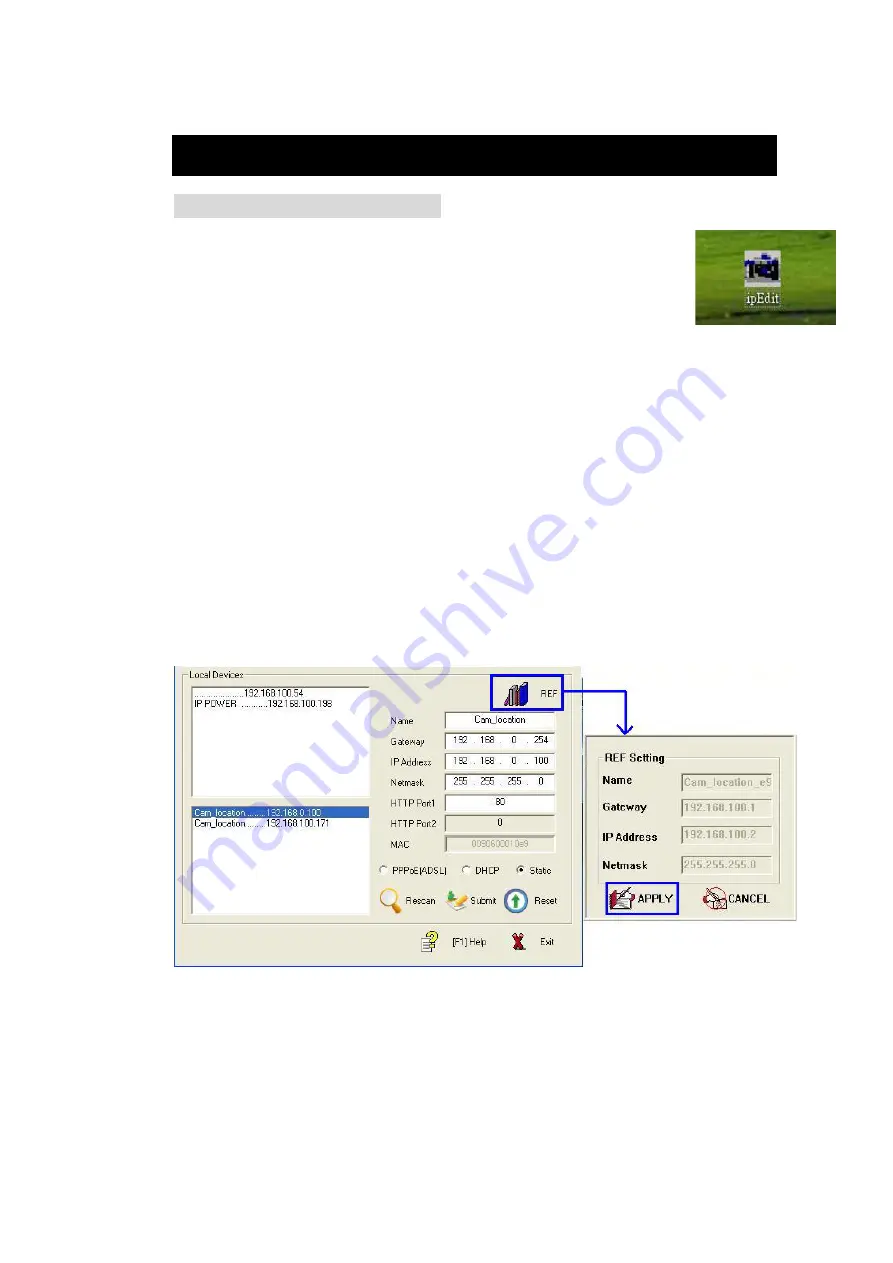
A. LOCAL Devices area:
IPEDIT will searching all IP Products 9XXX series in the same local Ethernet, the default
name of 9212Delux is IP Power, and display the information as select
1. Double click the IP address, it will be covered by dark stripe, its name, and IP will be displayed
below. The IP address of 9212Delux should in the same subnet with your PC, subnet mask,
and default gateway mast same as 9212Delux also.
For example, the IP address of 9212Delux is 192.168.10.9, so your computer needs to add an IP
address looks like 192.168.10.XXX to get connection to 9212Delux.
2. User can change its name (please use numbers or letter) or IP (please set in the same subnet
as your PC) in the text windows. Then click
Submit
after setting finish. After about 20 seconds,
the new setting will work. Click
Update,
the new setting of equipment will display in text window.
3. You can also click “REF” in IPEDIT to check your PC to get the subnet information. And
directly press “APPLY to “ amend the IP setting of selected 9212A-SL
NOTICE:
1. Make sure the RJ45 network wire have been connected correctly and the 9212 are power on.
2. It can obtain the virtual IP address after you run the ipeditv3.exe only if the Ethernet support
DHCP. Click the IP address to enter the web page. If the Ethernet not support DHCP, IP92XX will
change it’s IP address to fixed IP address. Please follow the steps below to change the subnet of
your PC:
- 14 -