background image


  10 


Connecting to the ioSafe NAS 

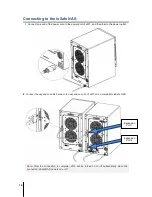
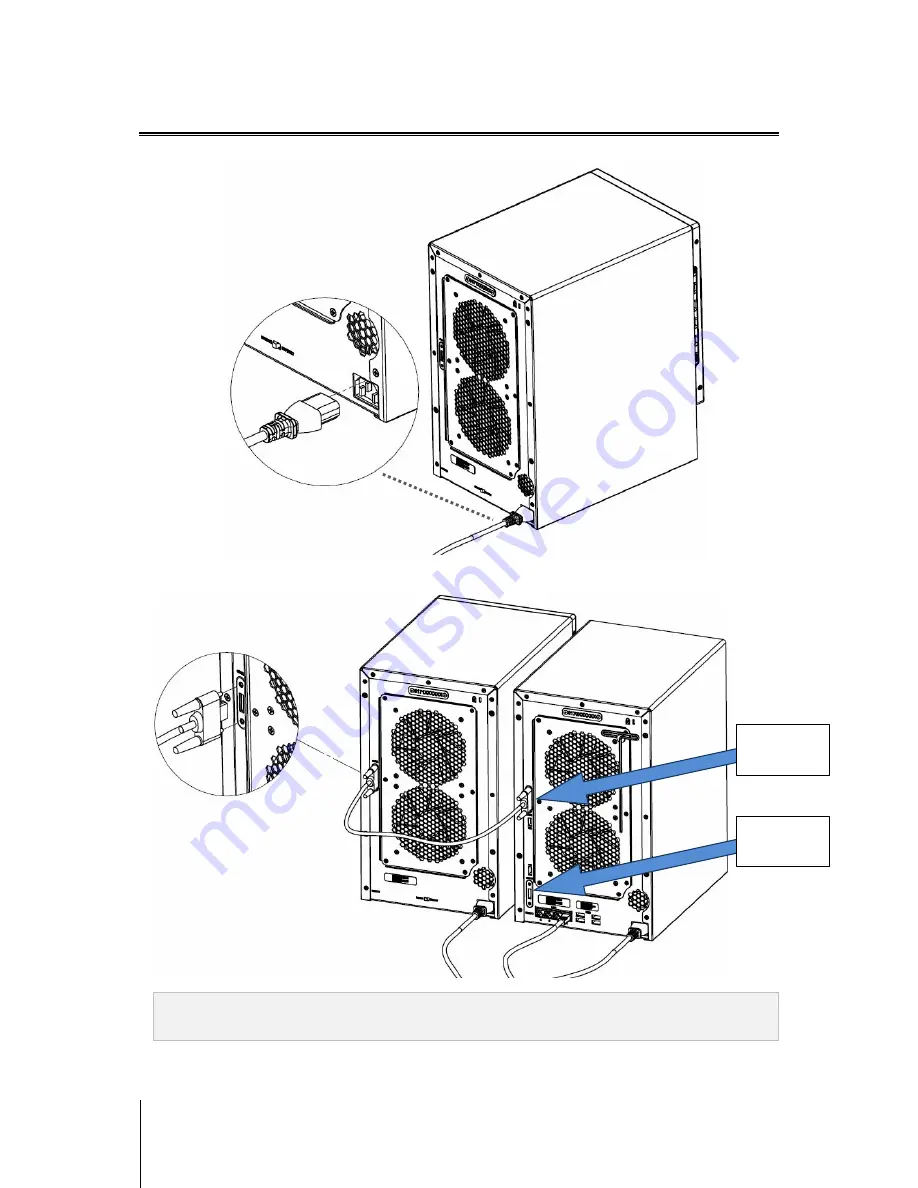
Connect one end of the power cord to the power port of x513, and the other to the power outlet. 


Connect the expansion cable between the expansion ports of x513 and a compatible ioSafe NAS.


Note:


After the connection is complete, x513 will be turned on or off automatically when the 

connected ioSafe NAS powers on or off.


Expansion 

Port 1 

Expansion 

Port 2 

Содержание x513

Страница 1: ...ioSafe x513 Hardware Guide 910 11637 00 Rev02 HARDWARE GUIDE X513 ENG...

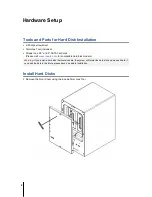
Страница 2: ...2 Hardware Setup Tools and Parts for Hard Disk Installation 6 Install Hard Disks 6 Connecting to the ioSafe NAS 10 Replace System Fan Assembly 11 How to configure in Disk Station Manager 12 Chapter 3...

Страница 3: ...safety instructions carefully before use to prevent your ioSafe from any damages Note ioSafe uses an unmodified version of Synology s DSM The software interface will sometimes refer to the Synology P...

Страница 4: ...lease refer to the Hardware Specifications table on Page 2 2 LED Indicators Front Panel Displays the status of internal disks and the system For more information see LED Indication Table in Appendix B...

Страница 5: ...e Make sure that the supplied AC voltage is correct and stable To remove all electrical current from the device ensure that all power cords are disconnected from the power source Risk of explosion if...

Страница 6: ...5 SATA hard disk Please visit www iosafe com for compatible hard disk models Warning If you install a hard disk that contains data the system will format the hard disk and erase all data If you need...

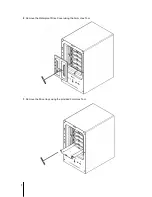
Страница 7: ...7 2 Remove the Waterproof Drive Cover using the 3mm Hex Tool 3 Remove the Drive trays using the provided 3mm Hex Tool...

Страница 8: ...If you want to set up a RAID set it is recommended that all installed hard disks are of the same size to make the best use of hard disk capacity 5 Insert the loaded hard drive tray into the empty hard...

Страница 9: ...HE SCREW IS SUFFICIENTLY TIGHT AND THE WATERPROOF GASKET IS PROPERLY COMPRESSED AVOID USING TOOLS OTHER THAN THE SUPPLIED HEX TOOL AS YOU COULD UNDER TIGHTEN OR BREAK THE SCREW 7 Install the Front Cov...

Страница 10: ...3 and the other to the power outlet 2 Connect the expansion cable between the expansion ports of x513 and a compatible ioSafe NAS Note After the connection is complete x513 will be turned on or off au...

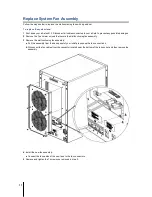
Страница 11: ...perimeter screws that secure the malfunctioning fan assembly 3 Remove the malfunctioning fan assembly a Pull the assembly from the back panel of your ioSafe to expose the fan connections b Disconnect...

Страница 12: ...on x513 only if you expand the internal volume of the master NAS with x513 They will not be stored on x513 if you create a new independent volume Hard drives previously used in an ioSafe NAS will not...

Страница 13: ...e with x513 select the volume you want to expand from the volume list click Manage and follow the Volume Manager Wizard to complete the expansion For detailed information about volume management pleas...

Страница 14: ...umber product type and date of purchase 2 If you cannot email call ioSafe Disaster Support Team at 1 888 984 6723 US Canada or 1 530 820 3090 International extension 430 3 Report disaster event and ob...

Страница 15: ...patible Drive Type 3 5 SATA III SATA II HDD 2 5 SATA III SATA II HDD 2 5 SATA III SATA II SSD Max Capacity 40TB 5x 8TB hard drives Hot Swappable HDD Yes Size HxWxD mm 375 x 222 x 318 Weight Kg 27 AC I...

Страница 16: ...al eSATA Green Static Connected to a NAS Off Disconnected from a NAS Hard Disk Status Green Static Disk ready and idle Blinking Disk is being accessed Orange Static Cannot Read Write Errors occur Off...

Отзывы: