


User Manual of Digital Video Recorder
33
3.2
Operations in Live View Mode
In live view mode, there are many functions provided. Some of the functions are listed below.
•
Single Screen
: showing only one screen on the monitor.
•
Multi-screen:
showing multiple screens on the monitor simultaneously.
•
Auto-switch:
the screen is auto switched to the next one. And you must set the dwell time for each screen
on the configuration menu before enabling the auto-switch.
Menu>Configuration>Live View>Dwell Time.
•
Start Recording:
start all-day normal recording or motion detection recording for all channels.
•
Add IP Camera:
automatically or manually add the online network camera(s).
•
Playback:
play back the recorded videos for current day.
•
Output Mode:
set the video output mode to Standard, Bright, Gentle or Vivid.
•
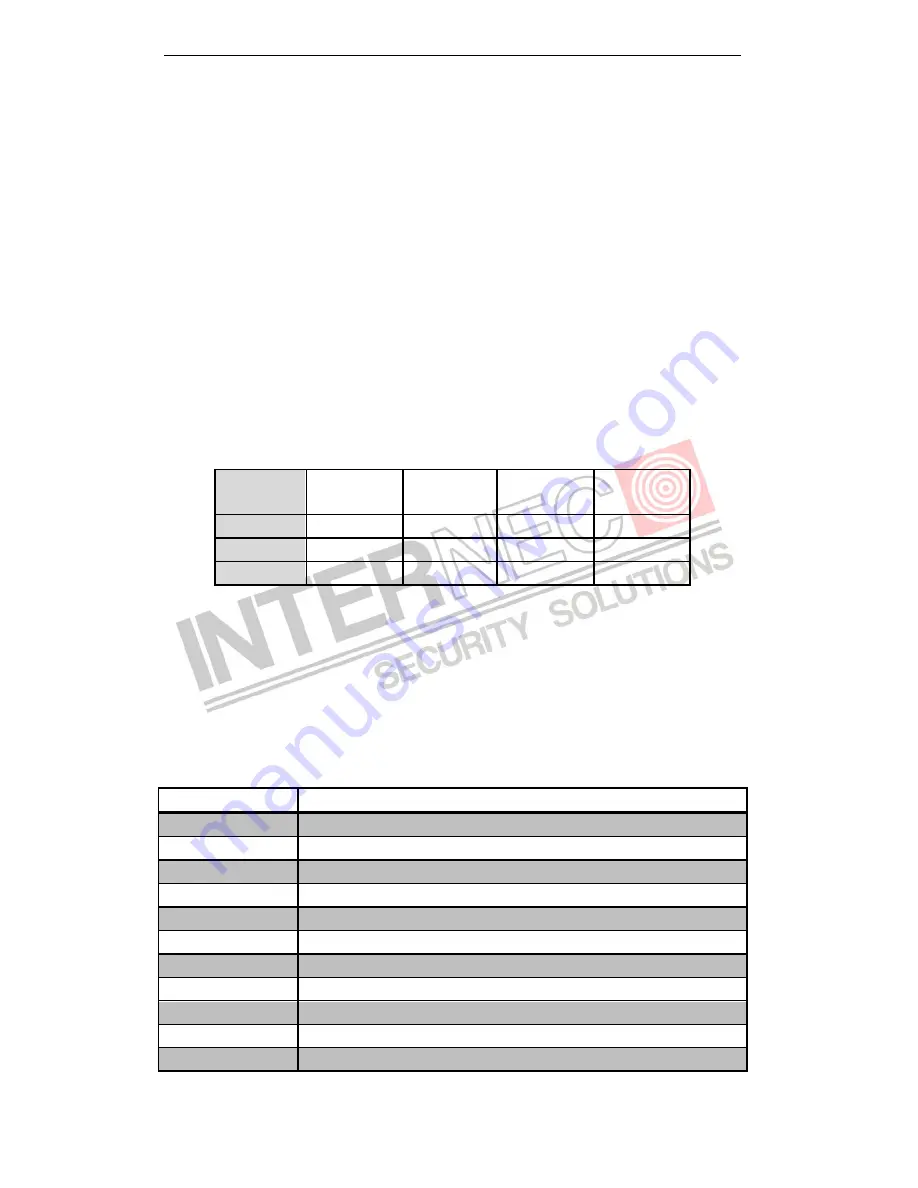
Aux Monitor:
the device checks the connection of the output interfaces to define the main and auxiliary
output interfaces. See the table below for the priority level of the main and aux outputs.
Table 3. 2
Priorities of Outputs
HDMI/VGA
CVBS
Main output
Auxiliary
output
1
√
√
HDMI/VGA
CVBS
2
√
×
HDMI/VGA
3
×
√
CVBS
√
means the interface is in use,
×
means the interface is out of use or the connection is invalid. And the
HDMI, VGA and CVBS can be used at the same time.
When the aux output is enabled, you can do some basic operation in the live view mode for the Aux output,
while no operation is allowed for the main output.
3.2.1
Using the Mouse in Live View
Table 3. 3
Mouse Operation in Live View
Name
Description
Menu
Enter the main menu of the system by right clicking the mouse.
Single Screen
Switch to the single full screen by choosing channel number from the dropdown list.
Multi-screen
Adjust the screen layout by choosing from the dropdown list.
Previous Screen
Switch to the previous screen.
Next Screen
Switch to the next screen.
Start/Stop Auto-switch
Enable/disable the auto-switch of the screens.
Start Recording
Start all-day continuous recording or motion detection recording for all cameras.
Add IP Camera
Automatically or manually add the online network camera(s).
Playback
Play back the video of the selected channel.
Output Mode
Set the video output mode to Standard, Bright, Gentle or Vivid.
Aux Monitor
Switch to the auxiliary output mode.
Содержание I7-H0704/08/16Vh
Страница 1: ...Digital Video Recorder User Manual...
Страница 12: ...User Manual of Digital Video Recorder 11 Chapter 1 Introduction...
Страница 21: ...User Manual of Digital Video Recorder 20 Chapter 2 Getting Started...
Страница 32: ...User Manual of Digital Video Recorder 31 Chapter 3 Live View...
Страница 41: ...User Manual of Digital Video Recorder 40 Chapter 4 PTZ Controls...
Страница 50: ...User Manual of Digital Video Recorder 49 Chapter 5 Recording Settings...
Страница 70: ...User Manual of Digital Video Recorder 69 Chapter 6 Playback...
Страница 88: ...User Manual of Digital Video Recorder 87 Chapter 7 Backup...
Страница 102: ...User Manual of Digital Video Recorder 101 Chapter 8 Alarm Settings...
Страница 105: ...User Manual of Digital Video Recorder 104 Figure 8 6 Copy Settings of Motion Detection...
Страница 108: ...User Manual of Digital Video Recorder 107 Figure 8 11 Copy Settings of Alarm Input...
Страница 117: ...User Manual of Digital Video Recorder 116 Chapter 9 Network Settings...
Страница 138: ...User Manual of Digital Video Recorder 137 Chapter 10 HDD Management...
Страница 153: ...User Manual of Digital Video Recorder 152 Chapter 11 Camera Settings...
Страница 159: ...User Manual of Digital Video Recorder 158 Chapter 12 Device Management and Maintenance...
Страница 170: ...User Manual of Digital Video Recorder 169 Chapter 13 Others...
Страница 181: ...User Manual of Digital Video Recorder 180 Chapter 14 Appendix...


