


TruVision Recorder Operator Guide
3 / 4
Description
Stop playback. Timeline jumps back to 00:00 time (midnight).
Play or pause recording.
Reverse playback by the configured skip time (default is 30
seconds)
Fast forward playback by the configured skip time (default is
30 seconds).
Decrease playback speed. Options available are: ½ speed,
¼ speed, 1/8 speed, single frame.
Increase playback speed. Options available are: 2X speed,
4X speed, 8X speed, 32X speed.
Previous file/day/event recording.
Play next file/day/event recording in the search result.
4.
Playback progress bar
: This bar displays how far playback of the
recording has progressed. It also indicates the type of recording.
5.
Recording type
: Description of the color coding of recording types
that appear in the playback progress bar.
Green indicates continuous recording. Red indicates alarm recording.
Yellow indicates motion recording. Pale green indicates manual
recording. Pale blue indicates TextIn recording (depends on recorder
model).
6.
Call up the Search window to search for recorded video files.
7.
Hide the playback control toolbar.
8.
For 24-hour/All-day playback mode, quit playback and return
to live view.
For playback from search mode, quit playback and return to
the search screen.
Instant playback
Use the quick access toolbar to quickly replay recorded video from the last five
minutes (or preprogrammed period depending on the recorder). Only one camera
at a time can be selected. Depending on the recorder, the instant playback period
can be changed under Display Settings > Monitor > More Settings.
To instantly replay recorded video:
1.
In live view, left-click the mouse on the desired camera image. The quick
access toolbar appears. Click
Instant Playback
.
2.
Select the desired camera from the drop-down list and click
OK
.
Playback starts immediately. The Instant Playback scroll bar appears under
the selected camera.
3. Click
Pause
on the toolbar to pause playback.
Click
Play
to restart playback.
Click
Stop
to stop playback and return to live view.
24-hour playback
Use this option to play back recorded video from the last day. Playback starts at
midnight and runs for the 24-hour period. 24-hour playback is shown in full screen
view.
Note
: This option is called “All-day Playback” on some recorders.
To play back video from the 24 hours:
1.
In live view mode right-click the mouse on the desired camera image. Click
24-hour Playback
in the mouse menu.
The playback window appears. By default, the camera is in full-screen
mode.
2.
To select more than one camera for multiview playback or to select
playback from a different day, move the mouse to the right edge of the
screen. The camera/calendar panel appears. Check the desired cameras
and/or another day.
Playback starts immediately.
Note
: A message appears if there are no recordings found during this
period.
3.
Use the playback control toolbar to manually control playback.
4. Click
Exit
to return to live view.
– Or –
Right-click the mouse and click
Exit
in the mouse menu to return to the
previous screen.
Searching recorded video
1.
In live view, right-click the mouse and select
Advanced Search
from the
menu.
2. In
the
Search
menu, select one of the following search types:
Normal:
Search all recorded video by selected cameras,
recording type, type of file protection (locked or
unlocked), and time period.
Event:
Search only event recorded video. Files can be
searched by alarm inputs or motion detection.
Note
: Only motion detection that has been recorded
as events will be listed in this search. Motion that has
been recorded as a non-event can be searched
under the Normal menu.
Bookmark:
Search selected cameras only for recorded video
with bookmarks.
Note
: In some recorders this functions is called “Disk
Analysis”.
Snapshot:
Search selected cameras only for recorded video
with snapshots.
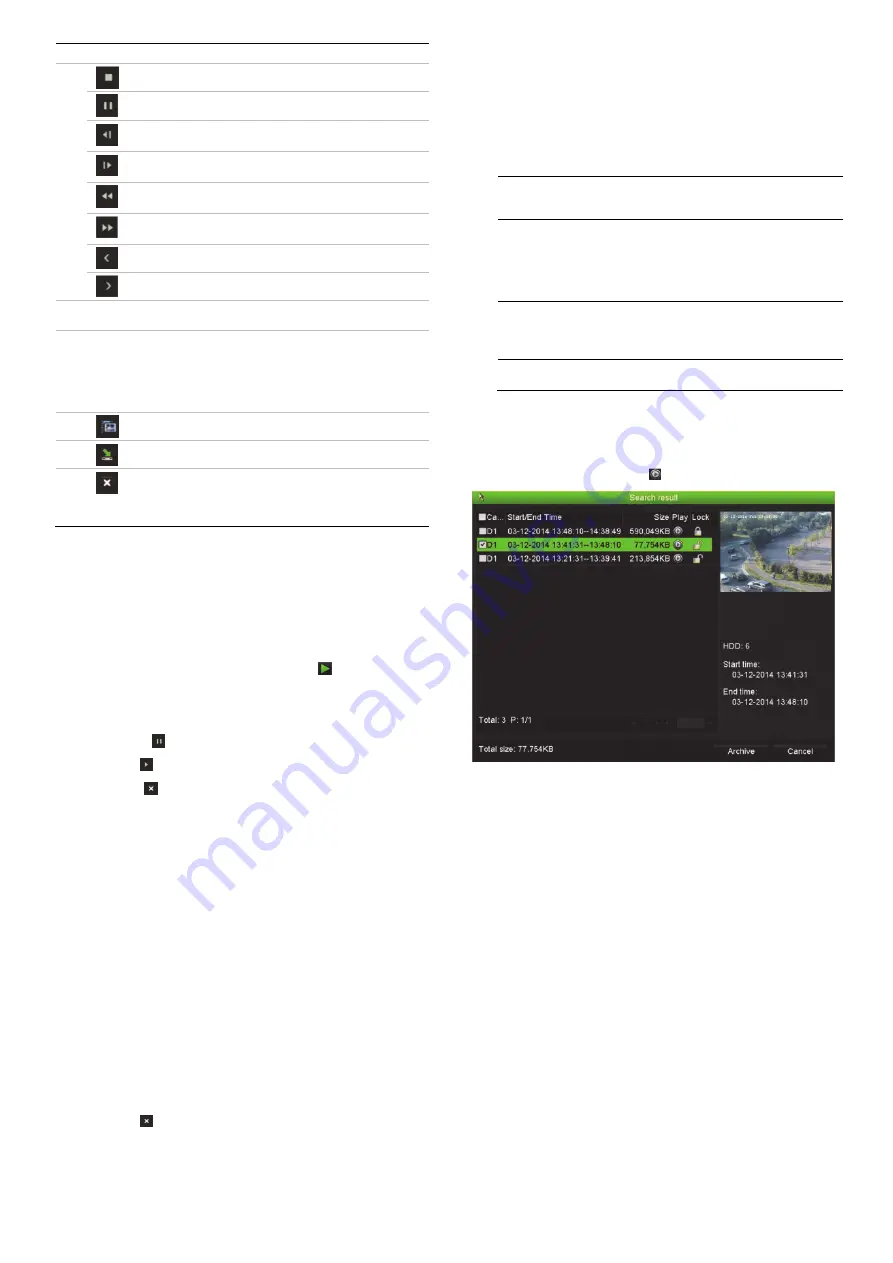
Search results
A search will usually produce a list of files. The files are listed by camera, and
then for each camera by date and time. The most recent file is listed first. Only
one file can be played at a time. Click
of a selected file to play it back.
Archiving recorded files
There are two ways to archive files:
Quick Archive
: Press the Archive button on the front panel to archive
recorded files quickly. The recorder downloads all the recorded files on the
unit to fill the available memory space on the media. This option is not
available via the mouse.
Advanced Search:
You can specify archiving settings such as a specific
time and date period, recording type, start and end times, as well as
cameras.
Quick Archive
To archive recorded video using Quick Archive:
1.
Insert the backup device into the recorder.
If using a USB memory drive, insert the device into the USB port on the
front panel.
Depending on the recorder model, if using a digital video disk (DVD) or
eSATA drive, insert the disc into the DVD drive. If more than one media
type is found in the recorder, the USB device takes precedence over the
others.
2. Press
Archive
on the front panel or remote control to open the quick
archive screen.
3. Click
Start
or press the Archive button on the front panel. The unit starts to
download all the files listed.


