D-0133833-A – 2022/09
AD629 - Instructions for Use - EN
Page 33
3.7 Printing
The data from the AD629 can be printed in two ways:
•
Direct printout:
Allows results to be printed directly after testing (via a supported USB printer
The printout logo can be configured via the audiometer itself (see below) or via the Diagnostic
Suite (in the General Setup a logo image can be downloaded to the AD629 from the PC).
•
PC
: Measurements can be transferred to the Diagnostic Suite PC program (see separate
operational manual) and printed via this. This allows printouts to be fully customized via the Print
Wizard. It also allows for combined printouts – e.g. together with the AT235 or Titan Middle Ear
Analysers.
3.8 AD629 stand alone unit, print logo update
1. Open up the “Paint” program.
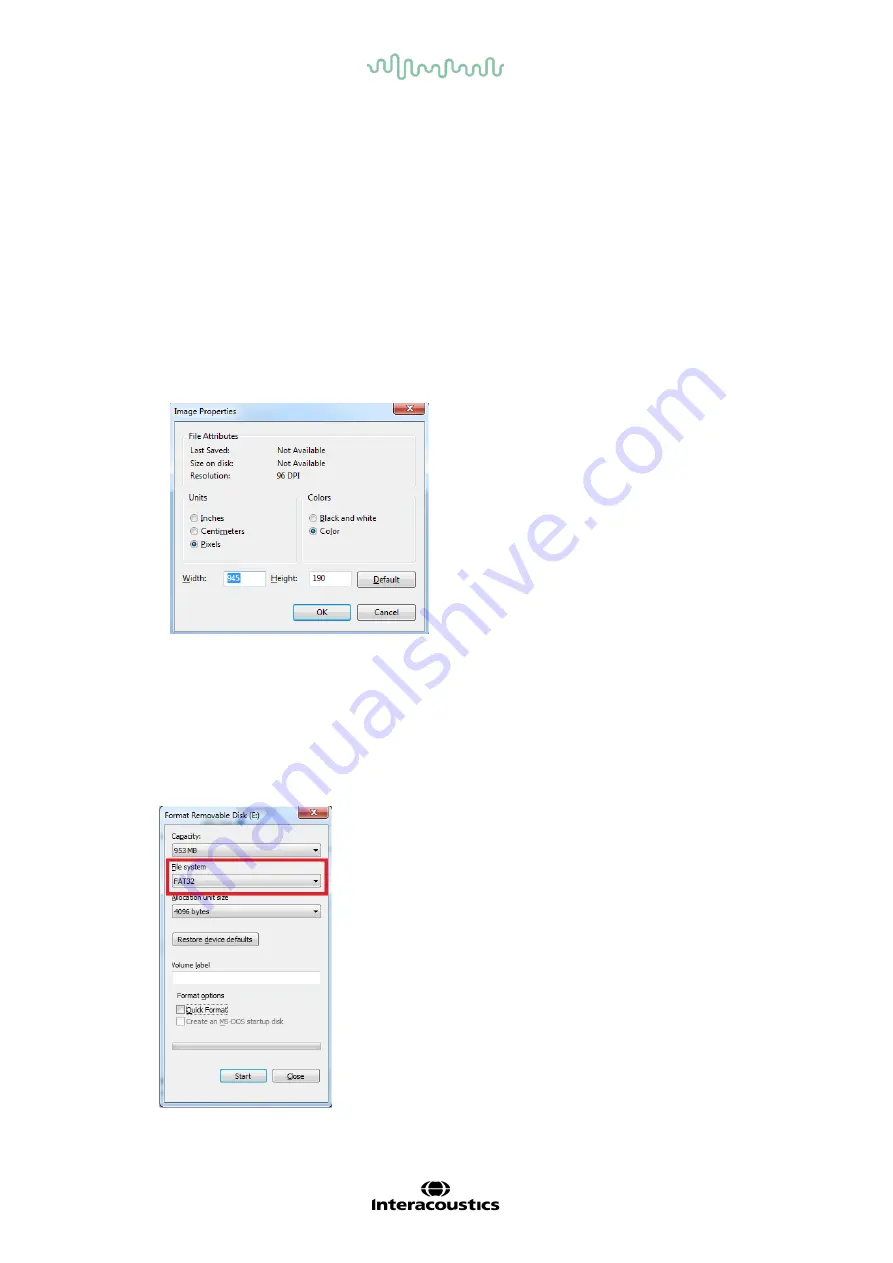
2. Open up “Image Properties”, by pushing the Ctrl + E keys.
3. Set the “Width” to 945 and the “Height” to 190 as shown. Click on “OK”.
4. Edit the Image and the Company data to fit inside the set area.
5. Save the created file as “PrintLogo.bmp”.
6. Zip the “PrintLogo.bmp” file to the following name “update_user.logo.bin”.
The “update_user.logo.bin” file is now ready to be used.
7. Find a USB thumb drive with at least 32MB in total size and insert it into your PC.
8. Go to My Computer and right click on the USB thumb drive and select ‘Format’ **Note-this
will erase everything on your USB thumb drive*.
9. Ensure that ‘FAT32 is selected as your File System- Leave other settings as listed.


