


name
is the administrator name of the print server. If you change the name, you
need to log in to the print server from the administrator utility or Web management
with the new name. The default user name is “admin.”
Password:
enter the password you want to change for the print server. The
password can be up to an 8-digit alphanumeric format. The default password is
“1234.”
re-type Password:
enter the password you want to change for the print server
again.
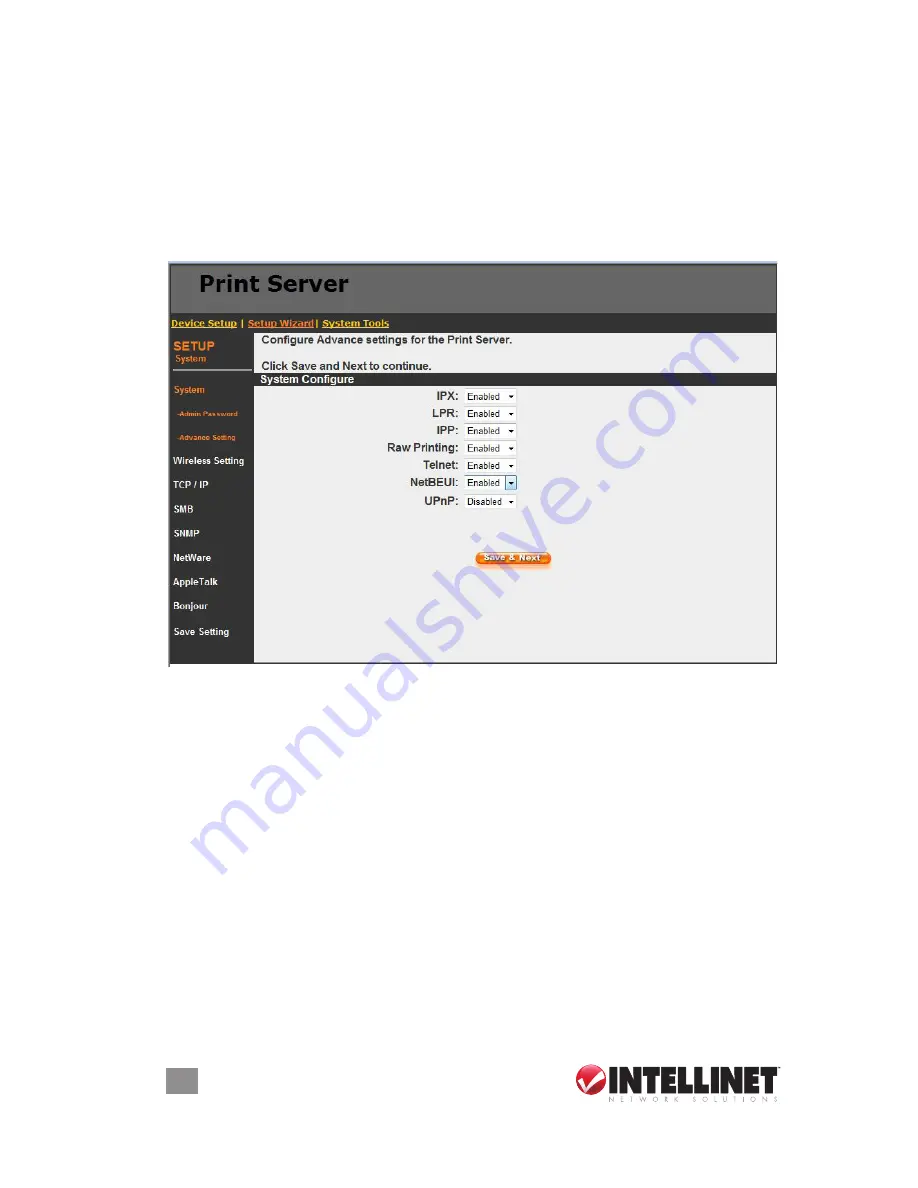
8.4.1.2 advanced settings
This screen allows you to enable/disable the printing protocol.
To enable the function, select “enable”; to disable the function, select “disable.”
8.4.2 wireless
If you want to use the print server through a wireless lAN, set up the print server
through the Ethernet first and make sure your wireless LAN setting is correct. After
setting the wireless lAN, unplug the ethernet cable and restart the print server.
You can then start to use the print server through the wireless lAN. If the wireless
configuration doesn’t work, plug the Ethernet cable in again, restart the print server
and configure the print server through the Ethernet until the wireless LAN settings
are correct.
You can set parameters that are used for the wireless stations — including Function
and eSSId — to connect to this print server. You can manually set the parameters
of a wireless lAN on this screen or use the Site Survey function to automatically
search for an available access point and associate with it.
mode
is the operation mode of wireless station. If you’re using an access point in
the wireless lAN infrastructure, the wireless mode is Infrastructure.
essId
is the unique name identifying a wireless lAN. The Id prevents the
unintentional merging of two co-located WlANs. Make sure that the eSSId of all
52
WEB MANAGEMENT
Содержание 509060
Страница 1: ...1 Port USB Wireless Print Server user manual Model 509060 INT 509060 UM 0508 01...
Страница 2: ......
Страница 71: ...3 Click on the Advanced tab and click Settings 4 Click on the Exceptions tab and click Add Program 71 XP SP2...
Страница 75: ......


