46
Intel® Server System SR2500AL User’s Guide
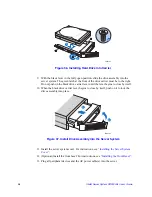
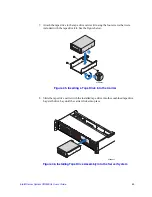
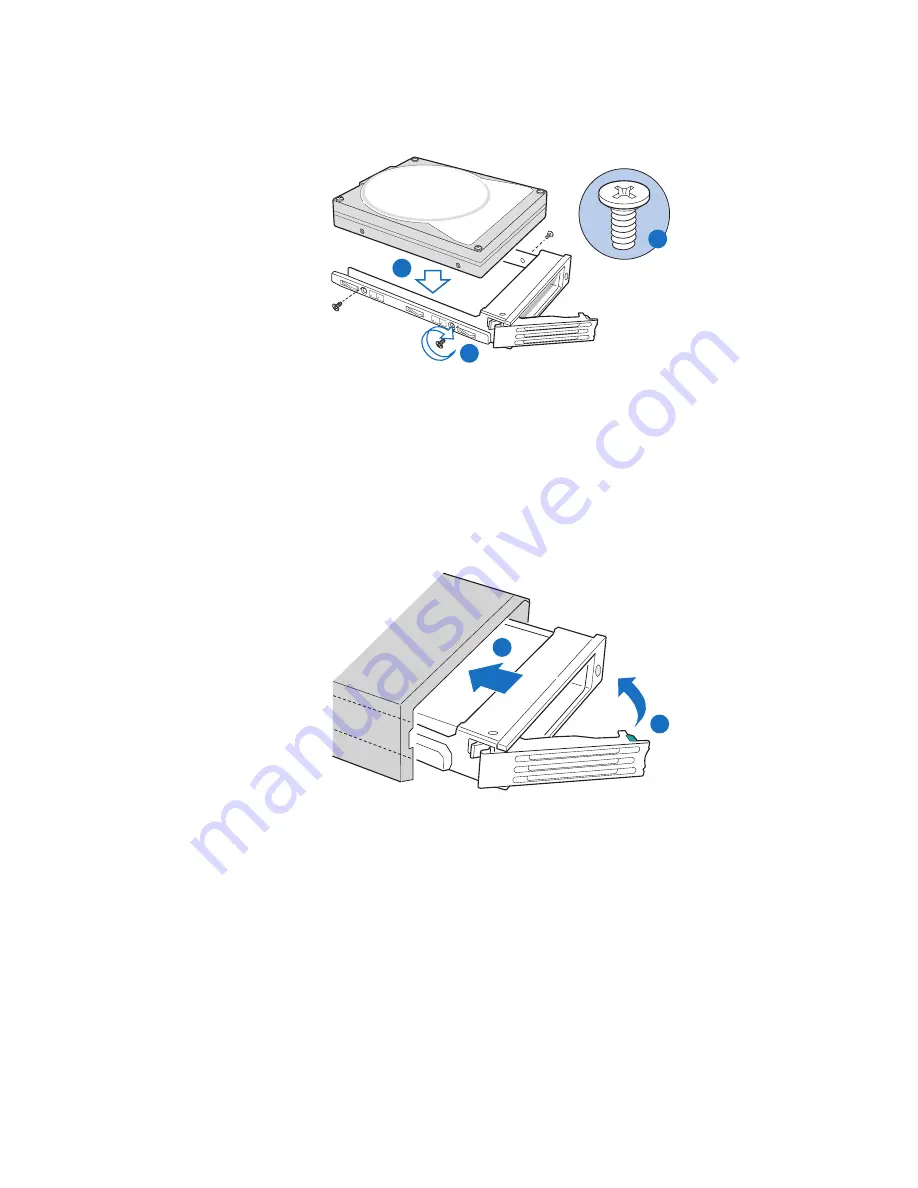
Figure 36. Installing Hard Drive into Carrier
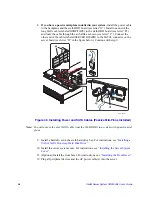
9. With the black lever in the fully open position, slide the drive assembly into the
server system. The green latch at the front of the drive carrier must be to the right.
Do not push on the black drive carrier lever until the lever begins to close by itself.
10. When the black drive carrier lever begins to close by itself, push on it to lock the
drive assembly into place.
Figure 37. Install Drive Assembly into the Server System
11. Install the server system cover. For instructions, see
“Installing the Server System
Cover”
.
12. (Optional) Install the front bezel. For instructions, see
“Installing the Front Bezel”
.
13. Plug all peripheral devices and the AC power cable(s) into the server.
TP02143
A
B
B
TP02144
A
B
Содержание SERVER SYSTEM SR2500AL
Страница 6: ...vi Intel Server System SR2500AL User s Guide ...
Страница 10: ...x Intel Server System SR2500AL User s Guide ...
Страница 20: ...xx Intel Server System SR2500AL User s Guide ...
Страница 22: ...xxii Intel Server System SR2500AL User s Guide ...
Страница 46: ...24 Intel Server System SR2500AL User s Guide ...
Страница 55: ...Intel Server System SR2500AL User s Guide 33 Figure 22 Removing the Processor Air Duct TP02131 ...
Страница 97: ...Intel Server System SR2500AL User s Guide 75 Figure 65 Removing the Backplane from the Server System AF000016 ...
Страница 144: ...122 Intel Server System SR2500AL User s Guide ...
Страница 158: ...136 Intel Server System SR2500AL User s Guide ...
Страница 174: ...152 Intel Server System SR2500AL User s Guide ...
Страница 186: ...164 Intel Server System SR2500AL User s Guide ...
Страница 210: ...188 Intel Server System SR2500AL User s Guide ...

