background image

© Intatec Ltd 2014

8

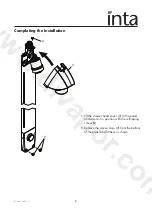
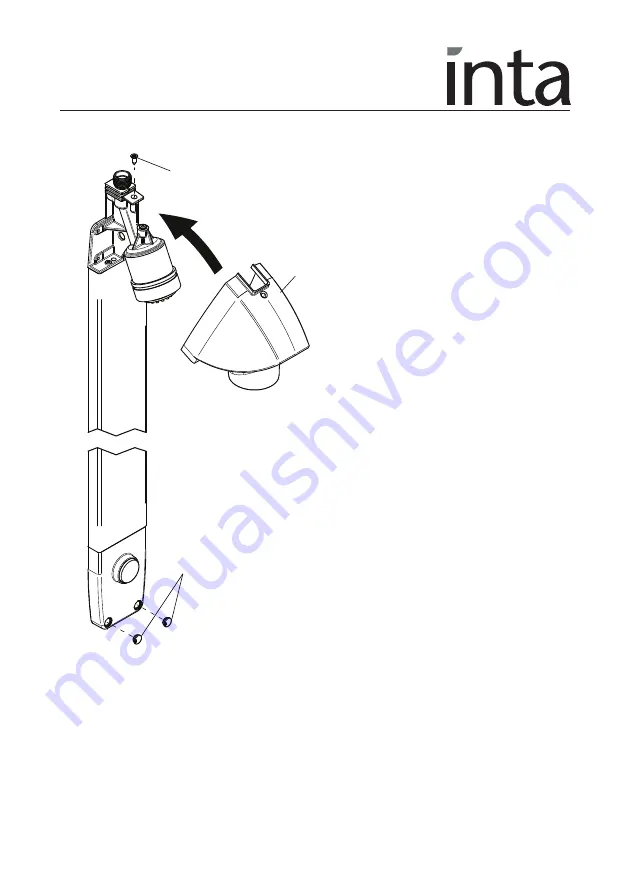
Completing the Installation

 •  Fit the shower head cover (2) to the panel      
     and secure it in position with the self-taping    
     screw (4).

 •  Remove the screws caps (9) from the bottom   
     of the panel and fit them as shown.

2

4

9

www.divapor.com

Содержание i-sport SP9206CP

Страница 1: ...We cannot accept any responsibility should it be found that in any respect the information is inaccurate or incomplete or becomes so as a result of further developments or otherwise Intatec Ltd Airfi...

Страница 2: ...at WRc on Tel 01495 248454 or Institute of Plumbing on Tel 01708 472791 All products MUST be re commissioned to suit site conditions to ensure optimum performance levels of the product are obtained S...

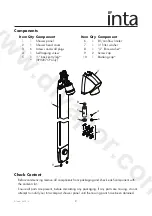
Страница 3: ...screw 9 2 Screw cap 5 1 back entry leg 10 1 Blanking cap SP9207CP only Check Content Before commencing remove all components from packaging and check each component with the contents list Ensure all p...

Страница 4: ...te provision must be made to ensure the water quality including limescale when installing the shower the presence of impurities may damage the self closing cartridge If the system has not been used fo...

Страница 5: ...er supply to the shower or thermostatic mixing valve to remove any debris that may be in the supply pipework The i sport compact panel shower should be positioned at a convenient height for most users...

Страница 6: ...s in the shower panel as a template mark their positions on the wall or use to drill pilot holes Ensure the shower panel will be vertical when fitted Drill six holes and using the wall plugs and screw...

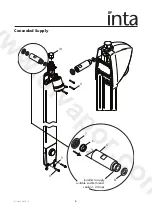
Страница 7: ...Intatec Ltd 2014 6 3 3 10 5 6 7 G B Installer to apply suitable Loctite thread sealant 2 drops 8 9 Concealed Supply w w d i v a p o r c o m...

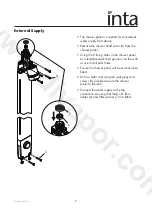
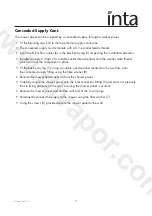
Страница 8: ...hread which will lock the component in place Fit the back entry leg 5 using a suitably sized spanner located on the two flats onto the concealed supply fitting using the fibre washer 8 Remove the show...

Страница 9: ...eting the Installation Fit the shower head cover 2 to the panel and secure it in position with the self taping screw 4 Remove the screws caps 9 from the bottom of the panel and fit them as shown 2 4 9...

Страница 10: ...NUING OPERATION OF THE SELF CLOSING VALVE B FOR THIS REASON THE OUTLET HOLE MUST BE KEPT UNRESTRICTED When the operating button is released the water flow will stop automatically after the pre defined...

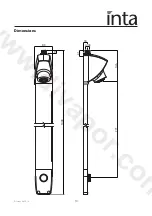
Страница 11: ...Intatec Ltd 2014 10 Dimensions 15 1000 146 777 G B 18 31 85 w w d i v a p o r c o m...

Страница 12: ...finish and should be treated with care An occasional wipe with a mild washing up liquid on a soft damp cloth followed by a thorough rinsing is all that is required Do not use an abrasive or chemical h...

Отзывы: