


Omnipod
®
5 App screens are for educational purposes only. Consult your healthcare professional before using these features and for personalized recommendations.
Omnipod
®
5 App screens are for educational purposes only. Consult your healthcare professional before using these features and for personalized recommendations.
SECTION 2
| RESPONSE
SECTION 2
| RESPONSE
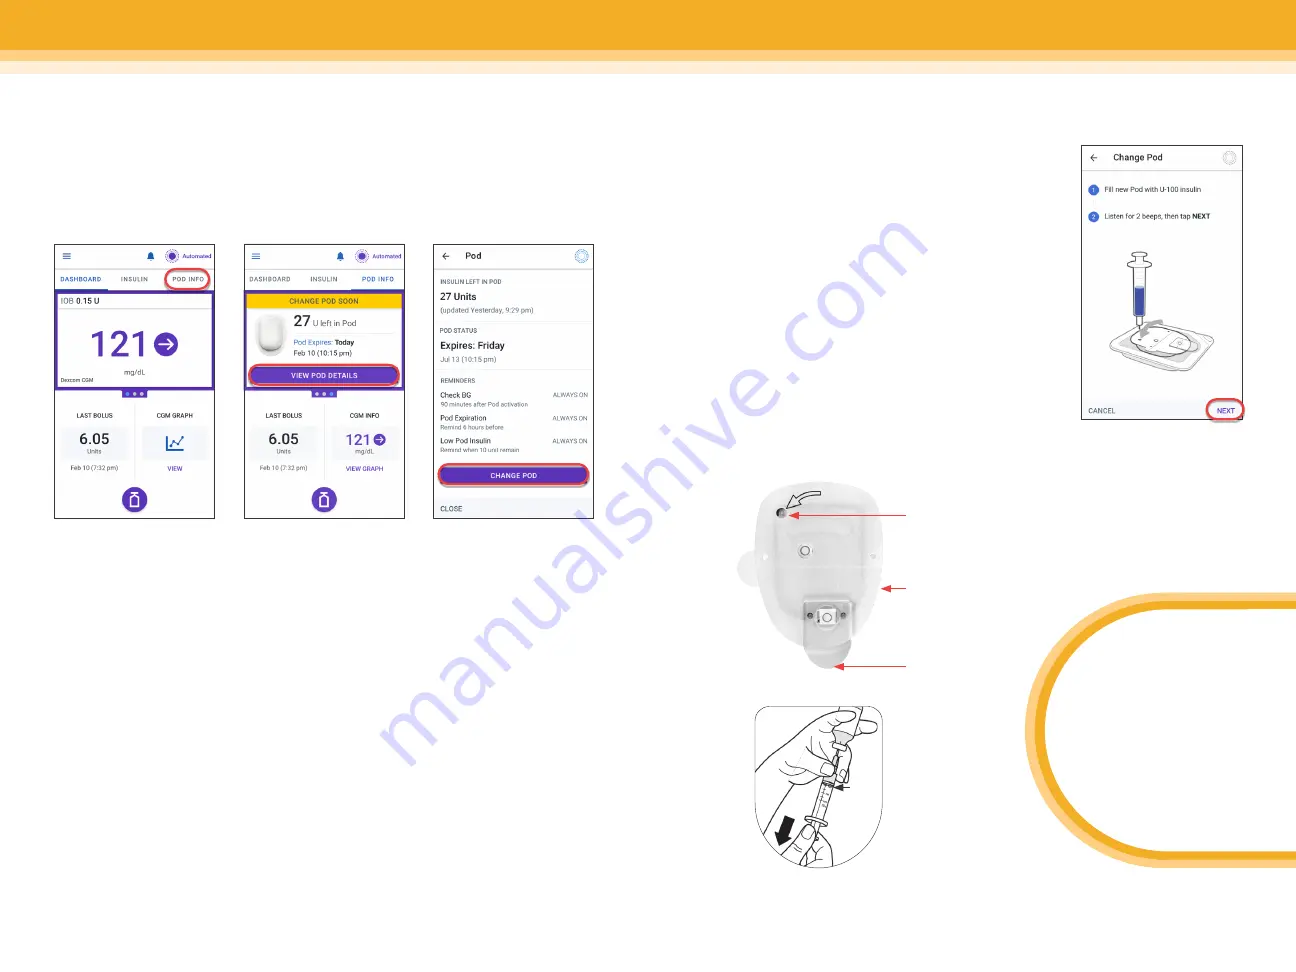
To deactivate and
change Pod, tap
POD INFO
Tap
VIEW
POD DETAILS
Tap
CHANGE
POD, and then tap
DEACTIVATE POD. If
the pod has already
been deactivated, tap
SET UP NEW POD on
the home screen
How to change a Pod
The Pod should be changed every 72 hours or when it has run out of insulin.
There also may be rare instances when a Pod change is necessary for the
system to keep working.
Removing old Pod
1. Gently lift the edges of the adhesive tape from the user’s skin and remove
the entire Pod. Remove the Pod slowly to help avoid possible skin irritation.
2. Use soap and water to remove any adhesive that remains on the skin, or,
if necessary, use an adhesive remover.
3. Check the infusion site for signs of infection.
4. Dispose of the used Pod according to local waste disposal regulations.
Caution:
Do not apply a new Pod until you have deactivated and removed
the old Pod. A Pod that has not been deactivated properly can continue to
deliver insulin as programmed, putting the user at risk of over infusion and
possible hypoglycemia.
MIN
fill
line
Filling a new Pod
1. Take the fill needle and twist clockwise onto
syringe. Remove protective cap on needle.
2. Pull back on plunger to draw air into syringe
equal to the amount of insulin.
3. Empty air into vial of insulin.
4. Turn vial and syringe upside down and
withdraw insulin.
5. Tap or flick syringe to remove any bubbles.
Leaving the Pod in its tray, insert the syringe
straight down into the fill port and empty out
all of the insulin. Be sure the Pod beeps twice.
Put the Controller/app right next to the Pod
and press NEXT.
Clear
Needle Cap
Fill Port
Adhesive
Backing
BOTTOM
TIP!
You must fill the Pod
with at least 85 units
of insulin, but no
more than 200 units.
Fill the Pod
with _____ units
12
13
Содержание Omnipod 5
Страница 1: ...CAREGIVER GUIDE OMNIPOD 5...


