content with certain vertical angles, we must require tripod to assist especially during night, sunrise, sunset and in weak
light environments, or we need to shoot with long exposure, delay etc. , in which cases, one cannot hold cameras. Here
are suggestions for choosing a tripod matching Pro 2.
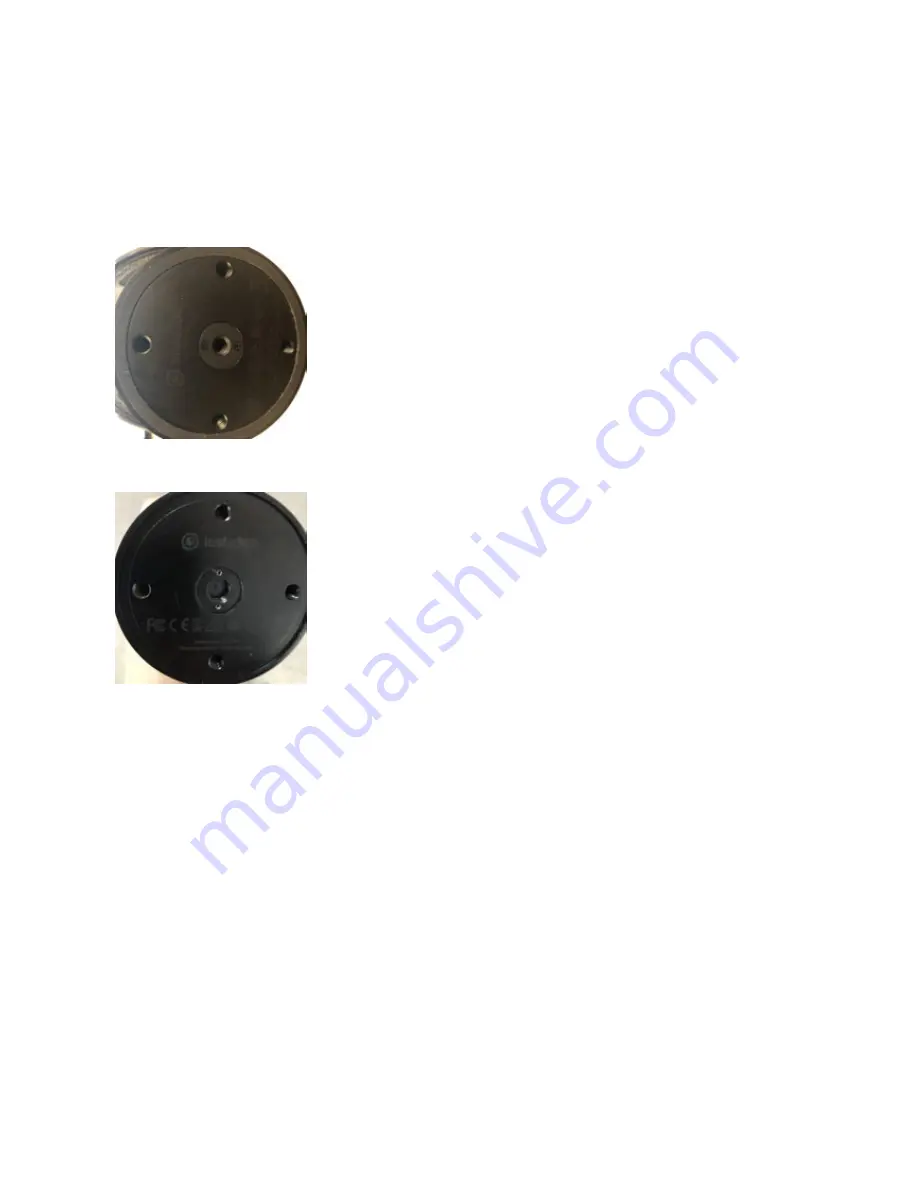
1. Mounting point on the tripod holder has two types: 1/4 inch and 3/8 inch. The base bottom of Pro 2 provides 3/8 nut
stad turning 1/4 inch tapped hole structure, allowing camera to fit the common tripod screw specifications of 1/4 and
3/8. Apart from the mounting point at the bottom, altogether four 1/4 mounting points are around forming a cross,
which is convenient for using some special tripods to make stronger fixation.
(Base central mounting point is 3/8 turn 1/4)
(Base central mounting point is 3/8)
2. When choosing tripod, one should first consider whether it is stable, and try to choose professional brand or have a
try personally to select the suitable one.
3. Panoramic video always simulates a first-person point of view. The distance of Pro 2 base to lens is about12 cm, so
please select tripod with a height above 160 cm.
4. Panorama video also needs bottom stitching. It’s not recommended using a tripod with direction adjusting handle.
5. Shooting of scenery theme may give priority to single unipod. Unipod occupies a much smaller area than tripod,
which is easier to erase in post editing. In panoramic videos, if we look down at our feet, we o en find that there is a
place that is unnatural or covered with LOGO of the producer, which actually hides the unipod position.
6. if the subject is mainly recording activity or there are many uncontrollable people on the scene, a tripod which is
more stable should be chosen to avoid person collision and camera damage.
Содержание Pro2
Страница 1: ...Pro2 User Manual English ...
Страница 11: ...Specification parameter Specification Parameter ...
Страница 36: ...3 It takes a while to load all the contents in SD cards Please wait for loading process to complete ...
Страница 46: ...8 It takes a while to load all the contents in SD cards Please wait for loading process to complete ...
Страница 58: ......
Страница 59: ......
Страница 73: ...Methods for creating HDR images by using Photoshop ...
Страница 74: ......
Страница 93: ...Open camera raw filter for color grading ...
Страница 94: ...Once again we apply polar coordinate e ect to return to the rectangular of 2 1 ...
Страница 100: ...Import a panorama you can drag mouse to view panoramic view Preview small window is at the upper right corner ...
Страница 122: ...Distort Polar Coordinates Polar to Rectangular Image Rotation 180 ...
Страница 166: ...2 AutoPano Video stitching Open AutoPano Video import videos ...
Страница 167: ...Select Stitch for quick stitching Press Stitch button set Lens properties 10 57 for focal length Fisheye for lens type ...
Страница 168: ...Adjust the lens in Realtime preview You can also turn on the Auto pano Giga for more detailed tuning ...
Страница 191: ...Modify minimum Trakers Frame to be around 50 Maximum tracker Count to be around 500 ...
Страница 201: ...Windows can also use PotPlayer to play ...
Страница 213: ... 2 Click Start 3 A er stitching calibration select the option you need If there s no problem click Done ...
Страница 214: ...Use Calibration function on mobile phone 1 Click Calibration a er connecting Pro 2 to the mobile phone ...
Страница 215: ... 2 Click Start ...
Страница 216: ......
Страница 217: ... 3 A er stitching calibration select the option you need If there s no problem click Done ...
Страница 221: ...Image Trim select transparent pixels cut o redundant pixels Distort Polar Coordinates Polar to Rectangular ...


