3. Please make sure that you have deleted the previous firmware bin file, and keep the file name
(Insta360_Pro2_Update.bin) of newly downloaded firmware unchanged; otherwise the system may not be able to
automatically identify the latest firmware and thus cannot upgrade regularly.
4. Restart the camera a er finishing all preparations mentioned above; then the camera will enter upgrading stage
to upgrade the firmware. Once the work has completed, it will restart again.
5. You can click "Info" in setting to check the version of your camera and Pro 2 Serial Number.
How to downgrade firmware?
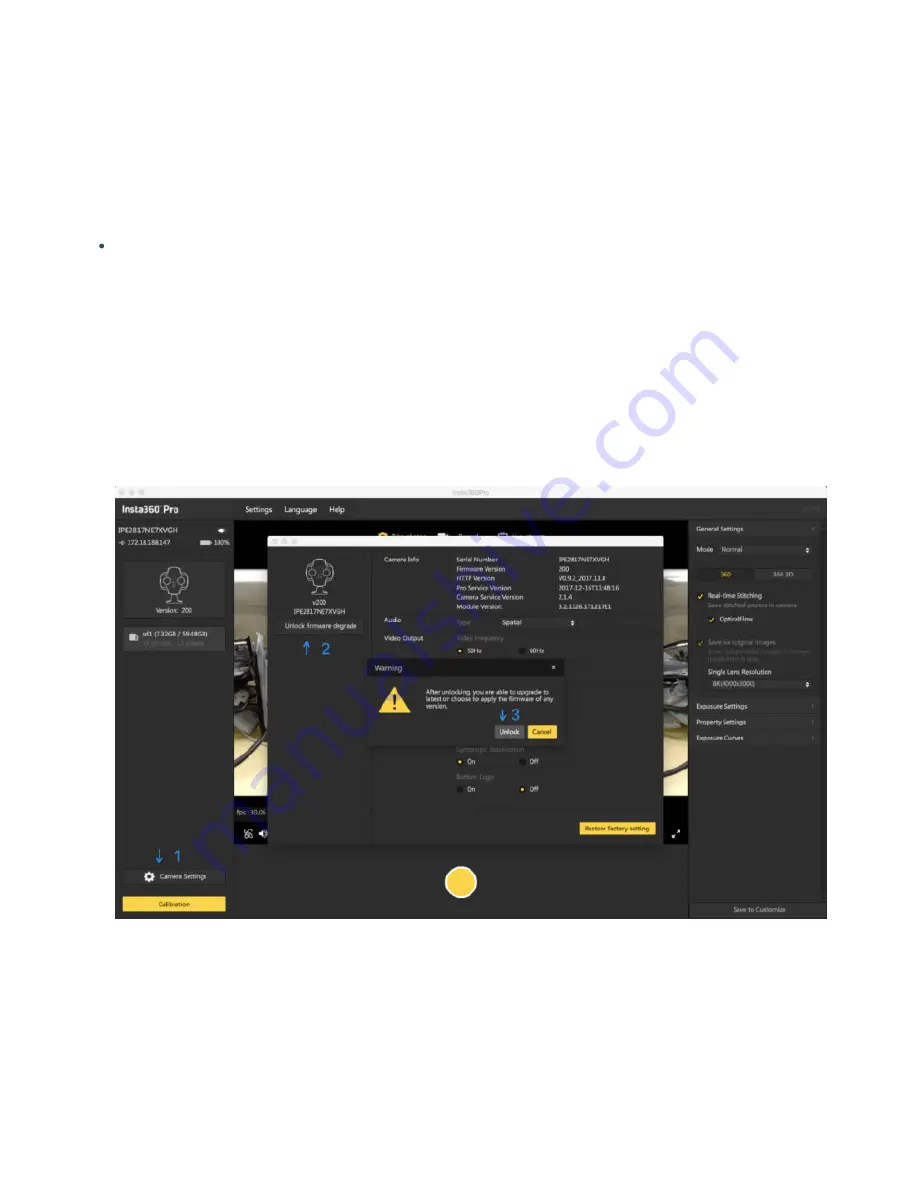
If you want to degrade from Beta firmware to the lower version firmware, please unlock the degrade limit of your
camera's firmware first. Follow the steps as below:
1. Use the Pro PC (1.3.0 version or above) to connect to the current camera.
2. When the camera is connected, open "Camera settings" and click "Unlock firmware degrade" under the camera
icon.
3. Once unlocked, the camera's firmware can be updated to any version via regular updating.
7.4.2 Working temperature and extreme environment
In order to ensure that Pro 2 can be in optimum working condition, the recommended working environment temperature
range is 0-40
℃
.
Because Pro 2 itself needs heat dissipation to maintain normal work, the camera is equipped with heat hole, so it cannot
be waterproof and dustproof. Therefore, do not place Pro 2 in excessive humidity or excessive dust environment, to avoid
Содержание Pro2
Страница 1: ...Pro2 User Manual English ...
Страница 11: ...Specification parameter Specification Parameter ...
Страница 36: ...3 It takes a while to load all the contents in SD cards Please wait for loading process to complete ...
Страница 46: ...8 It takes a while to load all the contents in SD cards Please wait for loading process to complete ...
Страница 58: ......
Страница 59: ......
Страница 73: ...Methods for creating HDR images by using Photoshop ...
Страница 74: ......
Страница 93: ...Open camera raw filter for color grading ...
Страница 94: ...Once again we apply polar coordinate e ect to return to the rectangular of 2 1 ...
Страница 100: ...Import a panorama you can drag mouse to view panoramic view Preview small window is at the upper right corner ...
Страница 122: ...Distort Polar Coordinates Polar to Rectangular Image Rotation 180 ...
Страница 166: ...2 AutoPano Video stitching Open AutoPano Video import videos ...
Страница 167: ...Select Stitch for quick stitching Press Stitch button set Lens properties 10 57 for focal length Fisheye for lens type ...
Страница 168: ...Adjust the lens in Realtime preview You can also turn on the Auto pano Giga for more detailed tuning ...
Страница 191: ...Modify minimum Trakers Frame to be around 50 Maximum tracker Count to be around 500 ...
Страница 201: ...Windows can also use PotPlayer to play ...
Страница 213: ... 2 Click Start 3 A er stitching calibration select the option you need If there s no problem click Done ...
Страница 214: ...Use Calibration function on mobile phone 1 Click Calibration a er connecting Pro 2 to the mobile phone ...
Страница 215: ... 2 Click Start ...
Страница 216: ......
Страница 217: ... 3 A er stitching calibration select the option you need If there s no problem click Done ...
Страница 221: ...Image Trim select transparent pixels cut o redundant pixels Distort Polar Coordinates Polar to Rectangular ...


