background image

11

10 Qt. Air Fryer Oven

www.insigniaproducts.com

Cooking with your air fryer oven

1

Place the food to be cooked on the cooking rack(s), then place the cooking 
rack(s) into the air fryer oven and close the door.

2

Press the preset button for the food you are preparing, or set the time and 
temperature using the +/- buttons.

3

Press the 

 (power) button to begin cooking, or wait five seconds and 

cooking begins automatically.

4

When cooking begins, the cooking indicator 

 flashes. When the food is 

done cooking, the fan and the cooking indicator 

 remain on for 20 seconds. 

The display will then show “OFF” for 20 seconds followed by a beep for five 
seconds.

5

Remove the food from your air fryer oven.

Using the accessories

Using the proper accessory will help you achieve a satisfactory result and will 
improve your cooking experience.

Using the cooking racks

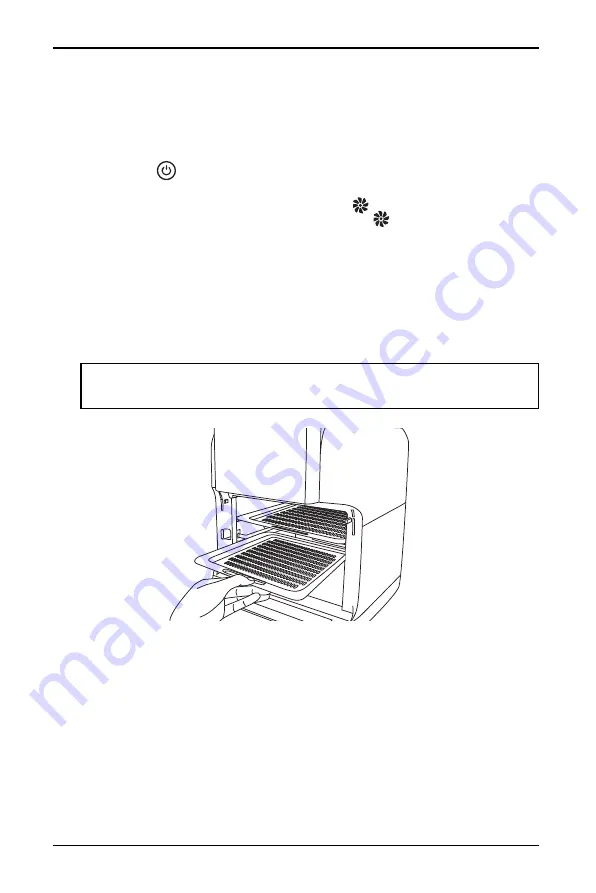
Slide the cooking racks into the upper two pairs of rails for dehydration or to cook 
crispy snacks. The cooking racks are also useful for cooking items like pizza (up to 
7.4 in. (18.8 cm).

Note

: The cooking racks have a non-stick coating which makes them easy to clean. The 

use of foil on the cooking racks is not recommended because the holes in the rack provide 
air circulation for even cooking.

Содержание NS-AF10DBK2

Страница 1: ...Before using your new product please read these instructions to prevent any damage USERGUIDE 10 Qt Digital Air Fryer Oven NS AF10DSS2 NS AF10DBK2 NS AF10DSS2 C ...

Страница 2: ... the cooking time 9 Setting the temperature 9 Using the preheat feature 9 Recommended cooking time and temperature 10 Cooking with your air fryer oven 11 Using the accessories 11 Maintaining your air fryer oven 15 Cleaning your air fryer oven 15 Storing your air fryer oven 15 Troubleshooting 15 Specifications 16 ONE YEAR LIMITED WARRANTY 17 Introduction Congratulations on your purchase of a high q...

Страница 3: ...ting elements 7 Do not cover the air inlet and the air outlet while the appliance is operating 8 Do not add oil to the drip tray or pans as this may cause a fire hazard 9 While cooking the internal temperature of the unit reaches several hundred degrees Fahrenheit TO AVOID PERSONAL INJURY never place hands inside the unit unless it is thoroughly cooled 10 Children should be supervised to ensure th...

Страница 4: ...r electric burner or in a heated oven 28 Do not use your air fryer oven for anything other than its intended purpose 29 Use only with a 120V AC power outlet Never use an outlet below the counter 30 Always unplug by gripping the electrical plug Never pull on the cord 31 Your air fryer oven should be operated on a separate electrical circuit from other operating appliances If the electrical circuit ...

Страница 5: ...e that automatically shuts down the unit when it reaches the preset time You can manually switch off the appliance at any time by pressing the Power Button The fan will continue running for about 20 seconds to cool down the unit Extension cord instructions An extension cord may be used if the following care is exercised in their use The marked electrical rating of the extension cord should be at l...

Страница 6: ...nel for easy operation Integrated timer that lets you set and monitor the cooking time to help ensure tasty results Clear window allows you to view food while cooking Easy to clean parts including a dishwasher safe cooking racks and a drip tray Package contents 10 Quart Digital Air Fryer Oven Cooking racks 2 Drip tray Rotisserie spit Removal tool User Guide Components Top lid Rotisserie spit rotat...

Страница 7: ...ator Lights when the display is showing time 5 Temperature buttons Press to increase or decrease the temperature 6 Mode buttons indicators Press to select a cooking mode The button lights to show which mode is selected 7 Light button Press to turn on the interior light 8 Time buttons Press to increase or decrease cooking time 9 Preheat button Press to begin preheating the air fryer oven 10 Rotate ...

Страница 8: ...panel flash once 9 Press the preheat button if needed Choosing the cooking mode 1 With the unit on select the mode you want by pressing the appropriate mode button The corresponding mode indicator lights up The display shows the cooking temperature and cooking time alternatively with the latter counting down by the minute 2 When the mode is selected press the power button to start the cooking proc...

Страница 9: ... to save time and help make air frying perfect Use the preheat feature If a recipe calls for a preheated oven When cooking meats or proteins that benefit from a hot initial searing 1 Place the empty pan and cooking rack into your air fryer oven 2 Press the power button then press the preheat button The button blinks 3 When your air fryer oven beeps once place food onto the cooking rack and program...

Страница 10: ...200 C Chicken drumsticks 25 1 1 lb 18 22 360 F 182 C Chicken breast 25 1 1 lb 10 15 360 F 182 C Spring rolls 25 75 lb 15 20 400 F 200 C Use oven ready Frozen chicken nuggets 25 1 1 lb 10 15 400 F 200 C Use oven ready Frozen fish sticks 25 1 1 lb 6 10 400 F 200 C Use oven ready Mozzarella sticks 25 1 1 lb 8 10 360 F 182 C Use oven ready Stuffed vegetables 25 1 1 lb 10 320 F 160 C Use oven ready Cak...

Страница 11: ...oking indicator remain on for 20 seconds The display will then show OFF for 20 seconds followed by a beep for five seconds 5 Remove the food from your air fryer oven Using the accessories Using the proper accessory will help you achieve a satisfactory result and will improve your cooking experience Using the cooking racks Slide the cooking racks into the upper two pairs of rails for dehydration or...

Страница 12: ...t forks 2 from the rotisserie spit 2 Pass the shaft through the length of the whole chicken roast or cut of meat 3 Mount the meat forks one on each end on the rotisserie spit insert into the meat to hold it in place then tighten the wing nuts to hold the meat forks in place WARNING Meat forks and other accessories are sharp Pay special attention during use to avoid personal injury When cooking is ...

Страница 13: ...to the right to unlock it then place the rotisserie shaft into position in the rotisserie shaft rotator 5 Move the shaft lock switch to the left to lock the rotisserie spit in position 6 Begin cooking see Choosing the cooking mode on page 8 for information on how to begin cooking ...

Страница 14: ...r fryer oven when cooking is complete move the shaft lock switch to the right to release the rotisserie spit then reach into the air fryer oven with the removal tool engage the ends of the rotisserie spit with the tool and lift the rotisserie spit out of the air fryer oven ...

Страница 15: ...h Storing your air fryer oven 1 Unplug the appliance and let it cool thoroughly 2 Make sure that all components are clean and dry 3 Place the appliance in the clean dry place Troubleshooting PROBLEM POSSIBLE CAUSE SOLUTION The air fryer oven does not work The air fryer oven is not plugged in Make sure that the power cord is plugged in and the wall outlet works If not check the circuit breaker and ...

Страница 16: ...e that you dry the potato sticks properly before you add the oil Cut the potato sticks smaller for a crispier result Add slightly more oil for a crispier result Fried snacks are not crispy Use the type of snacks meant to be prepared in a traditional deep fryer Use oven snacks or lightly brush some oil onto the snacks for a crispier result The cooking rack will not slide into the air fryer oven cor...

Страница 17: ...rranty Period expires you must pay all labor and parts charges This warranty lasts as long as you own your Insignia Product during the Warranty Period Warranty coverage terminates if you sell or otherwise transfer the Product How to obtain warranty service If you purchased the Product at a Best Buy retail store location or from a Best Buy online website www bestbuy com or www bestbuy ca please tak...

Страница 18: ... EXCLUSIVE REMEDY FOR BREACH OF WARRANTY INSIGNIA SHALL NOT BE LIABLE FOR ANY INCIDENTAL OR CONSEQUENTIAL DAMAGES FOR THE BREACH OF ANY EXPRESS OR IMPLIED WARRANTY ON THIS PRODUCT INCLUDING BUT NOT LIMITED TO LOST DATA LOSS OF USE OF YOUR PRODUCT LOST BUSINESS OR LOST PROFITS INSIGNIA PRODUCTS MAKES NO OTHER EXPRESS WARRANTIES WITH RESPECT TO THE PRODUCT ALL EXPRESS AND IMPLIED WARRANTIES FOR THE ...

Страница 19: ...877 467 4289 U S and Canada INSIGNIA is a trademark of Best Buy and its affiliated companies Distributed by Best Buy Purchasing LLC 7601 Penn Ave South Richfield MN 55423 U S A 2021 Best Buy All rights reserved V1 ENGLISH 21 0520 ...

Отзывы: