Insignia NS-42L260A13 Скачать руководство пользователя страница 56

52

 NS-42L260A13 Insignia 42" LCD TV

www.insigniaproducts.com

One-year limited warranty - 
Insignia Televisions

Definitions:

Insignia Products (“Insignia”) warrants to you, the original 
purchaser of this new Insignia-branded television (“Product”), 
that the Product shall be free of defects in the original 
manufacturer of the material or workmanship for a period of one 
(1) year from the date of your purchase of the Product (“Warranty 
Period”). For this warranty to apply, your Product must be 
purchased in the United States or Canada from a Best Buy or 
Future Shop authorized dealer of Insignia brand products only 
that are packaged with this warranty statement. 

How long does the coverage last? 

The Warranty Period lasts for 1 year (365 days) from the date you 
purchased the Product. Your purchase date is printed on the 
receipt you received with the Product. 

What does this warranty cover? 

During the Warranty Period, if the original manufacture of the 
material or workmanship of the Product is determined to be 
defective by an authorized Insignia repair center or store 
personnel, Insignia will (at its sole option): (1) repair the Product 
with new or rebuilt parts; or (2) replace the Product at no charge 
with new or rebuilt comparable products or parts. Products and 
parts replaced under this warranty become the property of 
Insignia and are not returned to you. If service of Products or 
parts are required after the Warranty Period expires, you must 
pay all labor and parts charges. This warranty lasts as long as you 
own your Insignia Product during the Warranty Period. Warranty 
coverage terminates if you sell or otherwise transfer the Product. 

How to obtain warranty service? 

If you purchased the Product at a Best Buy or Future Shop retail 
store location and your television Product has a screen size of 
less than 42 inches, please take your original receipt and the 
Product to any Best Buy or Future Shop store. Make sure that you 
place the Product in its original packaging or packaging that 
provides the same amount of protection as the original 
packaging. If you purchased the Product from a Best Buy or 
Future Shop online web site, mail your original receipt and the 
Product to the address listed on the web site. Make sure that you 
put the Product in its original packaging or packaging that 
provides the same amount of protection as the original 
packaging. 
To obtain in-home warranty service for a television with a screen 
42 inches or larger, in the United States call 1-888-BESTBUY, 
Canada call 1-866-BESTBUY for Future Shop call 1-800-663-2275. 
Call agents will diagnose and correct the issue over the phone or 
will have a Insignia-approved repair technician dispatched to 
your home.

Where is the warranty valid? 

This warranty is valid only in the United States and Canada at 
Best Buy or Future Shop branded retail stores or websites to the 
original purchaser of the product in the county where the 
original purchase was made. 

What does the warranty not cover? 

This warranty does not cover: 

Customer instruction/education 

Installation 

Set  up  adjustments 

Cosmetic  damage 

Damage due to acts of God, such as power surges

Accident(s) 

Misuse 

Abuse 

Negligence 

Commercial purposes/use, including but not limited to use 
in a place of business or in communal areas of a multiple 
dwelling condominium or apartment complex, or 
otherwise used in a place of other than a private home.

Modification of any part of the Product, including the 
antenna 

Plasma display panel damaged by static (non-moving) 
images applied for lengthy periods (burn-in). 

Damage due to incorrect operation or maintenance 

Connection to an incorrect voltage or power supply 

Attempted repair by any person not authorized by Insignia 
to service the Product 

Products sold “as is” or “with all faults” 

Consumables, including but not limited to batteries (i.e. AA, 
AAA, C etc.)

Products where the factory applied serial number has been 
altered or removed 

Loss or Theft of this product or any part of the product

Up to three (3) pixel failures (dots that are dark or 
incorrectly illuminated) grouped in an area smaller than 
one tenth (1/10) of the display size or up to five (5) pixel 
failures throughout the display. (Pixel based displays may 
contain a limited number of pixels that may not function 
normally.)

Failures or Damage caused by any contact including but 
not limited to liquids, gels or pastes.

REPAIR REPLACEMENT AS PROVIDED UNDER THIS WARRANTY IS 
YOUR EXCLUSIVE REMEDY FOR BREACH OF WARRANTY. INSIGNIA 
SHALL NOT BE LIABLE FOR ANY INCIDENTAL OR 
CONSEQUENTIAL DAMAGES FOR THE BREACH OF ANY EXPRESS 
OR IMPLIED WARRANTY ON THIS PRODUCT, INCLUDING, BUT 
NOT LIMITED TO, LOST DATA, LOSS OF USE OF YOUR PRODUCT, 
LOST BUSINESS OR LOST PROFITS. INSIGNIA PRODUCTS MAKES 
NO OTHER EXPRESS WARRANTIES WITH RESPECT TO THE 
PRODUCT, ALL EXPRESS AND IMPLIED WARRANTIES FOR THE 
PRODUCT, INCLUDING, BUT NOT LIMITED TO, ANY IMPLIED 
WARRANTIES OF AND CONDITIONS OF MERCHANTABILITY AND 
FITNESS FOR A PARTICULAR PURPOSE, ARE LIMITED IN 
DURATION TO THE WARRANTY PERIOD SET FORTH ABOVE AND 
NO WARRANTIES, WHETHER EXPRESS OR IMPLIED, WILL APPLY 
AFTER THE WARRANTY PERIOD. SOME STATES, PROVINCES AND 
JURISDICTIONS DO NOT ALLOW LIMITATIONS ON HOW LONG AN 
IMPLIED WARRANTY LASTS, SO THE ABOVE LIMITATION MAY NOT 
APPLY TO YOU. THIS WARRANTY GIVES YOU SPECIFIC LEGAL 
RIGHTS, AND YOU MAY ALSO HAVE OTHER RIGHTS, WHICH VARY 
FROM STATE TO STATE OR PROVINCE TO PROVINCE. 
Contact Insignia: 
For customer service please call 1-877-467-4289 

www.insigniaproducts.com


Distributed by Best Buy Purchasing, LLC 
7601 Penn Avenue South, Richfield, Minnesota, U.S.A. 
55423-3645 
© 2012 BBY Solutions, Inc. 
All rights reserved. INSIGNIA is a trademark of BBY Solutions, Inc. 
Registered in some countries. All other products and brand 
names are trademarks of their respective owners.

Содержание NS-42L260A13

Страница 1: ...NS 42L260A13 UserGuide 42 LCD TV ...

Страница 2: ...r 10 Connecting a cable or satellite box 10 Connecting an antenna or cable TV no box 13 Connecting a DVD or Blu ray player 13 Connecting a VCR 15 Connecting a camcorder or game console 16 Connecting a computer 16 Connecting a USB flash drive 17 Connecting headphones 18 Connecting a basic home theater system 18 Connecting a home theater system with multiple devices 19 Using the remote control 20 In...

Страница 3: ...ting up a favorite channel list 30 Viewing a favorite channel 30 Adding or changing a channel label 30 Checking the digital signal strength 31 Setting parental controls 31 Setting or changing the password 31 Locking control buttons 32 Blocking unrated TV 33 Setting parental control levels 33 Downloading rating information 35 Using closed captioning 36 Turning closed captioning on or off 36 Selecti...

Страница 4: ...ng slideshow settings 46 Maintaining 47 Cleaning the TV cabinet 47 Cleaning the TV screen 47 Troubleshooting 47 Video and audio 47 Remote control 48 General 48 Specifications 49 Programming universal remote controls 50 Programming a different universal remote control 50 Common universal remote control codes 50 Legal notices 51 One year limited warranty Insignia Televisions 52 Definitions 52 How lo...

Страница 5: ...come excited while watching a program especially on a larger than life TV Make sure that you place or install the TV where it cannot be pushed pulled over or knocked down Make sure that you route all cords and cables so that they cannot be pulled or grabbed by curious children Wall mounting If you decide to wall mount your TV always remember One size of wall mount does not fit all Use only a wall ...

Страница 6: ... exposed to dripping or splashing and no objects filled with liquids such as vases should be placed on the apparatus WARNING Electric shock hazard To reduce the risk of fire or electric shock do not remove any cover or expose the device to rain or moisture No user serviceable parts are inside Refer servicing to qualified service technicians Lightning For added protection for your device receiver d...

Страница 7: ... unit connection to grounding electrodes and requirements for the grounding electrode Note to CATV system installer Article 820 of the National Electrical Code ANSI NFPA No 40 provides guidance for correct grounding Specifically it states that the cable ground must be connected to the grounding system of the building as close to the point of cable entry as practical Condensation Moisture will form...

Страница 8: ...z screen refresh rate twice the rate of a 60 Hz screen a screen with 1 080 lines of resolution up from 720 lines in the last generation of HDTVs and special motion detection technology you will be experiencing a picture with clearer detail and brightness smoother transitions and reduced motion blurring particularly when watching fast motion sports and action scenes See page 25 for instructions on ...

Страница 9: ... your TV to a wall mount bracket 1 Carefully place your TV screen face down on a cushioned clean surface to protect the screen from damages and scratches 2 Remove the four screw that secure the stand to the stand column then remove the stand 3 Remove the four screws that secure the stand column to the TV screen then remove the stand column Notes If you plan to wall mount your TV do not install the...

Страница 10: ...in 200 mm Wall mount brackets Item Description Power indicator Turmsoff when your TV is on Lightsred when your TVis off standbymode Remote control sensor Receivessignals fromtheremotecontrol Donotblock MENU Press to open the on screen menu For more information see Navigating the menus on page23 INPUT Press to open the InputSource list press CH or CH to select a video input source then press INPUT ...

Страница 11: ...res a sound connection on page11orpage 14 1 4 3 2 1 2 3 4 Item Description DIGITALOUTPUT optical Connecta digital audioamplifierorhome theater system to thisjack to listen to TV audio through the amplifier speakers For more information see Using digital audio on page 18 COMPONENT Y VIDEO PB PR OR AV Y VIDEO The COMPONENT AV Y VIDEOjack worksas one of the component videojacksoras a composite video ...

Страница 12: ...ct ratio For more information see Aspect ratio options on page 25 return In TV mode press to return to theprevious channel S T W X Press to navigate in on screen menus and to adjust settings HOME Press to open the on screen menu INFO Press to display TVstatus information such as the channelnumber channelname ifavailable orsignal source For more information see Viewingchannel information on page 24...

Страница 13: ...MI video audio Best use this ifyourdevices have HDMI Component video requires an audio connection Better than composite or coaxial Compositevideo requires an audio connection Better than coaxial Coaxial video audio Good Connectiontype and jack Cable connectors Optical digital audio SPDIF Analog audio VGA computer video and audio Cautions Check the jacks for position and type before making any conn...

Страница 14: ...ed and all connected equipment is turned off 2 Connect the incoming cable from the cable wall jack to the cable in jack on the cable or satellite box 3 Connect an HDMI cable not provided to one of the HDMI jacks on the side of your TV and to the HDMI OUT jack on the cable or satellite box 4 Plug your TV s power cord into a power outlet turn on your TV then turn on the cable or satellite box 5 Go t...

Страница 15: ...he incoming cable from the cable wall jack to the cable in jack on the cable or satellite box 3 Connect a component video cable not provided to the COMPONENT AV Y VIDEO PB and PR video jacks on the back of your TV and the component video out jacks on the cable or satellite box 4 Connect an audio cable not provided to the L and R audio jacks on the back of your TV and to the audio out jacks on the ...

Страница 16: ...Connect the incoming cable from the cable wall jack to the cable in jack on the cable or satellite box 3 Connect a coaxial cable not provided to the ANT CABLE jack on the back of your TV and to the coaxial out jack on the cable or satellite box 4 Plug your TV s power cord into a power outlet turn on your TV then turn on the cable or satellite box 5 Go through the Setup Wizard on page 20 Note The C...

Страница 17: ...DMI 3 then press ENTER Notes Use a coaxial cable to eliminate interference and noise from radio waves Do not bundle the coaxial cable with the power cord or other cables If the antenna is not installed correctly contact qualified service personnel to correct the problem If the signal level for a channel is weak the picture may be distorted Adjust the antenna or use a highly directional outdoor or ...

Страница 18: ...t provided to the COMPONENT AV Y VIDEO PB and PR jacks on the back of your TV and to the COMPONENT OUT jacks on the component video device 3 Connect an audio cable to the L and R audio jacks on the back of your TV and to the L R AUDIO OUT jacks on the DVD or Blu ray player 4 Plug your TV s power cord into a power outlet then turn on your TV 5 Turn on the DVD or Blu ray player then set it to the co...

Страница 19: ...en turn on your TV and the VCR 4 Press INPUT to open the Input Source list 5 Press S or T to select Component AV then press ENTER 6 Insert a videotape in the VCR then press PLAY on the VCR Note The COMPONENT AV Y VIDEO PB and PR video jacks used to connect a component device share the L and R audio jacks with the COMPONENT AV Y VIDEO jack used to connect a composite device When you connect the aud...

Страница 20: ...and to the VGA jack on the computer 3 Connect an audio cable with a stereo mini plug not included to the PC DVI AUDIO IN jack on the side of your TV and to the AUDIO OUT jack on the computer 4 Plug your TV s power cord into a power outlet turn on your TV and the computer 5 Press INPUT to open the Input Source list 6 Press S or T to select VGA then press ENTER 7 Adjust the display properties on the...

Страница 21: ...perties on the computer if necessary Connecting a USB flash drive To connect a USB flash drive 1 Plug a USB flash drive into the USB port on the side of your TV 2 Turn on your TV 3 Press INPUT to open the Input Source list 4 Press S or T to select USB Photos then press ENTER Note You can also press HDMI repeatedly to select the computer HDMI cable Side of TV Caution Do not remove the USB flash dri...

Страница 22: ...ter system is turned off 2 Connect a digital optical audio cable not provided to the DIGITAL OUTPUT jack on the back of your TV and to the optical AUDIO IN jack on the digital home theater system Warning Loud noise can damage your hearing When using headphones use the lowest volume setting on your headphones that still lets you hear the sound Note You can also connect an amplifier home theater sys...

Страница 23: ... on your devices Refer to the documentation that came with your devices for connection information Just remember to use the best connection types available for the best picture and sound For information about connection types see What connection should I use on page 9 Note You can connect headphones an amplifier a home theater system or a sound bar to the AUDIO OUT jack If you want to use headphon...

Страница 24: ...uage screen opens 3 Press S or T to highlight the language you want then press ENTER The Choose Your Time Setting screen opens 4 Press S or T to highlight Mode then press W or X to select Custom to set the date and time manually or Auto to set the date and time automatically from a TV signal source based on the time zone you select Cautions Batteries should not be exposed to excessive heat such as...

Страница 25: ...highlight Antenna Cable or Satellite Box then press ENTER A If you select Antenna your TV scans for available channels The scan may take several minutes During scanning your TV searches for digital channels first When the digital channel search is complete a message appears asking if you want to search for analog channels Select Yes to continue searching for analog channels or select No to stop se...

Страница 26: ...ct Component AV If your TV is connected to a cable or satellite box using a composite video cable select Component AV Understanding the basics Turning your TV on or off To turn your TV on or off 1 Make sure that the power cord is connected to a power outlet 2 Press power to turn on your TV The power indicator turns blue 3 Press power again to turn off your TV Your TV enters standby mode and the po...

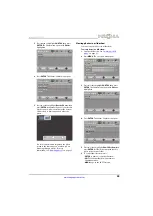
Страница 27: ... Mode Brightness Contrast Color Advanced Video Reset Picture Settings Energy Savings 50 46 78 MOVE OK ENTER MENU EXIT EXIT PREVIOUS SELECT Adjust settings to affect sound quality Audio Sound Mode Balance Advanced Audio Reset Audio Settings Standard 0 PICTURE CHANNELS SETTINGS PHOTOS AUDIO MOVE OK ENTER MENU EXIT EXIT PREVIOUS SELECT PICTURE CHANNELS SETTINGS PHOTOS AUDIO Channels Auto Channel Sear...

Страница 28: ...e audio information resolution CC mode current time and current program start and end times Analog channel information Displays channel number channel label if present signal type audio information and resolution Viewing system information To view system information 1 Press MENU The on screen menu opens 2 Press W or X to highlight SETTINGS then press T or ENTER The Settings menu opens 3 Press S or...

Страница 29: ...n 120 Eliminates motion blur with clear detail and smooth motion You can select Low Sets the effect to minimum Medium Provides smooth and clear picture motion for normal use High Eliminates motion blur with clear detail and smooth motion 24p Film Mode Provides smooth and clear picture motion from film based video Off Turns off Insignia Motion 120Hz Aspect Ratio Selects the aspect ratio of the pict...

Страница 30: ...ice To adjust component video settings 1 Make sure you have a device connected to the Y PB PR component video jacks on the side of your TV 2 Press VIDEO to select the component video device 3 Press MENU The on screen menu opens 4 Press W or X to highlight SETTINGS then press T or ENTER The Settings menu opens 5 Press S or T to highlight Component Settings then press ENTER 6 Press S or T to highlig...

Страница 31: ...external audio system You can select PCM to output audio in 2 channel stereo or RAW to pass through the original digital audio sound MTS SAP Analog channels only Selects the audio mode You can select MONO Select this option if there is noise or static on weak stereo broadcasts STEREO Select this option for programs broadcast in stereo SAP Select this option to listen to a secondary audio program i...

Страница 32: ...es Audio Only works only when the input source is TV and your TV is receiving a broadcast signal To exit audio only mode press any button When you exit audio only mode the Audio Only option is automatically reset to Off MOVE OK ENTER MENU EXIT EXIT PREVIOUS SELECT Adjust settings to affect picture quality PICTURE CHANNELS SETTINGS PHOTOS AUDIO Picture Picture Mode Brightness Contrast Color Advance...

Страница 33: ...dden channels You can still tune to a hidden channel by pressing the number buttons for the channel To hide channels 1 Press MENU The on screen menu opens 2 Press W or X to highlight CHANNELS then press T or ENTER The Channels menu opens 3 Press S or T to highlight Add Skip Channels then press ENTER The Channels Add Skip Channels screen opens 4 Press S T W or X to highlight the channel you want to...

Страница 34: ...ight the channel then press ENTER The check mark disappears and the channel is removed from the list If the list has more than one page press S or T to scroll through the pages MOVE OK ENTER MENU EXIT EXIT PREVIOUS SELECT Adjust settings to affect picture quality PICTURE CHANNELS SETTINGS PHOTOS AUDIO Picture Picture Mode Brightness Contrast Color Advanced Video Reset Picture Settings Energy Savin...

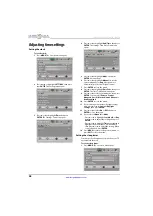
Страница 35: ...grams that exceed the ratings level you select To watch programs that exceed the selected rating you must enter a password To set or change the password 1 Press MENU The on screen menu opens 2 Press W or X to highlight SETTINGS then press T or ENTER The Settings menu opens with Parental Controls highlighted MOVE OK ENTER MENU EXIT EXIT PREVIOUS SELECT CH 2 0 Create labels for channels up to 11 cha...

Страница 36: ...ssword PICTURE CHANNELS SETTINGS PHOTOS AUDIO MOVE OK ENTER MENU EXIT EXIT PREVIOUS SELECT Change Password RRT5 Button Lock Block Unrated TV USA Parental Locks Canadian Parental Locks Off Off Settings Parental Controls Enter a new 4 digit password then re enter it to confirm PICTURE CHANNELS SETTINGS PHOTOS AUDIO MOVE OK ENTER MENU EXIT EXIT PREVIOUS SELECT Change Password RRT5 Button Lock Block U...

Страница 37: ...s Canadian Parental Locks On Off Settings Parental Controls Do not lock the buttons on the TV On Off PICTURE CHANNELS SETTINGS PHOTOS AUDIO MOVE OK ENTER MENU EXIT EXIT PREVIOUS SELECT Adjust settings to affect picture quality PICTURE CHANNELS SETTINGS PHOTOS AUDIO Picture Picture Mode Brightness Contrast Color Advanced Video Reset Picture Settings Energy Savings 50 46 78 MOVE OK ENTER MENU EXIT E...

Страница 38: ...nly Canadian French ratings E Exemptprogramming G General audiences 8ans Suitable for children 8 andolder 13ans Suitable for children 13 and older 16ans Suitable for children 16 and older 18ans Adult only MOVE OK ENTER MENU EXIT EXIT PREVIOUS SELECT Adjust settings to affect picture quality PICTURE CHANNELS SETTINGS PHOTOS AUDIO Picture Picture Mode Brightness Contrast Color Advanced Video Reset P...

Страница 39: ...XIT to close the menu Note When you block a rating that rating and all higher ratings are blocked OK ENTER MENU EXIT Settings Parental Controls Canadian Parental Locks English Rating French Rating Restrict movie and TV programs by Canadian Ratings E C C8 G PG 14 18 E G 8 ans 13 ans 16 ans 18 ans MOVE EXIT PREVIOUS SELECT PICTURE CHANNELS SETTINGS PHOTOS AUDIO MOVE OK ENTER MENU EXIT EXIT PREVIOUS ...

Страница 40: ... all of the screen Text1 through Text4 display content provided by the broadcaster 6 Press MENU to return to the previous menu or press EXIT to close the menu Note You can also press CCD to turn closed captioning on or off MOVE OK ENTER MENU EXIT EXIT PREVIOUS SELECT Adjust settings to affect picture quality PICTURE CHANNELS SETTINGS PHOTOS AUDIO Picture Picture Mode Brightness Contrast Color Adva...

Страница 41: ...dge Effect Selects the edge style Edge Color Selects the edge color 10 Press MENU to return to the previous menu or press EXIT to close the menu MOVE OK ENTER MENU EXIT EXIT PREVIOUS SELECT Adjust settings to affect picture quality PICTURE CHANNELS SETTINGS PHOTOS AUDIO Picture Picture Mode Brightness Contrast Color Advanced Video Reset Picture Settings Energy Savings 50 46 78 MOVE OK ENTER MENU E...

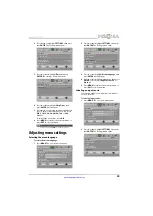
Страница 42: ...ighlight the hour minute or AM PM field then press S or T to adjust the setting When you are finished press ENTER 14 Press MENU to return to the previous menu or press EXIT to close the menu Setting the sleep timer You can specify the amount of time before your TV automatically turns off To set the sleep timer 1 Press MENU The on screen menu opens MOVE OK ENTER MENU EXIT EXIT PREVIOUS SELECT Adjus...

Страница 43: ...enu opens Note You can also press SLEEP to set the sleep timer MOVE OK ENTER MENU EXIT EXIT PREVIOUS SELECT Settings Auto Input Sensing Input Labels Parental Controls Closed Caption Time Menu Language English On Set menu language to English Français or Español PICTURE CHANNELS SETTINGS PHOTOS AUDIO MOVE OK ENTER MENU EXIT EXIT PREVIOUS SELECT Settings Time Date Time Sleep Timer Off Set a time for ...

Страница 44: ...press INPUT To turn the input sensor on or off 1 Press MENU The on screen menu opens 2 Press W or X to highlight SETTINGS then press T or ENTER The Settings menu opens 3 Press S or T to highlight Auto Input Sensing then press ENTER A menu opens 4 Press S or T to select On turns on the input sensor or Off turns off the input sensor 5 Press MENU to return to the previous menu or press EXIT to close ...

Страница 45: ...nect HDMI CEC compatible devices to your TV The connected device s HDMI CEC feature must be turned on If you connect an HDMI device that is not HDMI CEC compatible all the INlink Control features do not work Depending on the connected HDMI device the INlink Control feature may not work MOVE OK ENTER MENU EXIT EXIT PREVIOUS SELECT Adjust settings to affect picture quality PICTURE CHANNELS SETTINGS ...

Страница 46: ...ess MENU to return to the previous menu or press EXIT to close the menu MOVE OK ENTER MENU EXIT EXIT PREVIOUS SELECT Adjust settings to affect picture quality PICTURE CHANNELS SETTINGS PHOTOS AUDIO Picture Picture Mode Brightness Contrast Color Advanced Video Reset Picture Settings Energy Savings 50 46 78 MOVE OK ENTER MENU EXIT EXIT PREVIOUS SELECT Settings INlink English On Allow the TV to autom...

Страница 47: ...t Color Advanced Video Reset Picture Settings Energy Savings 50 46 78 MOVE OK ENTER MENU EXIT EXIT PREVIOUS SELECT Settings INlink English On Allow the TV to automatically control CEC devices connected to the TV via HDMI Auto Input Sensing Input Labels Closed Caption Time Menu Language PICTURE CHANNELS SETTINGS PHOTOS AUDIO MOVE OK ENTER MENU EXIT EXIT PREVIOUS SELECT Settings INlink Go to device ...

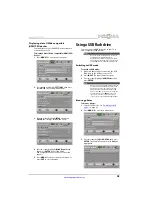
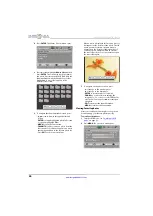
Страница 48: ...ext photo ENTER to rotate the photo clockwise ZOOM one or more times to enlarge the image by 1 2 or 4 or to select Fill to fill the screen You can press S T W or X to pan the photo EXIT to return to the thumbnail index MENU to return to the Photo menu Viewing favorite photos After you created your favorite photo list you can browse among your favorite photos quickly To view favorite photos 1 Switc...

Страница 49: ...he current folder 6 To control the slideshow press ENTER to pause or start the slideshow EXIT to exit the slideshow and return to thumbnail index MENU to go to the PHOTO menu MOVE OK ENTER MENU EXIT EXIT PREVIOUS SELECT Photos Photos View files from a USB flash drive that is connected to the TV PICTURE CHANNELS SETTINGS PHOTOS AUDIO MOVE OK ENTER MENU EXIT EXIT PREVIOUS SELECT Photos View only the...

Страница 50: ...transition when moving to the next file in the slideshow You can select None No transition effect Fade to Black Fades the screen to black between photos Vertical Wipe Wipes the screen from top to bottom between photos Horizontal Wipe Wipes the screen from left to right between photos Random Randomly selects a transition effect 7 Press EXIT to close the menu MOVE OK ENTER MENU EXIT EXIT PREVIOUS SE...

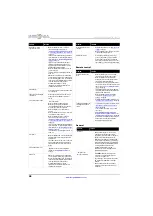
Страница 51: ...e Adjustingthe TV picture on page 24 Make sure that thecorrect picture mode is selected See Adjusting the TV picture on page 24 If you areusing an antenna thedigital channel signal maybe low To check the digital channel signal strength see Checking the digital signal strength on page 31 If you areusing an antenna and the signal strength is low adjust the antenna or use a highly directional outdoor...

Страница 52: ...our TV Try turning off one device at a time to determine which device is causing interference After youhave determinedwhich device is causing interference move it further from the TV to eliminate the interference Problem Solution No outputfrom one ofthe speakers Adjust the audiobalance See Adjustingsound settings on page27 Make sure that theaudio cables are connected correctly and securelyto your ...

Страница 53: ...ngscannotbe accessed If a setting is grayed thesettingis not available in the current video inputmode TV cabinet creaks When the TV is in use thetemperature rises naturally andmay cause the cabinetto expand or contractwhich can cause a creakingnoise This is not a malfunction Control buttons do not work Make surethat the Button Lock optionis set to Off See Locking control buttons on page 32 Unplugt...

Страница 54: ...crews M6 type 12 mm length 4 pcs V Chip version 2 0 Yes Sleep timer Yes Channel labeling Yes VESA mount mm horizontal vertical 400 200 Note The length of the wall mount screws vary depending on the wall mount bracket you purchased See the instructions that came with the wall mount bracket for screw lengths Tips If your universal remote control has a code search feature run a code search to identif...

Страница 55: ...er Connect the equipment into an outlet on a circuit different from that to which the receiver is connected Consult the dealer or an experienced radio TV technician for help FCC warning Changes or modifications not expressly approved by the party responsible for compliance with the FCC Rules could void the user s authority to operate this equipment Cables Connections to this device must be made wi...

Страница 56: ...st Buy or Future Shop branded retail stores or websites to the original purchaser of the product in the county where the original purchase was made What does the warranty not cover This warranty does not cover Customer instruction education Installation Set up adjustments Cosmetic damage Damage due to acts of God such as power surges Accident s Misuse Abuse Negligence Commercial purposes use inclu...

Страница 57: ...rchasing LLC 7601 Penn Avenue South Richfield MN55423 3645USA 2012BBY Solutions Inc All rights reserved INSIGNIA is a trademark ofBBYSolutions Inc Registeredin some countries All other productsand brand namesare trademarks oftheir respective owners ENGLISH 12 0030 ...

Отзывы: