— 25 —
Section V
NETWORKING THE NOVIA 272
Section II stressed setup of the NOVIA 272 using front-panel
‘knob and button’ data entry. As soon as you have a net-
work connection, feel free to ‘graduate’ to Web interface op-
eration. Although the OLED Menu Tree will continue to be
referenced here, the Web interface menu is nearly identical,
quite intuitive, and much faster.
The Web Interface
The ‘responsive’ design of the NOVIA 272 Web interface
provides an optimal viewing experience across a wide range
of devices. A minimum of resizing, panning and scrolling is
required between desktop computer monitors, tablets and
mobile phones.
DHCP IP Assignment
With the rear-panel
LAN PORT
connected to your network,
navigate from the Main Menu to
Setup
/
Network
/
IP Settings
.
Here you may select:
DHCP
to have your router automati-
cally assign an IP ad-
dress to the NOVIA 272.
A DHCP connection will
populate the fields on
the right-hand side of
the screen automatically.
Manual IP Setup
For any of several reasons you may need to set the IP ad-
dress of the NOVIA 272 manually. Select
Static IP
, and
then bracket the various network options shown on the
right to enter the proper decimal-delineated numbers. Use
Backspace
to make corrections and, when finished,
Save
the
new entry. Consult a competent IT professional if you need
help with this.
— 26 —
Assigning a Hostname
Setup
/
Network
/
Hostname
lets you assign a unique name to a
particular NOVIA 272 to identify it on the network. The fac-
tory-default name is
NOVIA272
. You might change this to
differentiate one processor from another on a common net-
work.
Use the knob to assign a new name and
Save
the name when
finished. Although Hostnames must be entered in all-
capital letters, you don’t have to use all-caps when address-
ing the processor. Under the Windows® operating system,
bring up the NOVIA 272 with a Web browser that’s on the
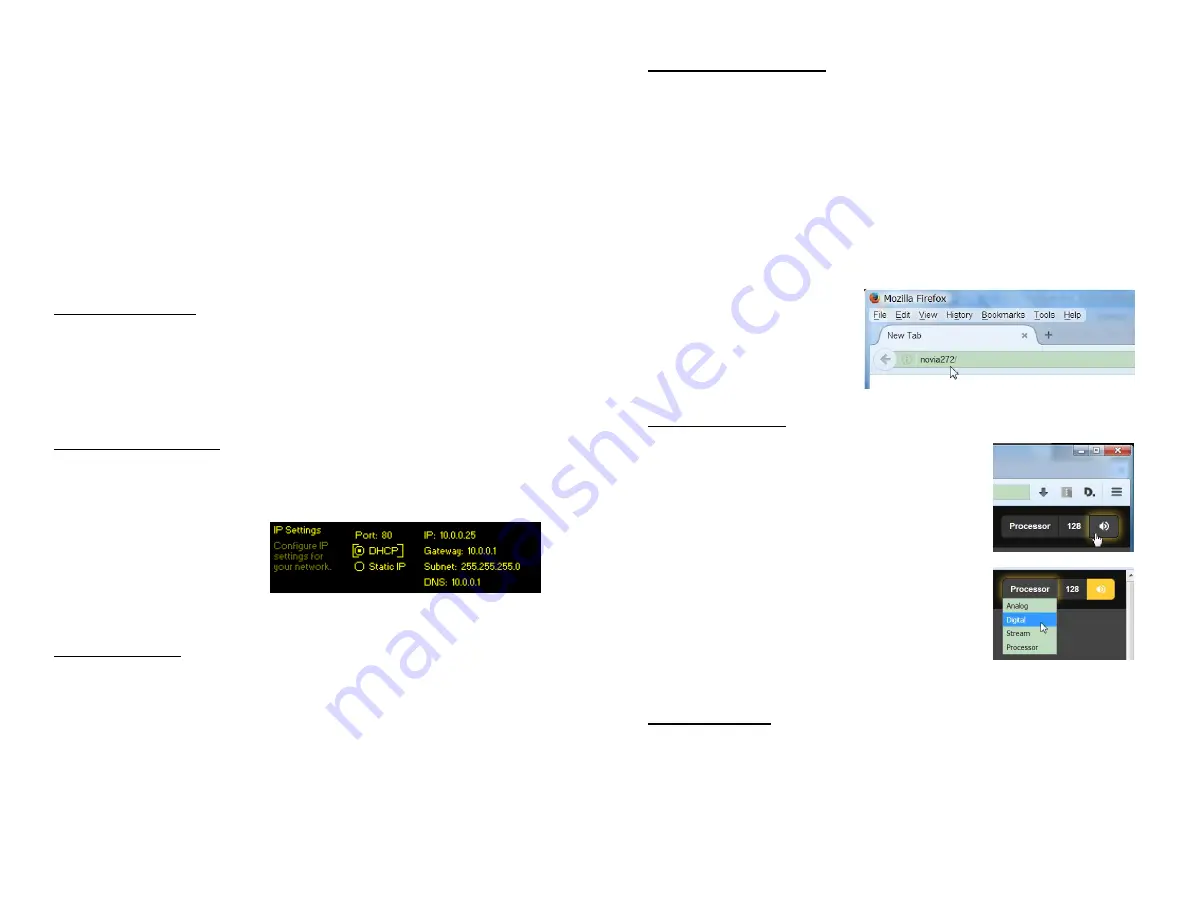
same network simply by typing the Hostname and a for-
ward-slash into the
browser address bar as
shown here. Non-Win-
dows browsers will re-
quire entering the entire
IP address of the unit.
Remote Listening
Click the loudspeaker icon at the top of
the screen to listen to the audio program
through your browser. The
128
box to
the left of the icon sets the audio moni-
tor streaming rate. 128kbps is default,
but you can drop this to 64kbps or even
32kbps if your network connection is
very slow. The box marked
Processor
, a
bit more to the left, selects the source
you are actually listening to. The pro-
cessor output is the default, but you can
listen to the incoming ‘raw’ (unpro-
cessed) program sources without chang-
ing or interrupting the on-air program.
Remote Access
To address your NOVIA 272 from outside your LAN (from
the Internet) the unit must have a static IP address. If your
router makes DHCP assignments for other equipment on
the network, simply assign the NOVIA 272 a static IP that is
outside the router’s DHCP range. Use the router’s Help util-
ity for this.


