- 34 -
- 34 -
www.innotek.net
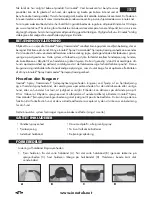
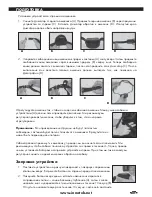
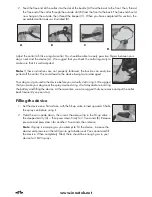
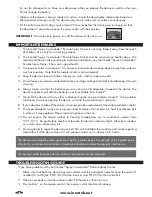
2. Feed the free end of the collar into the slot of the buckle (A) from the back to the front. Then, thread
the free end of the collar through the outside slot (B) from the front to the back. The free end should
now hang on the outside, then thread the keeper (C). When you have completed this section, the
assembled collar looks as illustrated (D).
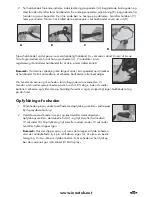
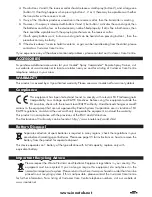
Adjust the collar to fi t like a regular collar. You should be able to easily pass two fi ngers between your
dog’s neck and the device (A). We suggest that you check the collar regularly to
make sure that it is well adjusted.
Note:
If these instructions are not properly followed, the buckle can easily be
pulled off the collar. This could lead to the device being lost or damaged.
Your dog must get used to the device before you actually start using it. We suggest
that you make your dog wear the spray device during 4 to 5 days before inserting
the battery and fi lling the device. At the same time, we also suggest that you remove and put the collar
back frequently on your dog.
Filling the device
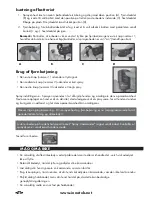
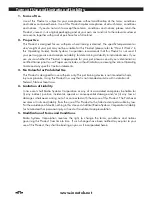
1. Set the device on a fl at surface, with the fi ll-up valve turned upwards. Shake
the spray can before using it.
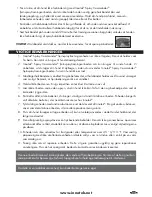
2. Hold the can upside down, then insert the aerosol tip in the fi ll-up valve –
the deepest cavity (A) – then press down fi rmly for 10 seconds (B). Release
pressure and press down for another 10 seconds, then release.
Note
: If spray is escaping as you attempt to fi ll the device, increase the
downward pressure on the refi ll can to get a better seal. You cannot overfi ll
the device. When completely fi lled, there should be enough gas in your
device for 18-23 sprays.
A
B
C
D
Содержание Spray Commander
Страница 39: ......

