Inline IN2022 Скачать руководство пользователя страница 5

4

IN2022 OPERATION MANUAL  -  REV 1.1  12/11/99                                            

©1995  -  INLINE, INC.

#4 Connect the IN2022 input cable to the computer’s video port.
The input cable is the 4’ long “Y” cable permanently attached to the interface.  Connect one of
the connectors on this cable to the computer’s video port as detailed below.

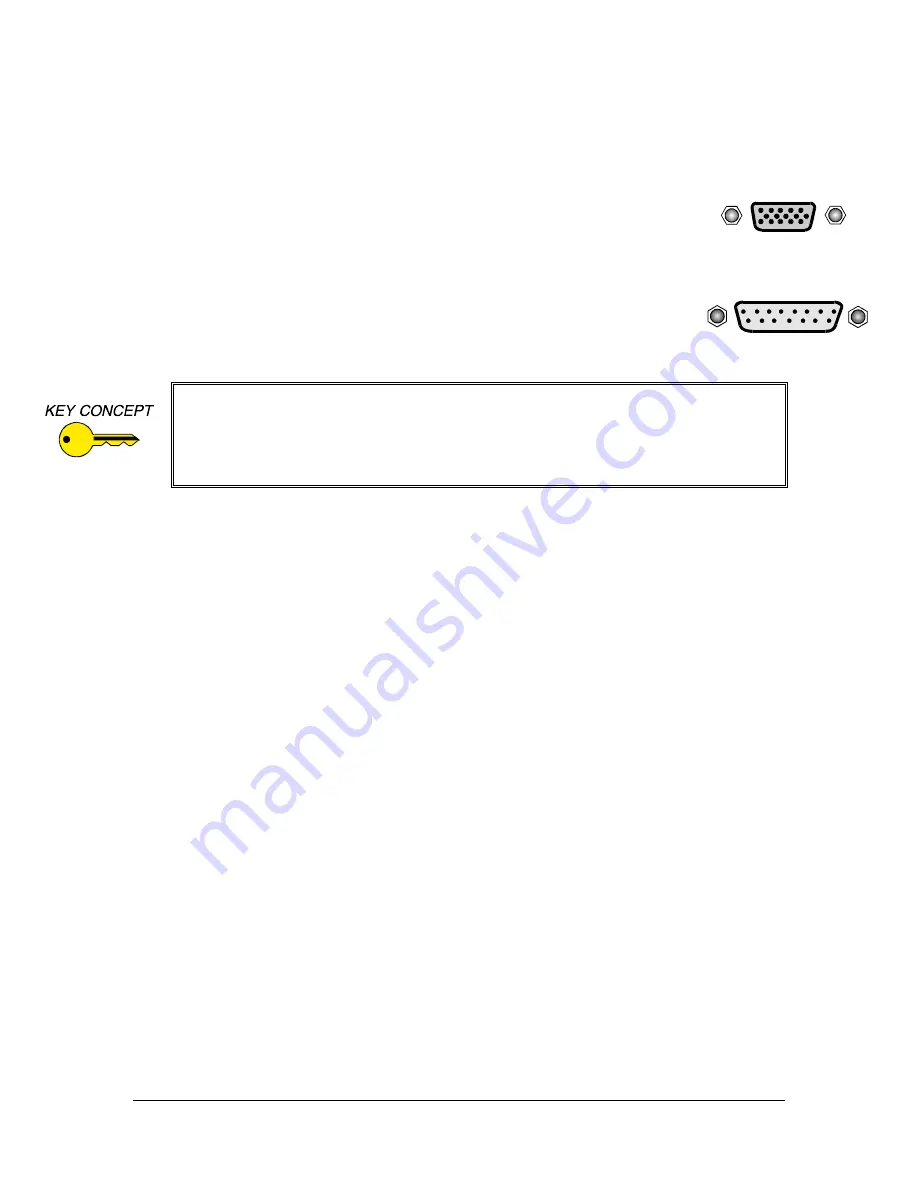
PC Compatible Computers (VGA)
Locate the video port on the computer, a 15-Pin HD connector which looks like this:
Connect the 15-Pin HD connector on the IN2022 input cable to the computer video
port.  Do not connect anything to the MAC input connector (15-pin D).

MAC Computers
Locate the video port on the computer, a 15-pin D connector which looks like this:
Connect the 15-Pin D connector on the IN2022 input cable to the computer video
port.  Do not connect anything to the VGA input connector (15-pin HD).

#5 Connect the local computer monitor (if present) to the appropriate LOCAL MONITOR
OUTPUT on the IN2022.  
If you have no local monitor you must set the emulation dip switches
(see page 7).

#6 Connect the IN2022 output to the display device RGB input.
Using high quality video cables, connect the output BNCs on the IN2022 to the RGB input on
your large screen monitor or data projector.  The interface will automatically set the output sync
format according to the number of cables you have connected to the output:

Cables Connected to BNCs

Output Format

RGB

RGsB

RGBS

RGBS

RGBHV

RGBHV

Cable selection is extremely important to the performance of any high resolution graphics
display system, especially when using long cable runs.  The following Inline cables are available
in a variety of lengths from 6’ to 100’ (longer cables available by special order) and are
recommended for all system connections:

IN7000 Series Standard Resolution Coax Cables - 3, 4 or 5 conductors
IN7100 Series High Resolution Coax Cables - 3, 4, or 5 conductors
IN7200 Series Ultra High Resolution Coax Cables - 3, 4 or 5 conductors

#7 Apply power to the IN2022.
Connect the round connector on the provided power transformer to the power input jack on the
IN2022 (US:  IN9207-1 15VDC / 900mA,  UK/European:  IN9208  15VDC / 1A).  Connect the
power transformer to the A/C power source.

#8 Complete the installation by powering up the computer and computer monitor.
If necessary, adjust the horizontal position control as detailed on page 6.

Some MAC computers such as the PowerBook and PowerMAC A/V models have a
proprietary connector which must be adapted to a standard 15-pin D video connector.
This video port adapter is available from Apple distributors.
Some PowerBook models do not have a video output port.  You must purchase a third-
party video output adapter in order to provide a video signal for external video displays.

Содержание IN2022

Страница 1: ...OPERATION MANUAL DEDICATED VIDEO INTERFACE SERIES IN2022 High Resolution Video Interface for VGA and MAC Computers...

Страница 2: ...ns Only 8 12 Opening the IN2022 Case 8 Diagram 2 Internal View 9 Blue and Red Gain Controls 9 Diagram 3 Dip Switches 10 Internal Dip Switches 11 12 SW1 Output Sync Horizontal Position Control Disable...

Страница 3: ...MAC II Quadra Centris Performa Power MAC Daystar MP Radius Exceptional Video Performance Featuring advanced video amplification circuitry the IN2022 offers video bandwidth in excess of 230 MHz ensurin...

Страница 4: ...the documentation for both the computer graphics card and the data display device to ensure compatibility Installation steps are listed below and outlined in Diagram 1 on page 5 1 Turn the computer an...

Страница 5: ...t according to the number of cables you have connected to the output Cables Connected to BNCs Output Format RGB RGsB RGBS RGBS RGBHV RGBHV Cable selection is extremely important to the performance of...

Страница 6: ...15V 900mA RGB Input Connect VGA Plug or MAC Plug to Video Port on Back of Computer DIAGRAM 1 IN2022 INSTALLATION INPUT VGA MAC HORIZONTAL POSITION LOCAL MONITOR OUTPUT 2022 HIGH RESOLUTION VIDEO INTER...

Страница 7: ...horizontal position control until the image is centered as desired 3 If the image appears dark or the colors are not properly displayed fine tune the controls on both the display device and the IN202...

Страница 8: ...ing the video card to the desired frequency refresh rate and resolution even without a local monitor If you are not using a local monitor locate your workstation type and desired mode in the chart bel...

Страница 9: ...ircuit board PCB to the lower case To assist in reassembly make note of the red ground strap terminal on the center screw 6 Lift the PCB Input Output connector assembly away from the lower case Flip t...

Страница 10: ...ale reproduction and color accuracy therefore these controls should only be adjusted by qualified technicians having the necessary test equipment Since the gain pots must be adjusted with power applie...

Страница 11: ...10 IN2022 OPERATION MANUAL REV 1 1 12 11 99 1995 INLINE INC...

Страница 12: ...tput Sync Horizontal Position Control Factory Default Settings 0100001010 These dip switches are normally all covered except for 6 Switch Number Function When Set to ON 1 1 N C 2 Green Out set opposit...

Страница 13: ...e may have a bad sync line Try running the sync through another cable Solution 3 The IN2022 output sync format may not be compatible with the display device The output image is very dark Solution The...

Страница 14: ...nput signal 11 Sec Bandwidth 230 MHz 3dB 7 volt input signal GENERAL Controls Horizontal Position Video Gain Sharpness Monitor Emulation Power Supply US IN9207 1 15VDC 900mA UK European IN9208 15VDC 1...

Страница 15: ...d warranty or merchantibility or fitness for any particular purpose all of which are expressly disclaimed The information in this manual has been carefully checked and is believed to be accurate Howev...

Отзывы: