26
18-GF74D1-1K-EN
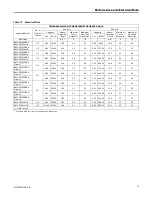
Table 19.
Downflow (continued)
5.
Slide the coil assembly out. Remove and discard the horizontal
drain pan.
Figure 6.
TEM8A0C48 and TEM8A0C60 Only
Figure 7.
All other models
6.
On both sides of the cabinet, remove the two screws that hold the
coil support brackets and retain for later use. Seal the holes to
prevent air leakage.
7.
Rotate and lift the two coil support brackets to remove from front
slots in cabinet.
Figure 8.
All models
8.
Bend the two tabs on each of the coil support brackets. Tabs
should be bent inward so they are parallel to the bottom flange.
Figure 9.
All models
Left
Right
Содержание TEM6A0B24H21SB
Страница 11: ...18 GF74D1 1K EN 11 Electrical Data...
Страница 38: ...38 18 GF74D1 1K EN N No ot te es s...
Страница 39: ...18 GF74D1 1K EN 39 N No ot te es s...


