background image

Network Settings 

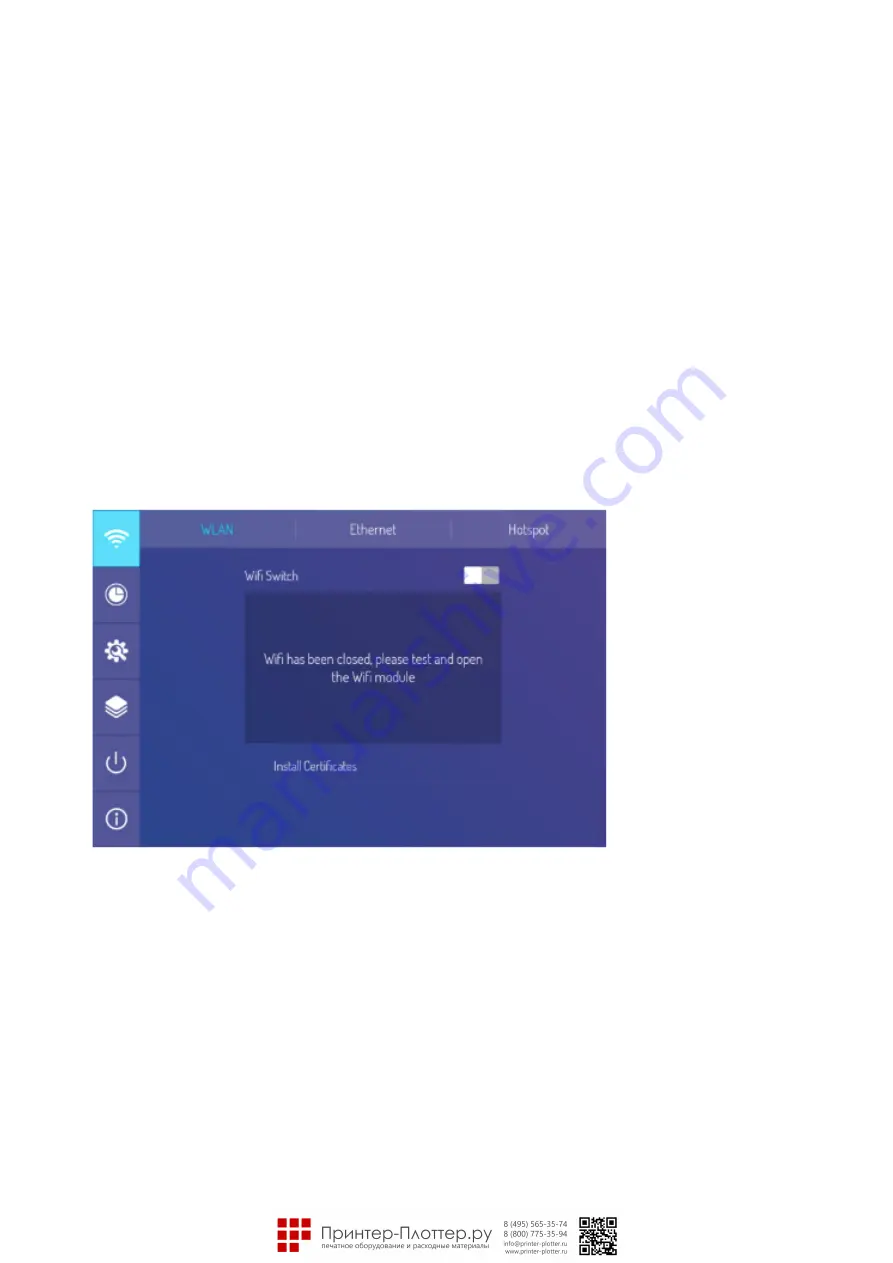
Select sidebar menu, press the setting icon and then enter systems setting page where it can conduct wireless 

network, wired network, wireless hot spot setting. 

Wireless Network (optional) 

1. Select sidebar menu > System Settings > Wireless Network. 

2. Turn on WLAN switch. 

3. Select the network to be connected from Network List, enter the connecting password, and then 

success to connect the wireless network. 

4. If there is no desired network in Network List, it can manually add a network. 

Wired Network 

1. Connect one end of the network cable to the network port of this machine before using wired network, 

and then connect the other end to a router. 

2. Select sidebar menu> System Settings > Wired Network. 

3. Turn on connecting switch. 

4. Select "DHCP" in IP settings, and then the machine will automatically obtain an IP address and connect to 

network. 

5. Select "Static" in IP settings, manually input IP address, gateway, network prefix length, DSN address, and 

then click "Finish" to connect to network. 

Remark:There are two network ports on this machine, either of which can be connected to wired network 

(choose one of them). When one network port is connected with a router, the other port can be connected with 

an external device. At this time, the Android system of this machine, OPS (Windows system only) and the external 

device form a LAN, which can be connected to network at the same time. 

Wireless Hot Spot(optional) 

1. Select sidebar Menu > System Settings > Wireless Hot Spot. 

2. Turn on hot spot switch. 

3. Enter the hot spot name in the text box, and the system defaulted name is “Android AP-7654" which is 

changeable into other name. 

4. Select encryption type. In case of opening network, no password is required, but any device that finds this 

network can connect to the WIFI network of this machine. In case of WPA PSK/WPA2 PSK encryption, a 

protective password over 8 digits shall be entered, and the correct password is required for other device 

that finds this network to connect to network. 

Содержание JTouch 00 Series

Страница 1: ...y before using the product Do not attempt to disassemble the product If the product does not work please contact us or our reseller in your area This Manual is provided for reference only The function...

Страница 2: ...nal Source Setting 12 Image Mode 12 Voice Mode 13 Menu Setting 13 Network Settings 14 Date and Language Setting 15 System Setting and Applications 15 Control Lock and Centralised Control Setting 16 Po...

Страница 3: ...or an enclosed environment Where any fl ammable or explosive material is present Where any combustible or corrosive gas is present 13 In order to avoid the risk of explosion do not expose the batteri...

Страница 4: ...e It provides multiple types of pens drawing tools and other functions and you can write and move the contents as you like Accessories Wall Mount 1 Precautions for Installation For installation of the...

Страница 5: ...C USB port is used to connect OPS equipment PUBLIC USB port serves as both Media USB port and PC USB port and is automatically switchable with the signal source 3 This product is connected with wirele...

Страница 6: ...GA port see the Technical Parameters DP Port Note The maximum resolution supported by OP port is 4K 60HZ The signal quality depends on length and quality of the OP cable so please use the recommended...

Страница 7: ...s product please fi rst power off the product The outdoor antenna should not be close to wires of high voltage mains supply otherwise electric shock may result Signal output ports AV OUT port Note The...

Страница 8: ...he maximum relaying amount depends on quality and length of the HDMI cable Audio ports Optical fiber port Note This port can output audio signals of this product ta speakers with a SPDIF IN port Audio...

Страница 9: ...nction In such case please change the angle of lighting or the product or operate the remote control close to the remote receiver 4 Replace the batteries in case of low battery as it will reduce the r...

Страница 10: ...l input or not the product will not enter the standby mode In the non Android main interface if there is no signal input within 15min the product will automatically enter the standby mode Save before...

Страница 11: ...Note The OPS module is optional Sidebar Setting Press the sidebar shortcut key arrow or slide from the edge of the screen inwards when feature activated in main menu settings to open the sidebar menu...

Страница 12: ...ource lock power on signal source and auto power off without signal Image Mode Select sidebar menu press setting icon to enter signal source setting menu then press the menu icon on the bottom right c...

Страница 13: ...um bass and treble setting sound output device setting and so on when move to voice mode sub option Menu Setting Select sidebar menu press setting icon to enter signal source setting menu then press t...

Страница 14: ...input IP address gateway network pre fi x length DSN address and then click Finish to connect to network Remark There are two network ports on this machine either of which can be connected to wired n...

Страница 15: ...it can automatically synchronise and update the time from the network automatically 24 hour setting as well as date time zoom input method system language setting etc when move down to system setting...

Страница 16: ...f factory data resetting under the guide of after sales personnel Control Lock and Centralised Control Setting Select sidebar menu press the setting icon and enter system setting page it can set remot...

Страница 17: ...wer On off Setting Select sidebar menu press setting icon and enter system setting page it can set wake on LAN timing switcher startup time shutdown time and so on when move down to power on off setti...

Страница 18: ...mation and shortcuts for whiteboard and fi le manager on the home page Ali apps include system apps and third party apps Annotate Select sidebar menu press annotate icon the annotation toolbar will ap...

Страница 19: ...tion background setting brush setting undo restore text clear screen save import picture spot light and split screen and other functions Documents Manager The document manager supports the playing of...

Страница 20: ...en to open up the fl oating toolbar option This contains the main screen applications and can be opened on any screen Swipe up along the edge of the bottom left right corner of the screen to open the...

Страница 21: ...1360X768 60Hz 5 WUXGA 1920X1080 60Hz No Mode Resolution Refresh rate 1 SD 720X480 60Hz 2 720X576 60Hz 3 1280x720 60Hz 4 1280x720 60Hz 5 HD 1920x1080 50Hz 6 1920x1080 60Hz 7 UHD 3840x2160 30Hz 8 3840x...

Страница 22: ...nnection failure Check if the power cord is properly connected Pictures shown on the product have dotted line or stripe interference Signal interference caused by automobile neon light electric hairdr...

Страница 23: ...question or service request about these contents and services please directly contact the corresponding content or service provider The products gets stuck crashes or cannot be operated 1 Too many pr...

Страница 24: ...ndly use period of this product is 10 years see the pollution control symbol in the right fi gure Such use period will be maintained under the normal working conditions speci fi ed in the User s Manua...

Отзывы: