background image

30

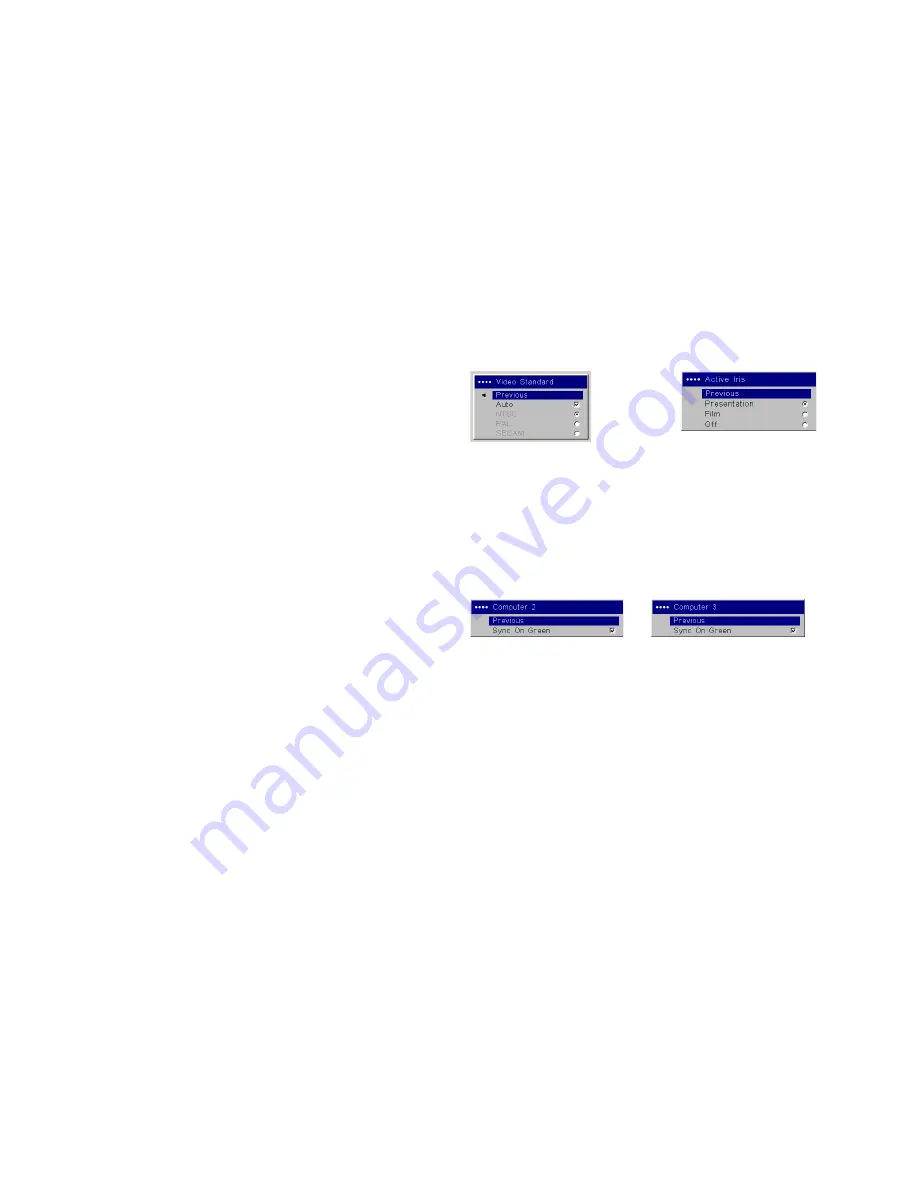
Video Standard

: when set to Auto, the projector attempts to automatically 

pick the video standard based on the input signal it receives. (The video 
standard options may vary depending on your region of the world.) If the 
projector is unable to detect the correct standard, the colors may not look 
right or the image may appear “torn.” If this happens, manually select a 
video standard by selecting NTSC, PAL, or SECAM from the Video Stan-
dard menu. 

Active Iris

: when on, the projector monitors the image brightness and mod-

ifies the light output if the image is dark, which improves black levels. In 
Presentation mode, it looks at peak brightness, in Theater mode it looks at 
average brightness.

Overscan

: (Computer 1 and video sources only) removes noise around the 

video image.

The following 4 options are for computer sources only: 

Phase

: adjusts the horizontal phase of computer 2, 3 and component (except 

480i and 576i) sources. 

Tracking

: adjusts the horizontal scan of a computer source (except Com-

puter 1).

Horizontal / Vertical Position

: adjusts the position of a computer source 

(except Computer 1) and Video 1 source (except 480i and 576i).

Computer 2

: allows you to turn Sync on Green on for this source.

Computer 3

: allows you to turn Sync on Green on for this source.

.

Video Standard

Active Iris

Computer 2

Computer 3

Содержание IN5102

Страница 1: ...IN5102 IN5104 IN5106 Regulatory models W50 W55 User s Guide...

Страница 2: ...rference to radio communications Operation of this equipment in a residential area is likely to cause harmful interference in which case the user will be required to correct the interference at his ow...

Страница 3: ...of laser beam warning labels on remote Location of laser beam warning labels on remote OR this label Do not look into laser beam emitted from the front of the remote control Location of laser beam war...

Страница 4: ...enu 28 Settings menu 31 Maintenance 35 Cleaning the lens 35 Replacing the clock batteries 35 Replacing the projection lamp 36 Cleaning the dust filter 38 Using the security lock 38 Appendix 39 Project...

Страница 5: ...this projector InFocus is not liable for the performance safety or certification of any other lamps The use of other lamps violates the projector warranty and voids all certification marks on this pr...

Страница 6: ...to visit our website Web address information is located on the back inside cover of this User s Guide Online Registration Register your projector on our website to receive product updates announcemen...

Страница 7: ...endix and on our website See the back inside cover of this User s Guide for website information HDMI is an industry standard uncompressed all digital audio video interface that connects between source...

Страница 8: ...ing Mount Kit is sold separately visit our website for more information Position the projector the desired distance from the screen The distance from the lens of the projector to the screen the zoom s...

Страница 9: ...lso connect to your computer using optional BNC or HDMI cables Connect the BNC connectors on the BNC cable to the appropriate Com puter 3 connectors on the projector Connect the other end to the video...

Страница 10: ...h screen or other control device or computer by connecting an RS 232 cable to the pro jector s Serial Control connector Specific RS 232 commands can be found in the Service and Support section of our...

Страница 11: ...ness No startup screen Get help on page 16 Turn on your computer The computer s image should appear on the projection screen If it doesn t press the Source button on the keypad or remote Make sure you...

Страница 12: ...the Zoom or Focus rings inside the lens door until the desired image size and focus are produced If the image is not on the screen or viewing area adjust it by using the lens shift dials inside the l...

Страница 13: ...sold separately into the S video connector on the video device and into the Video 2 connector on the projector Use the A V cable s audio connectors as described directly above the yellow connectors on...

Страница 14: ...in and turn on the video device The video device s image should appear on the projection screen If it doesn t press the Source button on the keypad or remote Adjust the height of the projector if nec...

Страница 15: ...ing area adjust it by using the lens shift dials inside the lens door Use the right dial to shift the lens left or right Use the left dial to shift the lens up or down Adjust the volume in the Audio m...

Страница 16: ...to run to cool the lamp When the lamp has cooled the Power light is solid green and the fans stop Press the power switch on the back of the projector and unplug the power cable to completely power of...

Страница 17: ...le in press power switch and power button Remove lens cap Correct image Only startup screen appears no computer image Press the Source button Activate laptop s external port Computer image projected 1...

Страница 18: ...zy or cropped Set your computer s display resolution to the native resolution of the projector Start Settings Control Panel Display Settings tab select1024x768 Image clear and not cropped Signal out o...

Страница 19: ...square Adjust keystone the Picture menu Square image Image not sharp Adjust the focus ring or Sharpness in the Picture Advanced menu Correct image Image does not fit 16 9 screen Change aspect ratio t...

Страница 20: ...ystem menu Correct image Image reversed left to right Turn on off Rear in Settings System menu Correct image Projected colors don t match source Adjust color tint color temperature brightness contrast...

Страница 21: ...ked allow projector to cool for one minute Unplug projector wait 20 minutes plug in projector and turn it on lamp lights Lamp won t turn on Lamp light is lit page 15 Lamp may need to be replaced page...

Страница 22: ...nty plan may be purchased from your dealer When sending the projector in for repair we recommend shipping the unit in its original packing material or having a professional packaging company pack the...

Страница 23: ...s the projector on page 10 and off page 15 menu opens the on screen menus page 27 up down arrows navigates to and adjusts settings in the menus page 27 select confirms choices made in the menus page 2...

Страница 24: ...jector s menu system Use the arrow buttons to navigate and the Select button to select features and adjust values in the menus The remote also has a power button to turn the projector on and off volum...

Страница 25: ...ed to the corresponding audio in for your source By default Audio 1 corresponds to Computer 2 Audio 2 cor responds to Computer 3 Audio 3 corresponds to Video 2 and 3 and Audio 4 corresponds to Video 1...

Страница 26: ...n features Several features are provided to make giving presentation easier The fol lowing is an overview details are found in the menu section on page 27 The Custom key available on several optional...

Страница 27: ...dually adjust the intensity of the red green and blue color See page 29 Customizing the projector You can customize the projector for your specific setup and needs See page 31 to page 34 for details o...

Страница 28: ...ous menu press the Menu button at any time to close the menus Dots appear before the menu name The number of dots indicate the menu s level ranging from one the Main menu to five the most nested menus...

Страница 29: ...e and changes the amount of black and white in the image Brightness changes the intensity of the image Color Computer 1 and video sources only adjusts a video image from black and white to fully satur...

Страница 30: ...ettings choose Factory Reset in the Set tings Service menu Advanced settings Sharpness changes the clarity of the edges of a video image Select a sharp ness setting Color Space This option applies to...

Страница 31: ...ge is dark which improves black levels In Presentation mode it looks at peak brightness in Theater mode it looks at average brightness Overscan Computer 1 and video sources only removes noise around t...

Страница 32: ...rses the image so you can project from behind a translucent screen Ceiling turns the image upside down for ceiling mounted projection WARNING To prevent eye injury if the projector is ceiling mounted...

Страница 33: ...White or Blue screen instead of the default screen when no source is detected at startup It also allows you to capture and display a custom startup screen To capture a custom logo display the image y...

Страница 34: ...ice Info displays the Service Info menu Network The projector has an RJ45 Ethernet connector that supports net work connections and TCP IP protocols This will allow for the control and management of t...

Страница 35: ...confirmation dia log box Reset Filter Hours resets the filter counter in the Service Info menu to zero Do this only after cleaning the filter It displays a confirmation dialog box Lens Type change th...

Страница 36: ...Visit our website for complete details on using the networking functionality 1 Turn off the projector and unplug the power cable 2 Wait 45 minutes to allow the projector to cool thoroughly 3 Turn the...

Страница 37: ...ool for at least 45 minutes before you replace the lamp Only genuine InFocus lamps are tested with this projector Use of other lamps may cause electrical shock and fire To prevent eye injury if the pr...

Страница 38: ...ew lamp module making sure that it is properly seated and tighten the three captive screws 7 Replace the cover over the lamp module by sliding it back into place and tightening the screw 8 Plug in the...

Страница 39: ...using a vacuum set on low power Replace the filter if it is damaged or too dirty to clean 6 Replace the dust filter and the bracket on the cover then replace the dust filter cover 7 Reset the filter h...

Страница 40: ...ect areas your retailer or your dealer Table 3 Projection sizes Short Fixed lens 0 8 1 throw ratio Minimum Image Maximum Image Distance feet m Diagonal Image feet m Image Width feet m Diagonal Image f...

Страница 41: ...57 4 0 120 3 118 3 0 189 4 8 150 3 8 150 3 8 240 6 1 200 5 1 197 5 0 319 8 1 250 6 4 248 6 3 402 10 2 300 7 6 299 7 6 480 12 2 350 8 9 350 8 9 559 14 2 Projection Distance inch m Screen Size inch m Mi...

Страница 42: ...n Size inch m Minimum Maximum 40 1 122 3 1 236 6 0 60 1 5 189 4 8 354 9 0 70 1 8 220 5 6 513 10 5 100 2 5 315 8 0 594 15 1 120 3 382 9 7 717 18 2 150 3 8 476 12 1 898 22 8 200 5 1 638 16 2 1197 30 4 2...

Страница 43: ...ing for example A write request example AAA where starts the command AAA denotes the command denotes the value to be written leading zeros not necessary ends the command Some commands have ranges whil...

Страница 44: ...fers to increasing or decreasing the menu bar position since the On screen Display is not an exact match of values For example Step 2 changes the data by 2 through the CLI Command Line Interface The m...

Страница 45: ...Contrast CON at RW 96 160 128 1 Custom Key Effect 0 blank 1 mute 2 aspect ratio 3 source 4 auto image 5 freeze 6 zoom 7 Source Info 8 Service Info 15 AV Mute EFK at RW 0 15 7 Display Messages 0 disab...

Страница 46: ...p Hours LMP at R 0 32766 0 1 Lamp Lit 0 not lit 1 lit LML at R 0 1 Reset Lamp Hours 0 not reset 1 reset LRT at W 0 1 n a Number of Lamp Resets LMR at R 0 32766 0 Lamp Total On Time All Bulbs LMT at R...

Страница 47: ...WR at RW 0 1 0 Power Save 0 disable 1 enable PSV at RW 0 1 0 Power up Source 0 computer 1 1 computer 2 2 computer 3 3 video 1 4 video 2 5 video 3 DSC at RW 0 5 1 Presets 0 user 1 1 user 2 2 user 3 3 P...

Страница 48: ...uter 3 3 video 1 4 video 2 5 video 3 SR1 at RW Source 2 SR2 Source 3 SR3 Source 4 SR4 0 5 0 1 3 4 Audio for Source 0 0 audio 1 1 audio 2 2 audio 3 3 audio 4 4 HDMI Internal 5 mute SA0 at RW 0 5 4 Audi...

Страница 49: ...48 Vertical Position VPS at RW if def 128 0 else def 128 def 128 auto 1 Video Standard 0 Auto 1 NTSC 2 PAL 3 SECAM VSU at RW 0 3 0 Volume VOL at RW 0 32 16 1...

Страница 50: ...custom logo startup screen 32 customer service contact information 21 D Default gateway 33 DHCP 33 Display Messages 31 displaying computer image 10 video images 13 dust filter cleaning 38 E elevator f...

Страница 51: ...p 7 shutdown 15 troubleshooting problems 15 R Rear 31 remote control 23 replacing the clock batteries 35 replacing the lamp 36 Reset Filter Hours 34 resetting lamp hours 37 RS 232 cable 9 connecting 6...

Отзывы: