background image

4

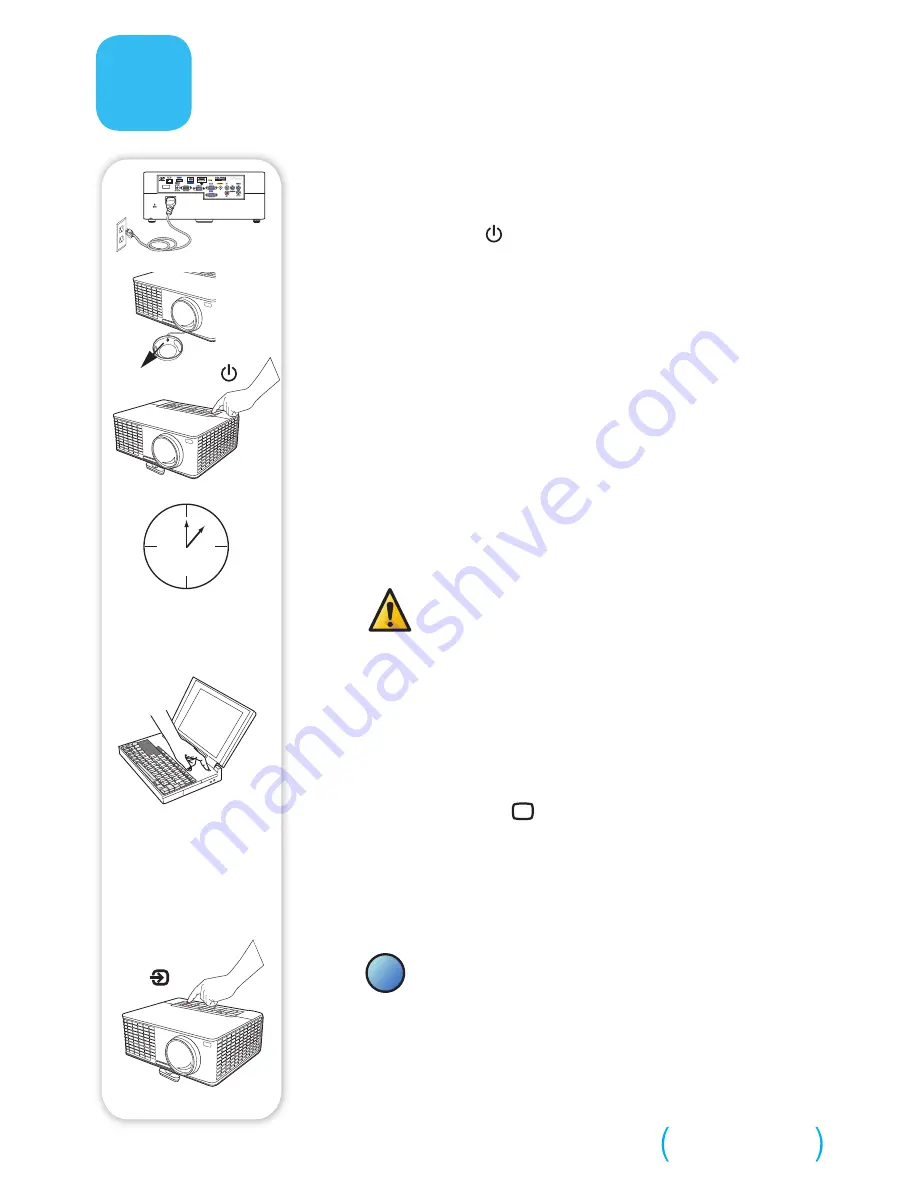
Turn on projector and source

1


 Connect the power cord to the projector 

and to an electrical outlet

The power light    on the projector will light amber.

2

   Remove the lens cap

3

   Turn on the projector

Touch the power light (or press power on the remote).
The power light will start blinking green.

4

   Wait for the lamp to warm up

After a few seconds, the power light will stop blinking, and 
the other buttons on the keypad will light up. It can take a 
minute for the lamp to reach full brightness.

Warning:


Do not look directly into the lens while 

the projector is being used.

5

  Turn on computer or other source

If your computer is connected to the USB Display connector, 
follow the instructions on your computer's screen. Otherwise, 
you may need to press a specific key combination to activate 
your laptop's external video port. On most laptops, hold 
down the FN key while pressing a key labeled CRT/LCD, LCD/
VGA, a monitor icon 

 , or similar. Key combos for popular 

models:

Apple F7                     HP/Compaq Fn+F4 or Fn+F6 

Sony Fn+F7        

Dell Fn+F8                 IBM ThinkPad Fn+F7      

Toshiba Fn+F5

Fujitsu Fn+F10      

Complete laptop activation chart at www.infocus.com/support

Important: 

If there is still no video, restart your 

computer (first make sure it's connected to the 
projector and the projector is turned on).

6

   Change source if needed

If needed, press 

source

 (on the projector or remote) and the 

select button to choose a different source. 

 TURN OVER

i

5-10 sec.

USB A

USB mini B

source

Содержание AA00019

Страница 1: ...Guide English For other languages see booklet Fran ais voir la brochure Deutsch siehe Brosch re Espa ol ver folleto Italiano vedi opuscolo Nederlands zie boekje Portugu s consulte livreto Svenska se h...

Страница 2: ...nner Buy a Full Featured Remote and Other Custom Accessories www infocus com store The top of your projector includes a convenient indicator panel with symbols that light up to show important status F...

Страница 3: ...VD VCR Also for game console cable box HDTV Receiver Better RCA Audio Cable HDMI Cable IN3916 only Best USB A USB mini B Computer Computer Cable included Connect to Computer using VGA OR OR Composite...

Страница 4: ...er is connected to the USB Display connector follow the instructions on your computer s screen Otherwise you may need to press a specific key combination to activate your laptop s external video port...

Страница 5: ...o review settings 3 Press select to change a setting If this shows more choices press or to update the setting then press select or menu to save it 4 Press menu to go back Press it again to remove the...

Страница 6: ...ceable Always use the included USB cable and power adapter or your computer to charge the wand Turn off the projector Download it at www infocus com support The Reference Guide is available in multipl...

Страница 7: ...lace lamp light is on Turn the projector off and wait at least one minute then turn it on again If the replace lamp light turns on again the lamp needs to be replaced For lamp replacement instructions...

Страница 8: ...ries NOTE This product is covered electrical and electronic equipment under the European Union s Waste from Electrical and Electronic Equipment WEEE Directive 2002 96 EC The WEEE Directive requires th...

Отзывы: