


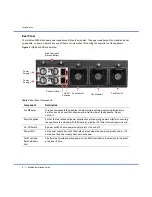

Installing an Appliance
12
Infoblox Installation Guide
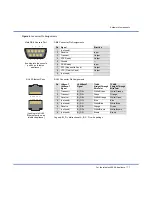
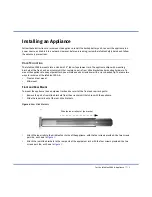
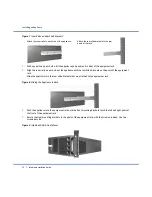
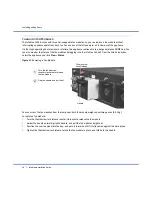
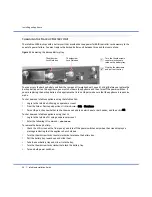
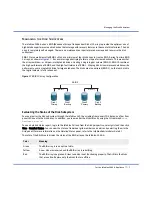
Figure 7
Inner Rail and Rear Slide Brackets
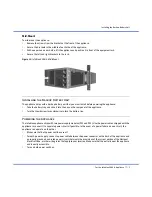
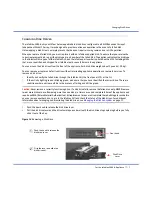
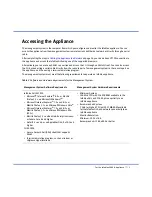
5.
With one person on each side, lift the appliance and position it in front of the equipment rack.
6.
Align the inner rails on each side of the appliance with the rear slide brackets on the posts of the equipment
rack.
7.
Slide the appliance into the rear slide brackets that are attached to the equipment rack.
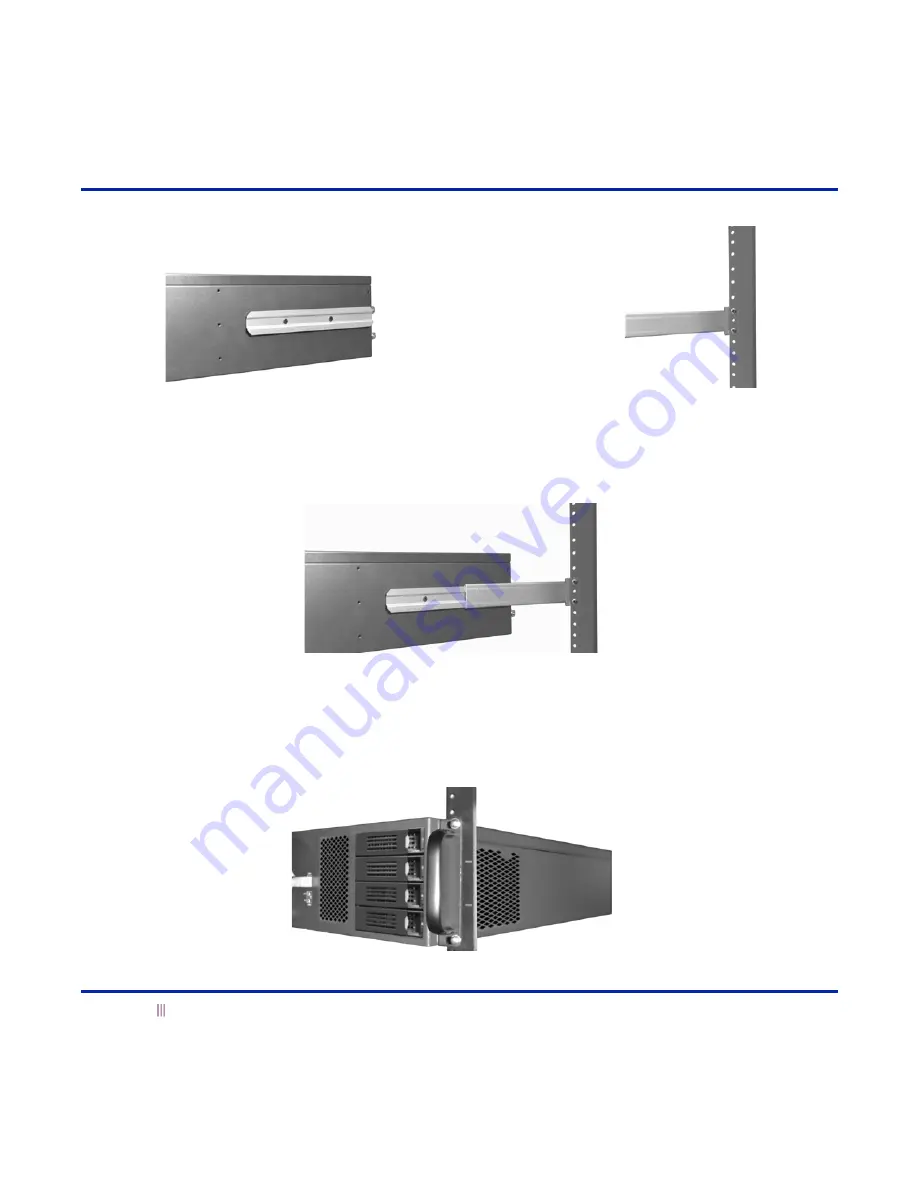
Figure 8
Sliding the Appliance in Rack
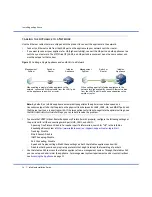
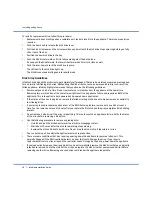
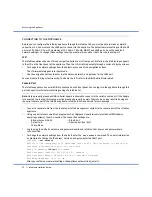
8.
Push the appliance in to the equipment rack until the front mounting brackets touch the left and right posts at
the front of the equipment rack.
9.
Secure the front mounting brackets to the posts of the equipment rack, with the screws provided. Use two
screws per side.
Figure 9
Infoblox-2000-A Front Mount
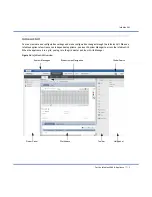
Attach the inner rails to each side of the appliance.
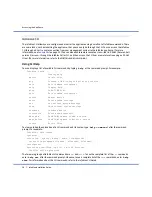
Attach the rear slide brackets to the rear
posts of the rack.


