l
During recording, short press the
Down/Photo
button (3) to take
a photo also.
l
Stop the video recording by pressing and holding down the
Down/Photo
button (3).
l
Video and picture files are stored in the built-in memory card after
video recording has been turned off.
Memory Access
When the device is turned on and connected to a computer, it is
recognized by the computer as a flash memory card, which is used
to access the device's memory and make copies of pictures and
videos.
l
Turn on the device and connect it to the computer through the
USB cable.
l
Double-click "my computer" on the desktop - double-click to
open the device named "Infiray" - then click and open the
device named "Internal Storage" to access
memory.
l
There are different folders named by time in memory .
l
Recorded videos and photographs are saved in these folders in
the format: IMG_HHMMSS_XXX. jpg (for photos) and
VID_HHMMSS_XXX.mp4 (for video). HHMMSS- hour/minute/
second; XXX - three-digit common file counter (for photos and
videos) which is NOT reset.
Note
Ø
You can enter and work on the menu during video recording.
Ø
The recording time is accumulated in minutes until the
recording stops, that is, the time shows 60:00 after 59:59.
Ø
The maximum duration of a video recording file is 10 minutes.
When itʼs more than 10 minutes, the video will be recorded onto
a new file.
Ø
The number of files is limited by the capacity of the device's
built-in memory. Regularly monitor the amount of free memory
in the built-in memory card, transferring footage and photos to
other media to free up space on the memory card.
12
13
LASER AND LASER RANGEFINDER FUNCTION
(Only for
FL25R/ FH25R)
FL25R/FH25R is built-in laser function for laser indication and laser
rangefinder.
Laser Indication Function
l
Turn the laser indicator (13) on with a long press of the
Up/Ranging
button (4) in the home screen.
l
And a red laser cursor appears synchronously on the
screen to indicate the position indicated by the laser.
l
Long press the
Up/Ranging
button (4) again or short press the
Power
button (6) to turn off the laser indication function.
Laser Rangefinder Function
l
Short press the
Up/Ranging
button (4) to switch on the laser
rangefinder function in the home screen.
l
The laser cursor opens automatically, and the tooltip at
the bottom of the screen displays the current ranging mode and
the distance of the target indicated by the cursor.
l
There are two kinds of ranging modes: single ranging and
continuous ranging . Press and hold the
Up/Ranging
button
(4) to switch between the two modes.
l
In the single ranging mode, short press the
Up/Ranging
button
(4) is required for ranging.
l
In the continuous ranging mode, the distance of the target
indicated by the cursor will be refreshed automatically every 1
second, without any keystroke operation.
l
The measurement range and accuracy is 600m±1m, and it will
be affected by fog and heavy rain and other weather.
l
After the measurement is completed, short press the
Power
button (6) to exit the laser rangefinder function.
Note
«
The laser function depends on the legal restrictions of
different countries and regions.
Ø
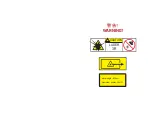
As with any laser device, it is not recommended to directly view
the emissions for long periods of time with magnified lenses.
Ø
The laser will be off automatically while in the standby mode.
239m


