18
QQ5 Plus
Scheduler Operations
NOTE:
User needs to correctly set up all the Hour, Min and Day of week
values on the scheduler for it to work. CleanMate will not start the cleaning
by itself in case scheduler setting is not complete.
Step 4.
After you properly set up the clock and scheduler, the LCD display
will return to normal display mode that shows both clock and scheduled day
of week value(s).
Auto Cleaning Function:
Press “Start” button on charging base once, and the CleanMate QQ5 unit will
automatically start cleaning once its battery is fully charged on the charging
base.
When CleanMate unit is being charged on the base, if user presses “Start” on
charging base and hold it for more than 3 sec., CleanMate will leave the base
and begin cleaning immediately.
When CleanMate unit is being charged on the base, user can always presses
the “Start” button on remote control to let CleanMate leave the base and
begin cleaning immediately (even when the battery is not fully charged).
Other Display Icons on LCD :
1. When you push "Start" button (just once), the"Auto" icon will appear on
the LCD.
2. After CleanMate QQ5 is fully charged, the battery "Full" icon will appear
on LCD.
QQ5 Plus
Installing Accessories
1
2
White
Black
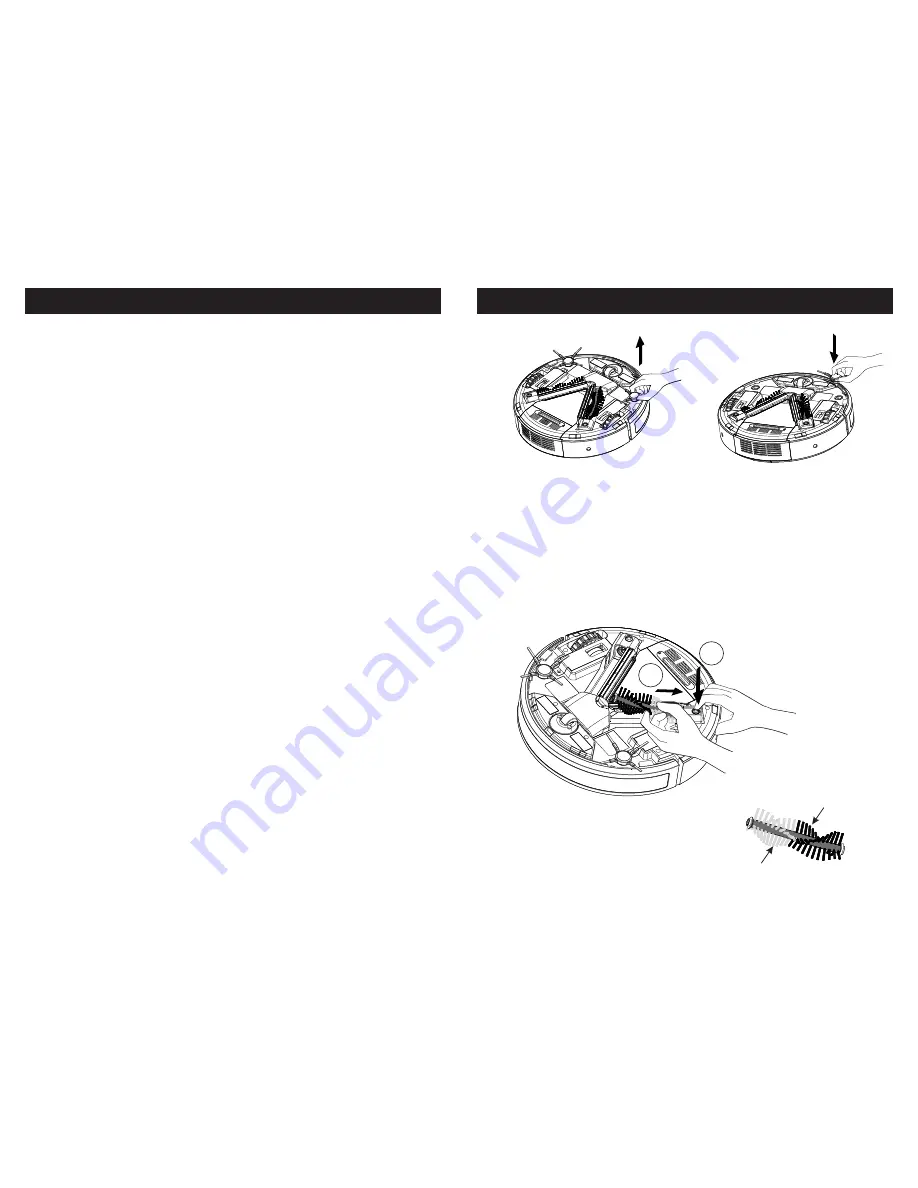
Side Brush Installation and Removal
19
To remove the side
brush, firmly hold its
base and pull the brush
out.
To install the side brush,
push it down to mounting
hole until it clicks.
Roller Brush Installation and Removal
To remove roller brush
, press and hold the roller brush button
(one in white, and other other in black) with one hand, pull the
brush back a little forwarding the brush button. Then, lift the
other end of roller brush up and remove the brush.
Please note that half of roller
brush is in white, and the other
half in black.


