Application Note
27 of 45
001-84858 Rev. *N
2021-03-23
PSoC 4 Programming Using an External Microcontroller (HSSP)
Testing the Example Projects
3.
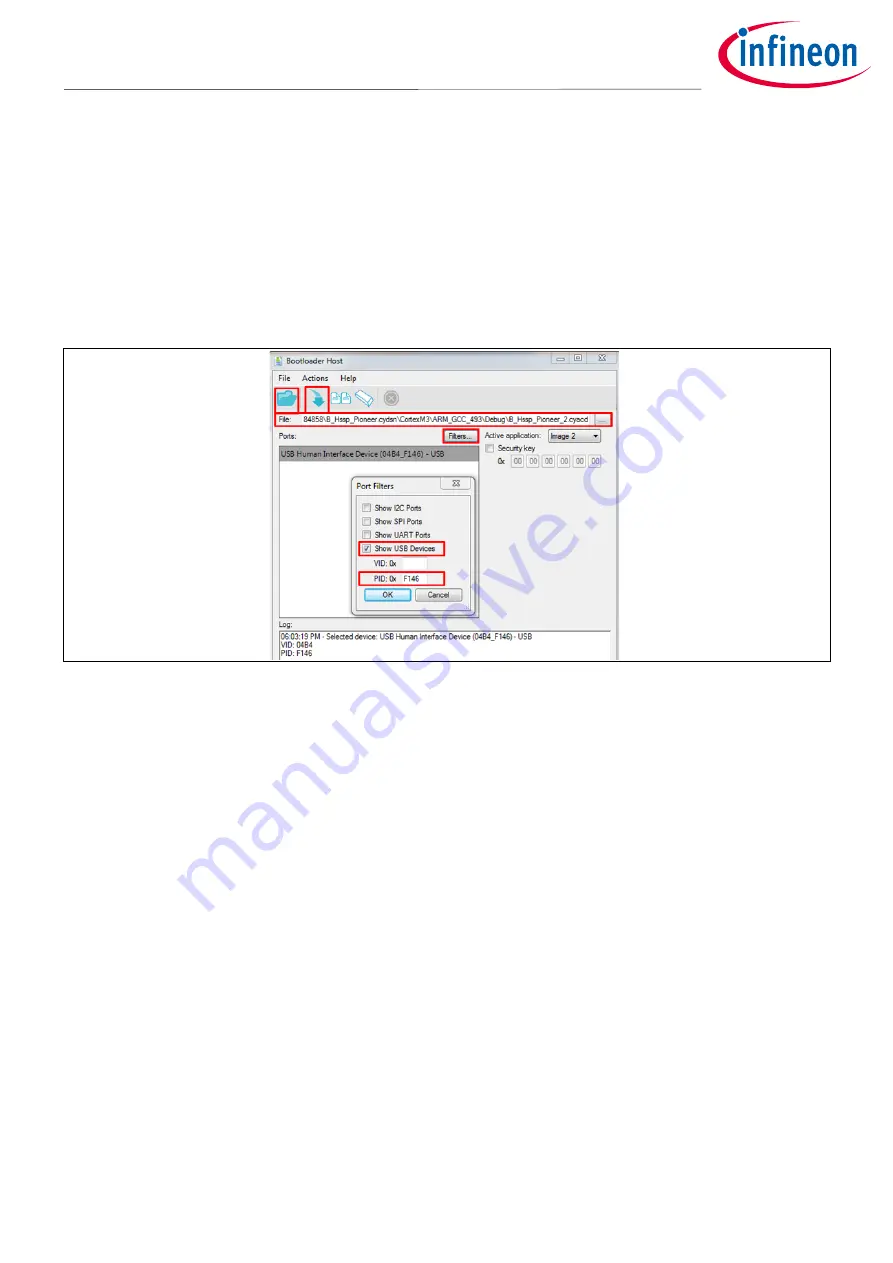
Bootload the HSSP project to PSoC 5LP:
a)
Open the bootloader host tool. Choose
Tools
>
Bootloader Host
in PSoC Creator.
b)
Click on the Filter button, and then click on the
Show USB Device
’ checkbox.
c)
Enter ‘0XF146’ in the PID field.
d)
PSoC 5LP bootloader is listed as USB Human Interface Device in the Port list.
e)
Click
Open
the GUI and select the
B_Hssp_Pioneer.cyacd
file from the following path:
..\ AN84858 \ B_Hssp_Pioneer.cydsn \ CortexM3 \ARM_GCC_441 \Debug \B_Hssp_Pioneer_2.cyacd
f)
Click
Program
to bootload the file to PSoC 5LP.
Figure 12
Bootloader Host Application
4.
Install the USBUART driver for the kit:
a)
Unplug and reconnect the USB cable.
b)
If Windows fails to install the USBUART drivers do the following:
a.
Open
Device Manager
. Make sure
USBUART
is present in the
Other devices
list.
b.
Double-click the USBUART entry to open its properties.
c.
Click
Update Driver
.
d.
Select the
Browse my computer for driver software
option.
e.
Navigate to the location where you saved the project attached with this application note, and
select the driver in the
USBUART driver
folder.
f.
Click
Next
. Windows generates a warning because the driver files are not signed. Ignore the
warning and proceed. Now the USBUART driver is installed on your machine
5.
Use HyperTerminal to start HSSP programming:
a)
Open HyperTerminal on your computer. If you do not have it, download any terminal application for
serial communication from the Internet.
b)
In the UART configuration window, set the baud rate at 9600, data bits as 8, stop bits as 1, parity as No
Parity, and Hardware Control as None.
c)
Press any alphanumeric button on the keyboard to start programming. If the operation is successful, the
terminal shows “HSSP Success”.


