10
Underwater CCTV Camera Manual
Web browser access
①
②
③
IP address change
①
②
③
NETWORK setting
After sufficiently checking the IP-related information that can be checked in
‘Checking the packing box’ on page 10, proceed to the following.
①
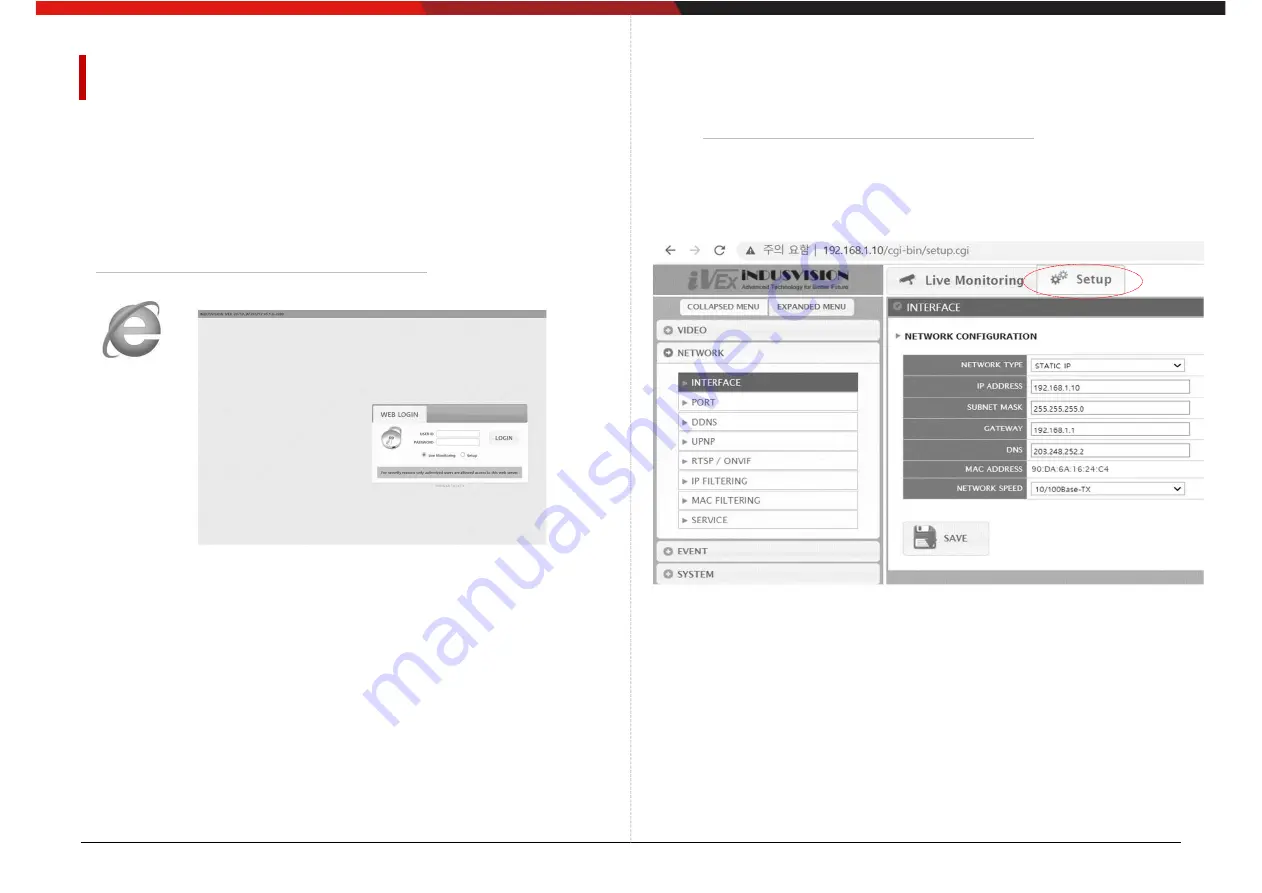
Enter the IP address in the address bar of Internet Explorer.
- The IP address is ‘Check the box’
②
When the web page shown in the picture above appears,
enter your ID and PW, and click the OK button.
③
If you log in successfully, you will be directed to the
Live Monitoring page.
•
Click the Setup item at the top of the Live Monitoring screen.
•
Click INTERFACE in the NETWORK category
→ move to IP Address
•
When selecting STATIC IP in IP setting, all settings except DNS
must be entered in the setting window as shown in the figure
above.
•
At this time, the gateway of the PC to which the router and web
viewer are to be connected,It must match the camera.
•
The IP address must also match the camera with all numbers
except for the 4th digit address, such as 192.168.1.X.
•
After all the settings are completed, it takes about 3~4 seconds for
the SAVE click settings to be applied.
•
When selecting DHCP in NETWORK TYPE, the above IP setting
is not required.


