11
Bulk Write
Enter identifier data for multiple iAssign tags (or cards) and upload
that data as a single file. You can then program the data to a series
of tags or cards.
1.
Create a bulk entry file containing a series of identifier entries
using word processing or spreadsheet software.
2.
Use the following format for entries in the file:
Field_name1:Entry1#Field_name2:Entry2#Field_name3:Entry3#
•
Each field name is
followed by a “:”
(colon)
•
Each entry by a “#”
(number sign)
•
Identifiers for user and site name are limited to 16
characters, including spaces.
Do not exceed this limit!
For Example:
•
User:Joe#Site:BuildingA#EquipGrp:Testing#Access:1#
•
User:MSmith#Site:Shed5#EquipGrp:Dev#Access:8#
Important:
Each line in the file is treated as a separate tag (or card).
Once bulk writing begins, the app will repeatedly prompt you to touch a
tag (or card)
to the device’s NFC target until each entry has been
written to a separate tag or card.
3.
Copy the bulk entry text to the smart phone
’s
clipboard.
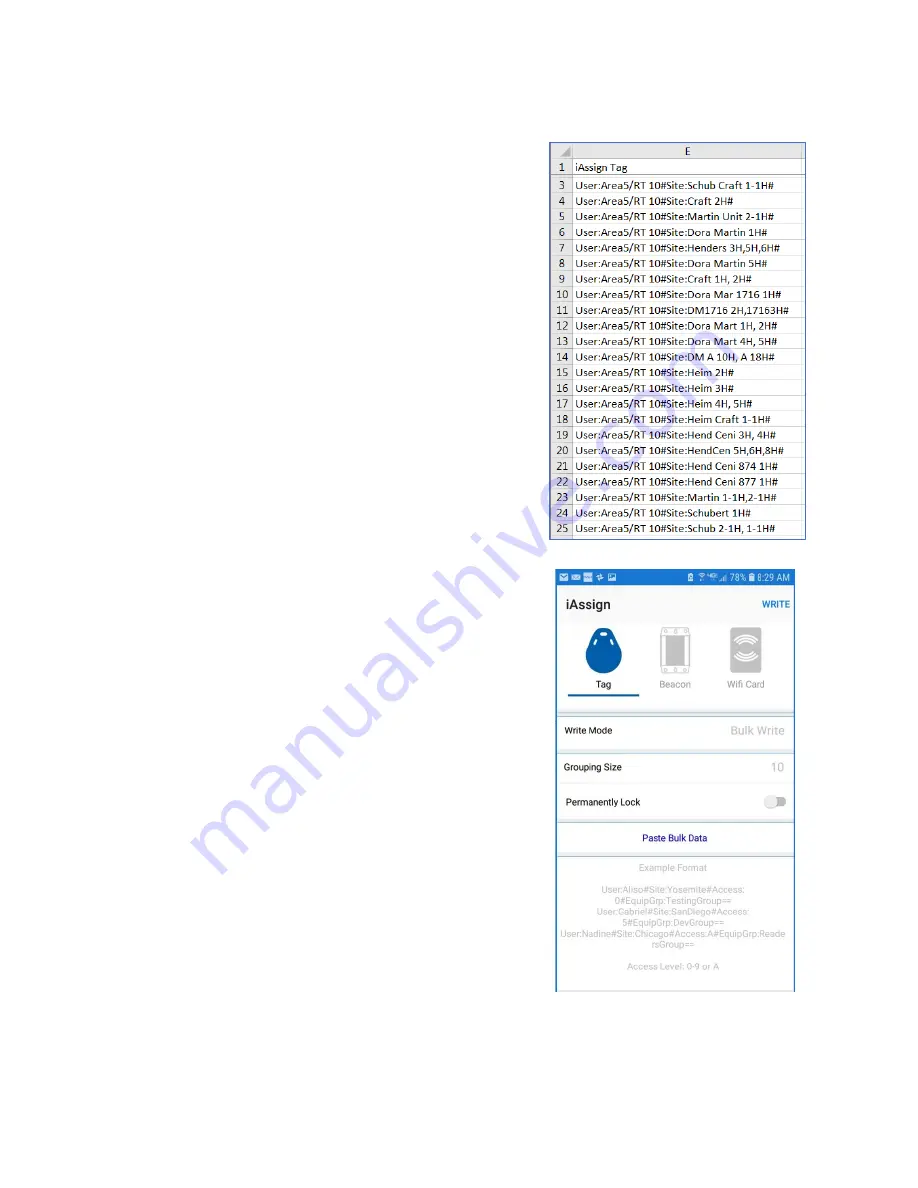
Example Bulk Entry File
Writing the bulk entries to tags
1.
Launch the iAssign app.
2.
Tap
Write Mode
and select
Bulk Write
.
3.
Tap
Grouping Size
and select from 5, 10, 15, 20, 30, 50, or
100 to set the number of tags (or cards) you will be
programming.
4.
Tap the
Permanently Lock
slider control to permanently lock
all the tags you are bulk writing.
Note:
Permanently locking tags (or cards) will
prevent
them from
subsequently accepting new identifiers.
5.
Tap
Paste Bulk Data
–
The text copied to the Smart phone
’s
clipboard will be pasted to a bulk entry file.
Note:
Be sure to have a sufficient quantity of tags (or cards) on hand
to match the number of entries in bulk entry file.
6.
You will be repeatedly prompted to touch iAssign tags (or
cards) to the NFC target on your smart phone.
7.
The bulk write process will continue until the app attempts to
write each entry in the bulk entry file to a separate iAssign tag
(or card).
Содержание iAssign
Страница 4: ......


