10
Write a tag
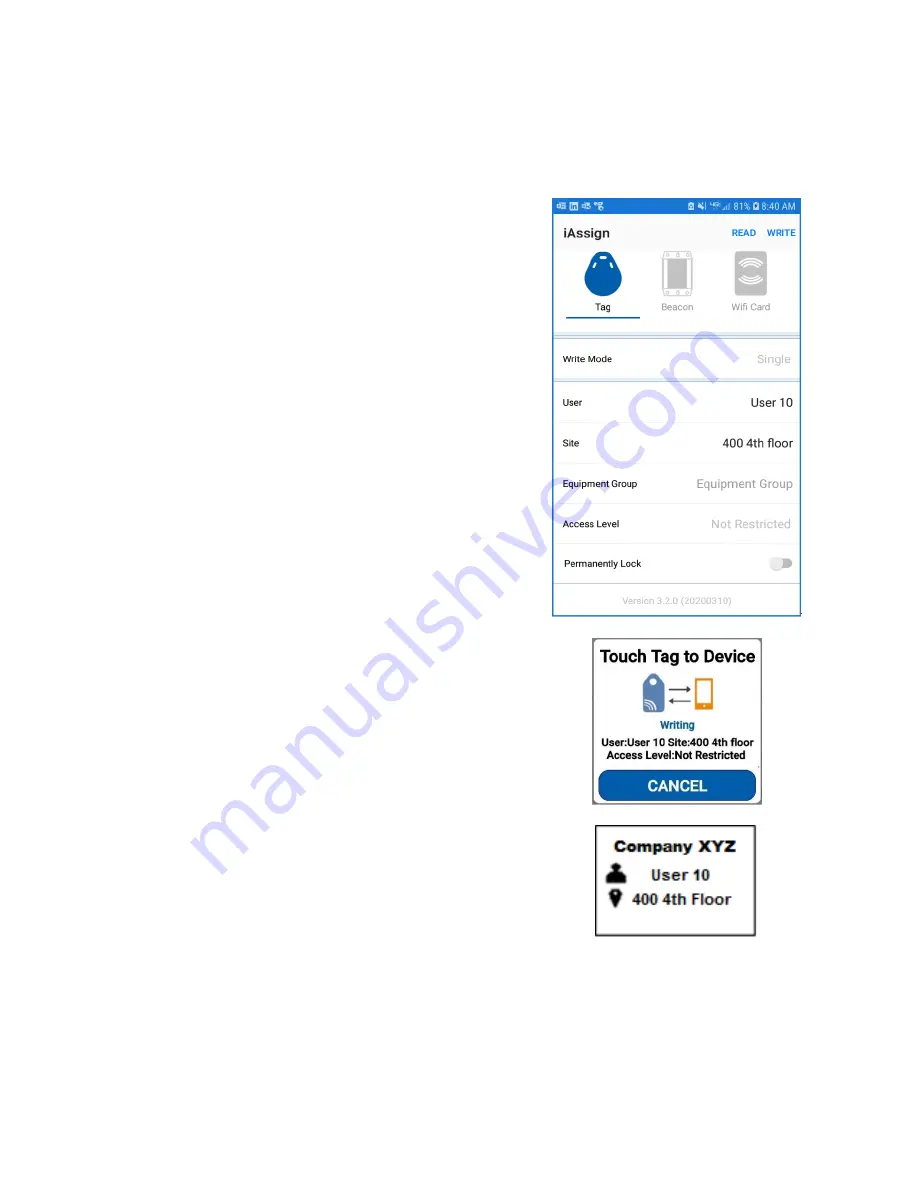
Write data to a single iAssign tag (or card) using your smart phone. Tap the programmed tag or card to an iAssign-
compatible instrument to update its user, site, equipment group, or access level.
Programming a tag
1.
Enter values for the following identifiers
a
, as needed:
•
User (Jon Smith, Mary Jones, etc.)
–
up to 16 characters
•
Site (Silo 1, Building 3, Shed 8, etc.)
–
up to 16 characters
•
Equipment Group
b
(Control Room, Maintenance, Electrical,
etc.)
–
up to 48 characters.
2.
If needed, select a value for Access Level: Not Restricted, Least
Restricted, Level 2 through Level 9, or Most Restricted.
3.
Tap the Permanently Lock
c
slider control to lock the entered or
selected identifiers to a tag (or card), if desired.
4.
Tap
WRITE
at the top of the Home screen -
The “Touch Tag to
Device” prompt displays
.
Note:
On iOS devices the prompt message is “Ready to Scan”.
5.
The prompt (shown, lower right) now displays the identifiers you
are writing to the tag or card.
6.
Touch an iAssign tag (or card) that you want to program to the
phone’s NFC target.
Notes:
a
When updating identifiers, values left unchanged in the app will leave
corresponding identifier values unchanged.
b
The instrument’s Equipment Group in iNet. If changed, on the next
docking the instrument will be automatically moved to the new group.
c
Permanently locking a tag or card will prevent it from subsequently
accepting new identifiers.
Assigning identifiers to an instrument
1.
Touch the iAssign tag (or card) programmed with identifiers to the
instrument’s NFC target –
See Figure 1.
Note:
If the Ventis Pro does not respond to the tag or card, ensure that
the NFC setting is enabled. See Table 6 for more information.
2.
The identifiers written (above) will update values on the
instrument
and display the values on the Ventis Pro’s screen.
Содержание iAssign
Страница 4: ......


