background image

GB

• Do not position
blinds behind the
cooker or less than 200
mm away from its
sides.
• Any hoods must be
installed according to
the instructions listed in
the relevant operating
manual.

Levelling

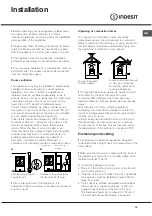
If it is necessary to level the
appliance, screw the
adjustable feet into the places
provided on each corner of the
base of the cooker (

see

figure).

The legs* fit into the slots on
the underside of the base of
the cooker.

Electrical connection

Install a standardised plug corresponding to the
load indicated on the appliance data plate (

see

Technical data table).
The appliance must be directly connected to the mains
using an omnipolar circuit-breaker with a minimum
contact opening of 3 mm installed between the
appliance and the mains. The circuit-breaker must be
suitable for the charge indicated and must comply with
NFC 15-100 regulations (the earthing wire must not be
interrupted by the circuit-breaker). The supply cable
must be positioned so that it does not come into
contact with temperatures higher than 50°C at any point.

Before connecting the appliance to the power
supply, make sure that:
• The appliance is earthed and the plug is compliant

with the law.

• The socket can withstand the maximum power of

the appliance, which is indicated by the data plate.

• The voltage is in the range between the values

indicated on the data plate.

• The socket is compatible with the plug of the

appliance. If the socket is incompatible with the
plug, ask an authorised technician to replace it.
Do not use extension cords or multiple sockets.

HOOD

420

Min.

min. 

650

 mm. with hood

min. 

700

 mm. without hood

mm.

600

Min.

mm.

420

Min.

mm.

* Only available in certain models

!

 Once the appliance has been installed, the power

supply cable and the electrical socket must be
easily accessible.

!

 The cable must not be bent or compressed.

The cable must be checked regularly and replaced

by authorised technicians only.

!


The manufacturer declines any liability should

these safety measures not be observed.

Gas connection

Connection to the gas network or to the gas cylinder
may be carried out using a flexible rubber or steel
hose, in accordance with current national legislation
and after making sure that the appliance is suited to
the type of gas with which it will be supplied (see the
rating sticker on the cover:  if this is not the case 

see

below). When using liquid gas from a cylinder, install a
pressure regulator which complies with current national
regulations. To make connection easier, the gas
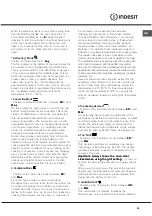
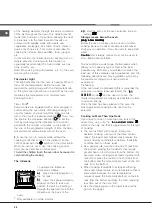
supply may be turned sideways*: reverse the position
of the hose holder with that of the cap and replace the
gasket that is supplied with the appliance.

!

 Check that the pressure of the gas supply is

consistent with the values indicated in the Table of
burner and nozzle specifications (

see below). This

will ensure the safe operation and durability of your
appliance while maintaining efficient energy
consumption.

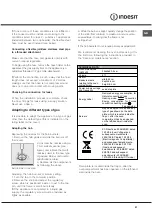
Gas connection using a flexible rubber hose

Make sure that the hose complies with current
national legislation. The internal diameter of the hose
must measure: 8 mm for liquid gas supply; 13 mm
for methane gas supply.

Once the connection has been performed, make
sure that the hose:
• Does not come into contact with any parts that

reach temperatures of over 50°C.

• Is not subject to any pulling or twisting forces and

that it is not kinked or bent.

• Does not come into contact with blades, sharp

corners or moving parts and that it is not
compressed.

• Is easy to inspect along its whole length so that

its condition may be checked.

• Is shorter than 1500 mm.
• Fits firmly into place at both ends, where it will be

fixed using clamps that comply with current
regulations.

20

Содержание KN6G527S/RU S

Страница 1: ...сплуатация духового шкафа Tаимер Таблица приготовления в духовом шкафу Предосторожности и рекомендации 14 Общие требования к безопасности Утилизация Экономия электроэнергии и охрана окружающеи среды Техническое обслуживание и уход 15 16 Отключение электропитания Чистка изделия Уход за рукоятками газовои варочнои панели Порядок замены лампочки в духовом шкафу Техническое обслуживание Руководство по...

Страница 2: ...ожет привести к пожару НИКОГДА не пытайтесь погасить пламя пожар водой Прежде всего выключите изделие и накройте пламя крышкой или огнеупорной тканью Не используйте абразивные вещества или режущие металлические скребки для чистки стеклянной дверцы духового шкафа так как они могут поцарапать поверхность что может привести к разбиванию стекла Внутренняя поверхность ящика если он имеется может сильно...

Страница 3: ...твляться через вытяжнои зонт соединенныи с эффективным дымоходом с натуральнои тягои или посредством электровентилятора которыи автоматически включается каждыи раз при включении изделия см рисунок Сжиженные натуральные газы тяжелее воздуха застиваются внизу по этои причине помещения для хранения баллонов с СНГ должны иметь внетиляционные отверстия у пола для вентиляции возможных утечек газа Баллон...

Страница 4: ...установлено таким образом чтобы электрическии кабель и электророзетка были легко доступны Электрическии кабель изделия не должен быть согнут или сжат Регулярно проверяите состояние кабеля электропитания и при необходимости поручаите его замену только уполномоченным техникам Фирма снимает с себя всякую ответственность в случае несоблюдения вышеописанных правил Подсоединение к газопроводу Подсоедине...

Страница 5: ...м повороте крана из положения максимального пламени в положение минимального пламени Конфорки варочнои панели не нуждаются в какои либо регуляции первичного воздуха Рекомендуем прочистить духовой шкаф перед началом его эксплуатации следуя инструкциям приведенным в параграфе Обслуживание и уход Изделие Комбинированная плита Торговая марка Торговый знак изготовителя Модель KN6G527S RUS Изготовитель ...

Страница 6: ...òîê ë æèêëåð 1 100 ïîòîê ë æèêëåð 1 100 ïîòîê ë Íîìè íàëüí Óìåíü øåííàÿ mm mm mm mm Áûñòðàÿ Áîëüøàÿ R 100 3 00 0 7 41 86 218 214 116 286 143 286 Ïîëóáûñòðàÿ Ñðåäíÿÿ SR 75 1 90 0 4 30 70 138 136 106 181 118 181 Äîáàâî íàÿ Ìàëàÿ A 55 1 00 0 4 30 50 73 71 79 95 80 95 Äàâëåíèå ãàçà Íîìèíàëüíîå mbar Ìèíèìàëüíîå mbar Ìàêñèìàëüíîå mbar 30 25 35 37 25 45 20 18 25 13 6 5 18 При 15 C и 1013 мбар сухой газ П...

Страница 7: ...RS Описание изделия Имеется только в некоторых моделях Панель управления Общии вид Крышка 7 ...

Страница 8: ...ие и эксплуатация Практические советы по эксплуатации газовых конфорок Для оптимальнои работы конфорок и для экономии газа следует использовать кухонную посуду с плоским дном с диаметром соответствующим конфорке и с крышкои Для определения типа конфорки смотрите рисунки в параграфе Характеристики конфорок и форсунок Эксплуатация духового шкафа При первом включении духового шкафа рекомендуем прокал...

Страница 9: ...ия фруктов и для тушения в специальных закрытых емостях для духовки В процессе приготовления блюд в статической духовке используйте только один уровень так как при одновременном использовании нескольких уровней получается плохое термораспределение Используя разные имеющиеся уровни можно распределить жар между верхней и нижней частью духового шкафа Если для приготовления какого либо блюда требуется...

Страница 10: ...ки и т д В особенности функция вентилированного гриля подходит для приготовления таких видов рыбы как филе чернии тунца рыбы меч фаршированных каракатиц и т д Вертел Для включения вертела выполните следующие операции a установите противень на 1 ый уровень b вставьте специальный держатель вертела на 3 ем уровне и вставьте вертел в специальное отверстие расположенное в задней стенке духовки c включи...

Страница 11: ...зовать функцию вентилированное которая позволяет достичь нужной температуры за короткий срок с сокращенным расходом электроэнергии Поместив выпечку в духовой шкаф можно переключить его на более подходящий режим приготовления Одновременное приготовление на нескольких уровнях При необходимости приготовления на двух уровнях следует использовать только режим вентилированный единственный дающий такую в...

Страница 12: ...тку термостата на требуемую температуру Оптимальный результат при использовании функции гриль получается когда решетка устанавливается на верхних уровнях смотреть таблицу приготовления после чего для сбора жира и во избежание образования дыма установить прилагающийся противень на самый нижний уровень Кондитерская выпечка При выпечке кондитерских изделий всегда следует помещать их в разогретую духо...

Страница 13: ...0 10 10 15 220 200 180 180 180 170 190 180 170 170 200 15 20 30 35 50 60 60 75 30 35 40 50 20 25 10 15 15 20 20 25 25 30 Forno Sopra Íàãðåâ ñâåðõó Äîâåäåíèå äîãîòîâíîñòè 3 4 15 220 Ãðèëü àìáàëà è êàðàêàòèöû àëüìàðû è êðåâåòêè íà øàìïóðàõ Ôèëå òðåñêè Îâîùè ãðèëü Òåëÿ èé áèôøòåêñ Îòáèâíûå Ãàìáóðãåð Ñêóìáðèÿ Ãîðÿ èå áóòåðáðîäû 1 1 1 1 1 1 1 1 Íîìåð 4 4 4 4 3 4 4 4 4 4 4 5 5 5 5 5 5 5 5 5 Ìàêñ Ìàêñ Ìà...

Страница 14: ...ли находились в положении и чтобы газовыи кран был перекрыт Не тяните за провод электропитания для отсоединения вилки изделия из электрическои розетки возьмитесь за вилкурукои Передначаломчисткиилитехническогообслуживания изделиявсегдавынимаитештепсельнуювилкуиз электророзетки Вслучаенеисправностикатегорическизапрещается открыватьвнутренниемеханизмыизделиясцелью самостоятельного ремонта Обратитесь...

Страница 15: ...риалыилиострые металлическиескребки которыемогутпоцарапатьповерхность иразбитьстекло Съемныедеталиможнолегковымытькаклюбуюдругуюпосуду такжевпосудомоечноимашине Надеталяхизнержавеющеисталимогутобразоватьсяпятна еслиони остаютсявтечениедлительноговременивконтактесводои повышенноижесткостиилисагрессивнымимоющимисредствами содержащимифосфор Послечисткирекомендуетсятщательно удалитьостаткимоющегосредс...

Страница 16: ...а Авторизованные сервисные центры Чтобы быть ближе к нашим потребителям мы создали широкую сервисную сеть особенностью которой является высокая подготовка профессионализм и честность сервисных мастеров На сегодняшний день она насчитывает около 350 сервисных центров на территории России и СНГ Их контакты Вы можете найти в сервисном сертификате и на сайте www indesit com в разделе Сервис Если вам на...

Страница 17: ...rol panel Start up and use 24 28 Using the hob Using the oven Electronic Timer Oven cooking advice table Precautions and tips 29 General safety Disposal Respecting and conserving the environment Maintenance and care 30 Switching the appliance off Cleaning the appliance Gas tap maintenance Replacing the oven light bulb Assistance Operating Instructions COOKER English 16 РУССКИЙ 1 RS GB KN6G527S RU ...

Страница 18: ...ended cooking on a hob with fat or oil can be dangerous and may result in fire NEVER try to extinguish a fire with water but switch off the appliance and then cover flame e g with a lid or a fire blanket WARNING Danger of fire do not store items on the cooking surfaces Do not use harsh abrasive cleaners or sharp metal scrapers to clean the oven door glass since they can scratch the surface which m...

Страница 19: ...d of any fans used Disposing of combustion fumes The disposal of combustion fumes should be guaranteed using a hood connected to a safe and efficient natural suction chimney or using an electric fan that begins to operate automatically every time the appliance is switched on see figure The liquefied petroleum gases are heavier than air and collect by the floor therefore all rooms containing LPG cy...

Страница 20: ...rical socket must be easily accessible The cable must not be bent or compressed The cable must be checked regularly and replaced by authorised technicians only The manufacturer declines any liability should these safety measures not be observed Gas connection Connection to the gas network or to the gas cylinder may be carried out using a flexible rubber or steel hose in accordance with current nat...

Страница 21: ...inimum setting 1 Turn the tap to the minimum position 2 Remove the knob and adjust the regulatory screw which is positioned inside or next to the tap pin until the flame is small but steady If the appliance is connected to a liquid gas supply the regulatory screw must be fastened as tightly as possible 3 While the burner is alight quickly change the position of the knob from minimum to maximum and...

Страница 22: ...of burner and nozzle specifications At 15 C and 1013 mbar dry gas Propane P C S 50 37 MJ Kg Butane P C S 49 47 MJ Kg Natural P C S 37 78 MJ m3 26 2 6 26 26 2 6 6 2 2 2 D 2 E E D E 2 6F 2 KN6G527S RU S S S R A 22 ...

Страница 23: ...GB Description of the appliance Only available in certain models Control panel Overall view 23 ...

Страница 24: ...in the Burner and nozzle specifications Using the oven The first time you use your appliance heat the empty oven with its door closed at its maximum temperature for at least half an hour Ensure that the room is well ventilated before switching the oven off and opening the oven door The appliance may emit a slightly unpleasant odour caused by protective substances used during the manufacturing proc...

Страница 25: ... of 2 rack levels can be used at the same time following the instructions in the section entitled Cooking On More Than One Rack This cooking mode is ideal for au gratin dishes or those which require an extended cooking time like lasagne macaroni bake chicken and roast potatoes etc Moreover the excellent heat distribution makes it possible to use lower temperatures when cooking roasts This results ...

Страница 26: ... knob on setting Storage recess below the oven only a few models only a few models only a few models only a few models only a few models Below the oven a recess can be used to contain cooking pans and cooker accessories Moreover during oven operation it may be used to keep food warm Caution Caution Caution Caution Caution this storage recess must not be used to store flammable materials The oven o...

Страница 27: ...emperatures simply by adjusting the thermostat knob to the desired temperature Therefore the best results when using the grill modes are obtained by placing the grid on the lower racks see cooking table then to prevent fat and grease from dripping onto the bottom of the oven and smoke from forming place a dripping pan on the 1st oven rack from the bottom Baking Cakes When baking cakes always place...

Страница 28: ... 3 15 10 10 10 10 10 10 10 10 10 15 220 200 180 180 180 170 190 180 170 170 200 15 20 30 35 50 60 60 75 30 35 40 50 20 25 10 15 15 20 20 25 25 30 To en Browning Good to perGect cooking 3 4 15 220 Grill Soles and cuttleGish SOuid and prawn kebabs Lod Gilet Qrilled Hegetables Real steak Lutlets Tamburgers Mackerels Toasted sandwiches 1 1 1 1 1 1 1 1 n U 4 4 4 4 3 4 4 4 4 4 4 5 5 5 5 5 5 5 5 5 Max Ma...

Страница 29: ...eaning or maintenance work without having disconnected the appliance from the electricity mains If the appliance breaks down under no circumstances should you attempt to repair the appliance yourself Repairs carried out by inexperienced persons may cause injury or further malfunctioning of the appliance Contact Assistance Do not rest heavy objects on the open oven door The appliance should not be ...

Страница 30: ... has been left on the surface for a long time or by aggressive detergents containing phosphorus After cleaning rinse well and dry thoroughly Any remaining drops of water should also be dried The cover If the cooker is fitted with a glass cover this cover should be cleaned using lukewarm water Do not use abrasive products It is possible to remove the cover in order to make cleaning the area behind ...

Страница 31: ...31 GB ...

Страница 32: ...32 GB XEROX FABRIANO 05 2012 195103739 00 ...

Отзывы: