background image


Inclarity Communications Ltd, Swallow Place, Oxford Circus, London, W1B 2AF 

United Kingdom


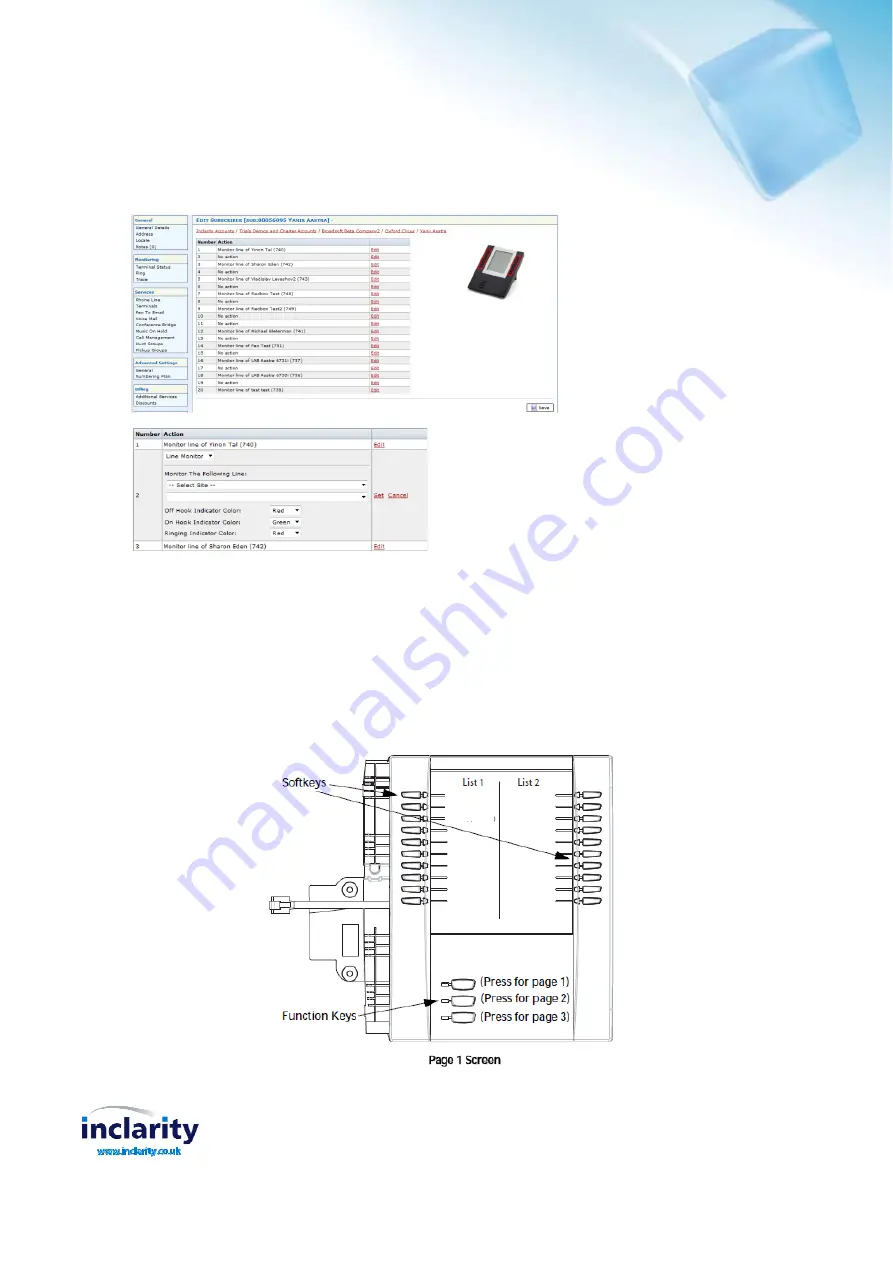
The following screen appears and it is then possible to add

 Line monitor 

buttons for each of the two available lists (List 

1 and List 2), using the standard button programming process. 

 
Note:

 List 1 includes button numbers 1 -10 and List 2 includes button numbers 11 -20. 


Using the Expansion Modules 
 

The M560 Expansion Module screen displays softkeys in column format. The function keys on the bottom left of the 
Module, allow you to display 3 full screens of softkeys. Each screen consists of 2 columns with the following default 
headings on each page: 
Page 1"List 1" and "List 2" 
Page 2"List 3" and "List 4" 
Page 3"List 5" and "List 6" 
 

Note:

 system support is available for the first page of 20 per module only (relating to Line Monitor button functionality). 

This applies to all three supported expansion modules. 


Содержание M560

Страница 1: ...d uses the LCD for displaying key labels Installing the Modules Use the following procedure to connect the M560 to your IP phone 1 Disconnect the phone from the LAN and if applicable the mains power Turn your phone over to show the bottom of the phone Remove the cable port cover plate as illustrated below 2 Turn the expansion module over to show the bottom of the module 3 Connect the RJ 45 cable t...

Страница 2: ...provides access to the following screen From here it is possible to add and remove expansion modules to the selected Aastra IP handset using the appropriate links and drop down option Click Set to define the required additional expansion module To define the Line Monitor buttons on the relevant module identified as x from the left click the Define buttons link from the options available This will ...

Страница 3: ...umbers 11 20 Using the Expansion Modules The M560 Expansion Module screen displays softkeys in column format The function keys on the bottom left of the Module allow you to display 3 full screens of softkeys Each screen consists of 2 columns with the following default headings on each page Page 1 List 1 and List 2 Page 2 List 3 and List 4 Page 3 List 5 and List 6 Note system support is available f...

Страница 4: ... the cursor to automatically advance to the next position To insert a space between letters press 4 To backspace and erase a mistake press the Backspace softkey Note The phone automatically uses an uppercase letter for the first letter of each word and a lowercase letter for all subsequent letters in the word If necessary use the ABC 4 softkey to specify uppercase letters or lowercase letters when...

Отзывы: