background image


70-M USER’S MANUAL           


      70-M V1.1 (05/07) 120009-0D.pdf      IKUSI se reserva el derecho de modificar esta información sin previo aviso.                                  

14


70-M V1.1 (05/07) 120009-0D.pdf     IKUSI reserves the right to modify this information without prior notification. 

 
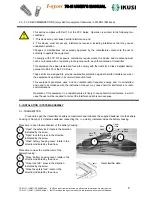
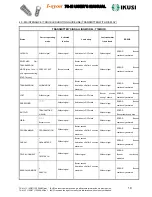
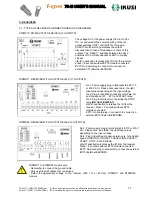
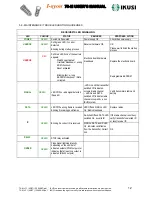
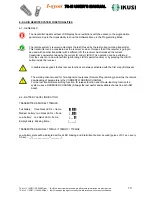
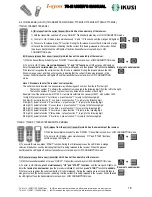
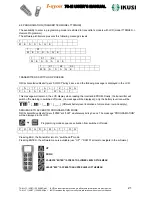
6.3.- BASE CHANNEL CHANGE (TRANSMITTER MODELS:T70MG10;T70MH3D;T70MH3;T70MH2)  


T70MG10 TRANSMITTER MODEL 

BASE CHANNEL CHANGE MODE (Press “5” and “10” functions 

simultaneously) -> Wait until the orange LED lights on continuously. 

3) The current base channel information is displayed: Number of red pulses  =  Number of units of the 

channel; Number of green pulses = Number in units of ten of the channel. 
4) Once the orange LED lights continuously, proceed to change the base channel 

Press function “1”, as many times as the number of units of ten of the new base channel. 

Note: To programme channels from 1 to 9, do not press this function  –equivalent to 0 value-- 


Press function “2”, as many times as the number of units of the new base channel. 

6) Updating and sending the new base channel data to the receiver (orange LED blinking). 

7) Once the new base channel is recorded in the receiver the transmitter switches to stand-by or LOW 

CONSUMPTION mode (Orange LED stops blinking ). 

5) To validate the new base channel, inmediately, press “10” function.  

Remark: If “10” function is not pressed inmediately, the new base channel is updated after a 

few seconds. 

The new updated base channel value will show with red and green 
LED pulses: 

Number of red pulses = Number of units of the channel. 

Number of green pulses = Number in units of ten of the channel.


2) Entering the base channel changing mode: 

1) With the transmitter switched off, press “ON/OFF”. Transmitter in stand-by or LOW CONSUMPTION mode. 

Note: Press “4” function to leave the process without updating the new base channel.  

The transmitter switches to stand-by or LOW CONSUMPTION mode. 


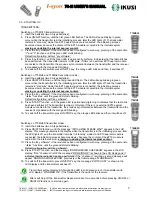
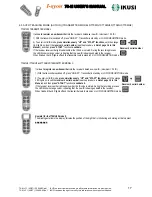
T70MH3 and T70MH2 TRANSMITTER MODELS 

BASE CHANNEL CHANGE MODE (Press “RIGHT” and “START” functions 

simultaneously) -> Wait until the orange LED lights continuously. 

3) The current base channel information is displayed: Number of red pulses  =  Number of units of the 

channel; Numberr of green pulses = Number in units of ten of the channel. 
4) Once the orange LED lights continuously, proceed to change the base channel 

Press function “DOWN”, as many times as the number of units of ten of the new base channel. 

Note: To programme channels from 1 to 9, do not press this function  –equivalent to 0 value-- 


Press function “UP”, as many times as the number of units of the new base channel. 

6) Updating and sending the new base channel data to the receiver (orange LED blinking). 

7) Once the new base channel is recorded in the receiver the transmitter switches to stand-by or LOW 

CONSUMPTION mode (Orange LED stops blinking ). 

5) To validate the new base channel, inmediately, press “START” function.  

Remark: If “START” function is not pressed inmediately, the new base channel is updated  

after a few seconds. 

The new updated base channel value will show with red and green LED pulses: 
Number of red pulses = Number of units of the channel. 

Number of green pulses = Number in units of ten of the channel.


2) Entering the base channel changing mode: 

1) With the transmitter switched off, press “ON/STOP”. Transmitter in stand-by or LOW CONSUMPTION 

Note: Press “ESC”->T70MH3 model or “RIGHT”->T70MH2 model function to leave 

 the process without updating the new base channel. The transmitter switches to stand-by  

or LOW CONSUMPTION mode.  


“ESC”

“RIGHT”

Содержание I-syon 70-M

Страница 1: ...ngel Iglesias 360 Herndon Parkway Model R70MR11 Suite 1400 Standards FCC 15 249 IC RSS 210 ID s PVT R70MR11 4166A R70MR11 Herndon VA 20170 http www rheintech com Report 2007256 Page 24 of 39 Appendix J Manual Please see the following pages ...

Страница 2: ...70 M ENGLISH ...
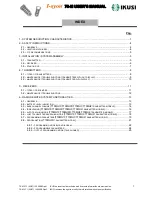
Страница 3: ...Y 9 4 3 MAINTENANCE TROUBLESHOOTING TRANSMITTER WITH DISPLAY 10 5 RECEIVERS 11 5 1 TYPES OF RECEIVERS 11 5 2 MAINTENANCE TROUBLESHOOTING 12 6 RADIO REMOTE SYSTEM FUNCTIONALITIES 13 6 1 GENERALS 13 6 2 BATTERY LEVEL INDICATION 13 6 3 BASE CHANNEL CHANGE T70MG10 T70MH3D T70MH3 T70MH2 TRANSMITTER MODELS 14 6 4 ID RELEASING T70MG10 T70MH3D T70MH3 T70MH2 TRANSMITTER MODELS 16 6 5 AUTO TEACHING MODE T70...

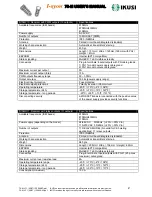
Страница 4: ...0mW 419MHz Modulation type FSK 4800 bps and 7 200 bps Protection IP65 NEMA 4 Channel bandwidth 25KHz Number of IDs 64K per band Response time 150ms Working channel selection Automatic at transmitters start up Display option Remote Programmer T70MH3D model 2 lines x 12 characters line icons Antenna Printed circuit board integrated standard Weight 180gr without batteries Dimensions Length 160mm Wide...

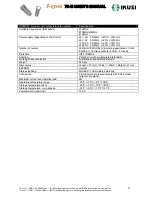
Страница 5: ...tected Electrical output protections Polarity inversion Short circuit Operating temperature 20ºC 70ºC 4ºF 158ºF Storage temperature 24h 25ºC 75ºC 13ºF 167ºF Storage temperature long periods 25ºC 55ºC 13ºF 131ºF Disconnecting security A MOSFET transistor connected with the positive value of the power supply provides security functions R70MR11 Receiver with relays outputs 11 outputs Specifications A...

Страница 6: ... 60Hz 20 30 Vin Number of outputs 06 RELAYS MODEL CE hoisting applications Cat 3 EN 954 1 06 relays outputs 3 Hoist 3 Travel Protection IP65 NEMA 4 Antenna Printed circuit board integrated standard Working channel selection Automatic at transmitters start up Weight 640 grs Dimensions Length 151 mm Wide 129mm Height 61mm EEPROM Internal Status signalling MultiLED 7 LED visible externally Connexions...

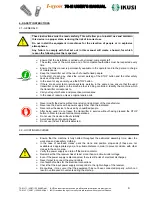
Страница 7: ...dentify the machine which the transmitter corresponds to Carry out regular checks and preventive maintenance In the case of repairs only use original spare parts Never modify the device without prior study and approval of the manufacturer Never use the device with a power supply other than the indicated Never allow the device to be used by unqualified people After being used do not leave the trans...

Страница 8: ...e arrow 3 Procedure to close the mechanism of the battery housing This device complies with Part 15 of the FCC Rules Operation is subject to the following two conditions 1 This device may not cause harmful interference and 2 This device must accept any interference received including interference that may cause undesired operation Changes or modifications not expressly approved by the manufacturer...

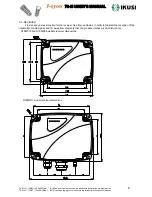
Страница 9: ...es the right to modify this information without prior notification 3 2 RECEIVER Find an easy access location for the receiver free from obstacles in order to facilitate the reception of the transmitter s radio signal and far away from elements that can produce intense electric disturbance R70MP10 and R70MR06 models receiver dimensions R70MR11 model receiver dimensions ...

Страница 10: ...ss becomes slower because the content of the EP70 module is copied into the internal eeprom erasing or updating the internal eeprom content 8 Press the key software if the module has been configured in such way pressing at the same time functions until the green LED starts blinking Default configuration with key software 9 Press START function until the green LED is permanently ligthning It indica...

Страница 11: ...itter Power solid green Hard OK solid green Signal green blinking fast Data green blinking fast ID green blinking fast 3 With STOP relay activated and active outputs Power solid green Hard OK solid green Signal green blinking fast Data green blinking fast ID green blinking fast Relay solid green if the STOP relay is activated Order green variable intensity if one or more PWM outputs are activated ...

Страница 12: ... switches to SWITCHED OFF mode máx 4 minutes min 30 seconds Without signal Red LED and buzzer continuously activated LOST Without signal Without signal Switches to SWITCHED OFF mode Buzzer bips during 1 minute Red LED and buzzer continuously activated PASSWORD Orange solid LED Without signal Switches to SWITCHED OFF mode Without signal Red LED and buzzer continuously activated AUTOID Orange LED Wi...

Страница 13: ...utes máximum Without signal ERROR Buzzer continously activated LOST Without signal Without signal It switches to OFF state Buzzer sounds during 1 minute ERROR Buzzer continously activated PASSWORD Without signal It switches to OFF state Without signal ERROR Buzzer continously activated AUTOID TRANSMITTING NEW ID Without signal It switches to OFF state Without signal ERROR Buzzer continously bips L...

Страница 14: ...P70 External EEPROM R70MR11 and 70MR06 models only Remember to connect the ground cable Only use fireproof cables for connections Select the appropriate voltage on the receiver 230 115 or 48 Vac R70MR11 and R70MR06 models RL 1 Power supply plug in terminals 24 48 115 or 230 V AC Please note see table the right fuse values depending on the input voltage RL 2 Plug in identified connection terminals ...

Страница 15: ... electronic board Blinking fast wrong EEPROM checksum Data corrupted Reprogramme EEPROM SIGNAL GREEN LED Off if no radio signal detected Squelch LED On and the transmitter switched Off indicates occupied radio channel LED On and DATA switched Off indicates radio channel occupied by a non IKUSI system Verify transmitter s radio and battery DATA GREEN LED Off if a wrong frame is received Blinking if...

Страница 16: ...bility to show the Software Menu in the Programming Mode The remote system s receiver remembers the last ID used by the last current working transmitter This transmitter can be considered as the receiver s owner It means that if the receiver is going to be used with another transmitter with a different ID the receiver must released the current transmitter s ownership releasing the current ID code ...

Страница 17: ...tter switched off press ON OFF Transmitter in stand by or LOW CONSUMPTION mode Note Press 4 function to leave the process without updating the new base channel The transmitter switches to stand by or LOW CONSUMPTION mode T70MH3 and T70MH2 TRANSMITTER MODELS BASE CHANNEL CHANGE MODE Press RIGHT and START functions simultaneously Wait until the orange LED lights continuously 3 The current base chann...

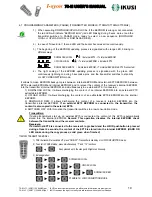
Страница 18: ...h to programme channels from 1 to 9 With UP function choose the number of units of ten of the new channel 5 To validate the new channel inmediately press START Remark If START function is not pressed inmediately the new base channel is updated after a few seconds The new channel information will be displayed in the LCD Freq Change Channel __ 01 02 03 MAXCAN NN 01 02 03 MAXCAN MAXCAN 11 in 870 MHz ...

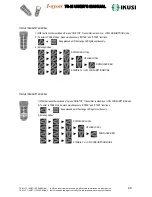
Страница 19: ...ease press START function During the ID release process the LED blinks in orange colour and the buzzer sounds indicating that the ID is being released in the receiver When the process has finished the LED lights off and the transmitter sets to satand by or LOW CONSUMPTION mode B ID secure release from a new transmitter which has not the ownership of the receiver 1 With the transmitter switched off...

Страница 20: ...s in orange colour indicating that the new ID is beeing updated in the receiver When finished the LED lights off and the transmitter sets to stand by or LOW CONSUMPTION mode T70MH3 T70MH2 and T70MH3D TRANSMITTER MODELS It allows to register a new transmitter into the receiver s database new ID maximum 32 ID 1 With the transmitter switched off press ON OFF Transmitter in stand by or LOW CONSUMPTION...

Страница 21: ... lights continuously T70MH2 TRANSMITTER MODEL SWITCHED OFF or LOW CONSUMPTION MODE 1 With the transmitter switched off press ON STOP Transmitter in stand by or LOW CONSUMPTION mode 2 To enter in SEARCH mode press simultaneously ENTER and START functions 3 Enter ENTER DOWN ENTER function s sequence The SEARCH function will execute 4 Press START and the transmitter switches to stand by or LOW CONSUM...

Страница 22: ... switches to PARAM mode ready to select a new sequence DOWNLOAD LOCAL or UPLOAD LOCAL or DOWNLOAD REM 2 In case of Grave Error the red LED and the buzzer becomes active continuously 3 The beginning of the EEPROM updating process is signalized with orange LED blinking in different ways 4 The right ending of the EEPROM updating process is signalized with the green LED continuously lightning on durin...

Страница 23: ...e 2 To enter in PARAM mode press simultaneously ENTER and START functions 3 Entering modes DOWNLOAD REM UPLOAD LOCAL DOWNLOAD LOCAL Keep pressed until the orange LED lights continuously STAND BY or LOW CONSUMPTION MODE T70MH2 TRANSMITTER MODEL 1 With the transmitter switched off press ON STOP Transmitter in stand by or LOW CONSUMPTION mode 2 To enter in PARAM mode press simultaneously ENTER and ST...

Страница 24: ...isplayed in the LCD I N I T I A L I Z I N G P L E A S E W A I T This message will remain in the LCD display when reading the internal EEPROM Finally the transmitter will switch off remaining in switched off mode no message will be displayed only the battery level icon will be displayed __ ___ _____ different battery level indications full medium low and empty SEQUENCE TO ACCESS TO PROGRAMATION MOD...

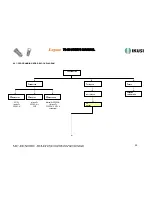
Страница 25: ...KUSI reserves the right to modify this information without prior notification 6 8 1 PROGRAMMING MODE BLOCK DIAGRAM PROGRAMATION 1 PARAMETERS 2 TELETEACH 3 SEARCH 1 0 DOWNLOAD LOC 1 1 UPLOAD LOC 1 2 DOWNLOAD REM WAIT PLEASE 2 0 ADJUST SERCHING LOST EMITTER EP70 Internal Tx EEPROM Internal Tx EEPROM EP70 Internal Rx EEPROM Internal Tx EEPROM EP70 if connected ...

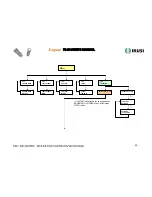
Страница 26: ...fy this information without prior notification 2 0 ADJUST 2 0 1 SEARCH MODE 2 0 2 TOUT LATENCY 2 0 3 TOUT OFF 2 0 4 T STOP 2 0 5 TELEALIGN SEARCH MODE ON OFF TOUT LATENCY MIN N TOUT OFF MIN NN T STOP SEG NN N SELECT OUT 1 10 SELECT OUT START 2 0 5 START OUT MODE OUT MODE LATCH TEMP The START relay activation can be programmed as MOMENTARY or LATCHING as well while pressing START function ...

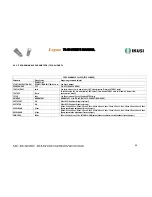
Страница 27: ...20min step of 1 min and infinite INF value Time from LATENCY state to Stand by state or low consumption mode TSTOP 2sec 1 to 10sec steps of 0 1sec Passive STOP time OUTMODE MOMENTARY MOMENTARY or LATCHING OUTPUTS OPERATING MODES SOFTSTART ON ON or OFF Enable or Disable soft start SOFTSTOP ON ON or OFF Enable or Disable soft stop ACCELRAMP 0 1sec 0 0sec 0 1sec 0 2sec 0 3sec 0 4sec 0 5sec 0 6sec 0 8...

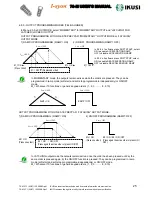
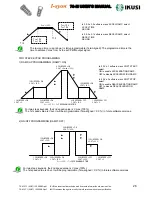
Страница 28: ...GRAMMING RAMP ON ME ON ME ON OFF Press again the active order or press ON OFF ME ON Press one order V MAX 100 2 ON OFF PROGRAMMING RAMP OFF RAMP OFF V MAX 100 RAMP ON T1 T2 V MAX 100 In MOMENTARY mode the outputs remain actives while the orders are pressed They can be programmed in ramp mode soft start and soft stop programmable independently or ON OFF mode MI Whatever 10 functions or generic keyp...

Страница 29: ...UT 30 VOUT 30 TI PROGRAMMABLE TIME 1 VEL SPEED ON V OUT 0 2 VEL SPEED ON V OUT 30 2 VEL SPEED OFF V OUT 30 1 VEL SPEED OFF V OUT 0 For two steps keypads the 2nd speed value is V max 100 The 1st speed value is Vout It will be programmable Tele aligned XX in future software versions For two steps keypads the 2nd speed value is V max 100 The 1st speed value is Vout It will be programmable Tele aligne...

Страница 30: ...3 9720 7422 ika ikusi com CHILE INGENIERÍA IKUSI CHILE LTDA Tel 56 2 335 9661 Fax 56 2 233 7511 ikc ikusi com FRANCE IKUSI FRANCE SARL Tel 33 1 43 03 52 22 Fax 33 1 43 03 52 42 ikf ikusi com MEXICO IKUSI GS MÉXICO S A DE C V Tel 52 55 5663 8600 Fax 52 55 5663 8684 contacto ikusi gs com mx PERU ÁNGEL IGLESIAS S A SUC DEL PERÚ Tel 51 1 211 6500 Fax 51 1 442 2073 ikpe ikusi com PORTUGAL IKUSI ELECTRÓ...

Страница 31: ...1 1 05 07 120009 0D pdf IKUSI se reserva el derecho de modificar esta información sin previo aviso 70 M V1 1 05 07 120009 0D pdf IKUSI reserves the right to modify this information without prior notification ...

Страница 32: ...1 1 05 07 120009 0D pdf IKUSI se reserva el derecho de modificar esta información sin previo aviso 70 M V1 1 05 07 120009 0D pdf IKUSI reserves the right to modify this information without prior notification ...

Страница 33: ...1 1 05 07 120009 0D pdf IKUSI se reserva el derecho de modificar esta información sin previo aviso 70 M V1 1 05 07 120009 0D pdf IKUSI reserves the right to modify this information without prior notification ...

Страница 34: ...1 1 05 07 120009 0D pdf IKUSI se reserva el derecho de modificar esta información sin previo aviso 70 M V1 1 05 07 120009 0D pdf IKUSI reserves the right to modify this information without prior notification ...

Отзывы: