34
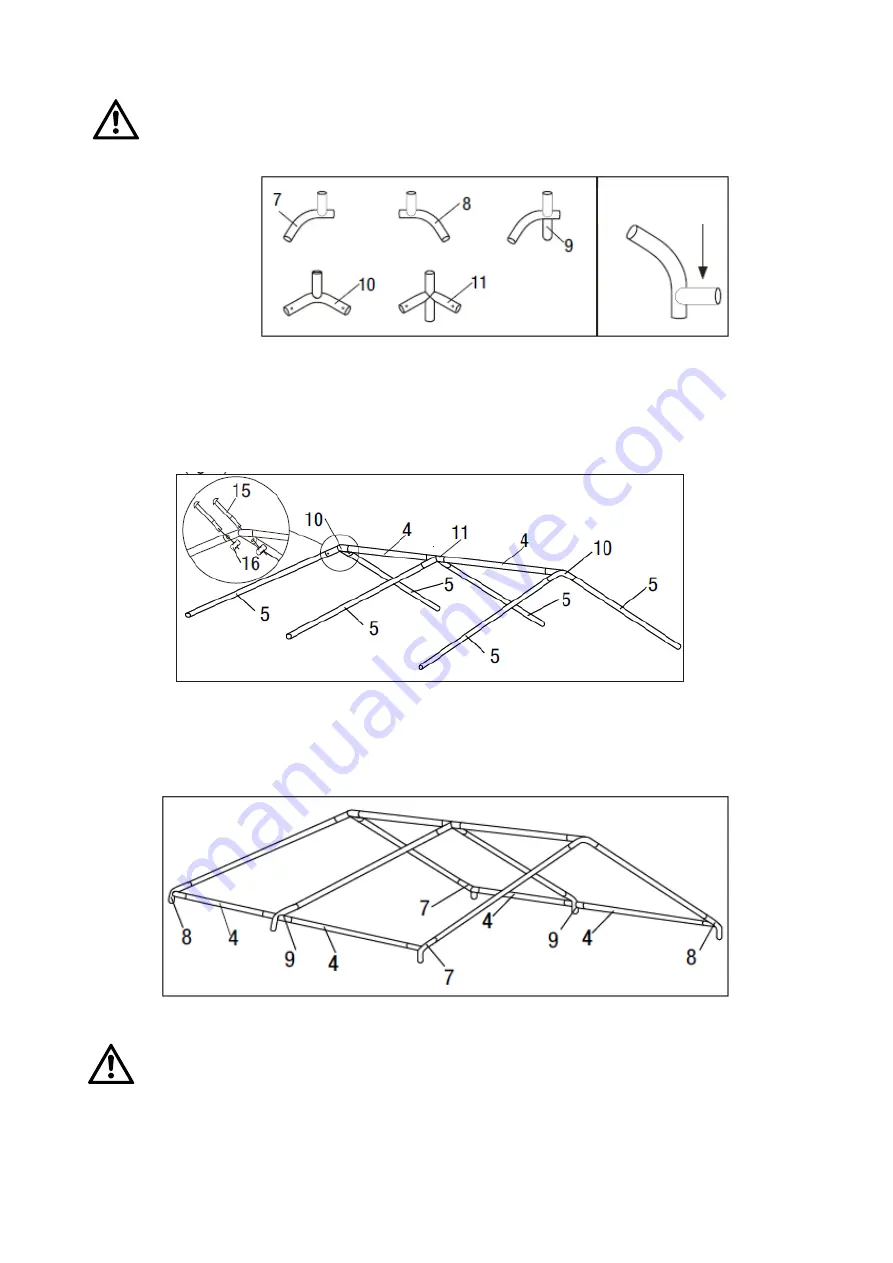
NOTE: The five connectors are different and individually numbered.
When
using them, ensure the welded socket for the cross rail is below the bend (fig. 2).
Assemble the centre section of the roof using the shoulder cross rails (4), 3-way peak con-
nectors (10) and 4-way peak connectors (11). Insert the rafter poles (5) into the connectors
afterwards. Connect rafter poles (5) with 3-way peak connectors (10) and 4-way peak con-
nector (11) with fittings (15, 16) (fig. 3).
Attach the shoulder cross rails (4) to the 3-way side connectors (7, 8) and 4-way side con-
nectors (9). Insert the connectors (7, 8, 9) into the rafter poles (5) to complete the assembly
of the roof (fig. 4).
NOTE: Be sure that all tubes are fully inserted. Use a rubber mallet if nec-
essary.
When using the connectors, be sure to remove the protective caps
first.
Welded socket
Fig. 2
Fig. 3
Fig. 4


